
Cantonese Roast Pork Belly, or siu yuk, is getting added to our compendium of roast meats that can usually be found in your average Chinatown restaurant window. After already posting recipes for Soy Sauce Chicken, “White Cut” Chicken, Roast Duck, and Char Siu Pork, we’ve saved the best for last.
Now, understand that although I was practically raised on this stuff like most children were raised on dinosaur chicken nuggets, I came to the party with absolutely no knowledge of how to actually make this Cantonese classic roast pork belly.
But don’t worry…although I happen to be writing this Chinese crispy roast pork belly recipe, I had a lot of help from the parents on this one. We did our research (this YouTube video played a big part in our success), and the results were pretty on point.
After we all came to an agreement on the right roast pork belly recipe, I cooked this thing pretty much on my own, and if I can do it, you totally can. It’s way easier than you’d expect. I don’t want to give away any spoilers up here, so scroll down to see how it’s done.

Before we move on, take note: For our Chinese roast pork belly recipe, you’ll see that we used a slab of skin-on pork belly that still had the ribs attached. Our thinking was that this would keep the pork moist. If you want to do it this way, you can remove (and subsequently snack on) said ribs before slicing your pork after it’s been roasted.
That said, it’s easier to get the pork to cook evenly without the ribs. The cooking time just needs to be adjusted, and it’s all detailed in our instructions. Totally your call, though.

All you need for this recipe is: pork belly, Shaoxing wine, salt, sugar, five spice powder, white pepper, rice wine vinegar, and salt.
That’s it.
I know, I couldn’t believe it either! On to the recipe…
Cantonese Roast Pork Belly: Recipe Instructions
Start by rinsing the pork belly, and then pat it dry. Place it skin-side down on a small tray (you’ll be putting it in the refrigerator for some time, so make sure you have space), and rub the Shaoxing wine into the meat (not the skin).
Mix together the salt, sugar, five spice powder and white pepper. Thoroughly rub this spice mixture into the meat as well. Flip the meat over so it’s skin-side up.
So, to do the next step, we used a sharp metal skewer. Carefully, systematically poke holes ALL over the skin, which will help the skin crisp up, rather than stay smooth and leathery.
The more holes there are, the better, really. Try not to gouge it too much. You want lots of small, delicate holes. Let it dry out in the fridge uncovered, for 12-24 hours.

We’ve tried these meat tenderizers, but find that the force gets spread out too much among all the blades, and they don’t pierce the tough pork skin well.
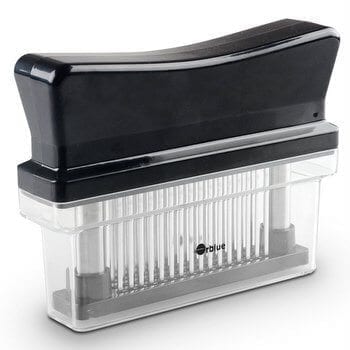
A single sharp metal skewer is your best bet.
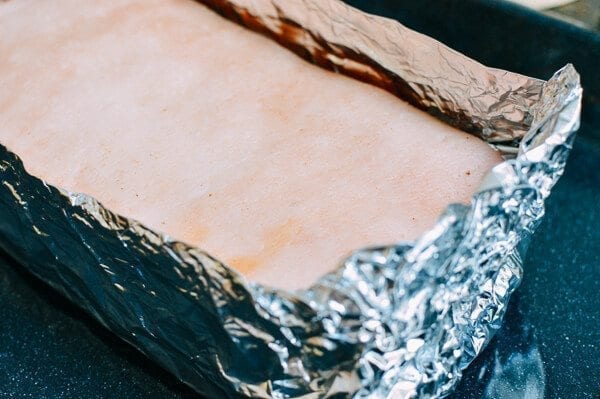
Preheat the oven to 375 degrees F. Place a large piece of aluminum foil (heavy duty foil works best) onto a baking tray, and fold up the sides around the pork snugly, so that you’re creating a kind of box all around it, with a 1-inch high border going around the sides.
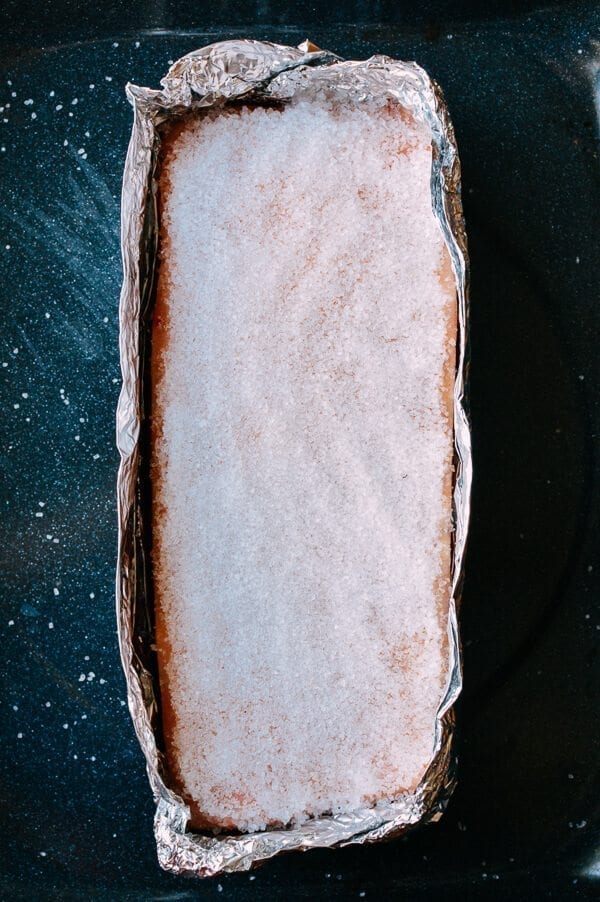
Brush the rice wine vinegar on top of the pork skin. Pack the sea salt in one even layer over the skin, so the pork is completely covered.
Place in the oven and roast for 1 hour and 30 minutes. If your pork belly still has the rib attached, roast for 1 hour and 45 minutes.
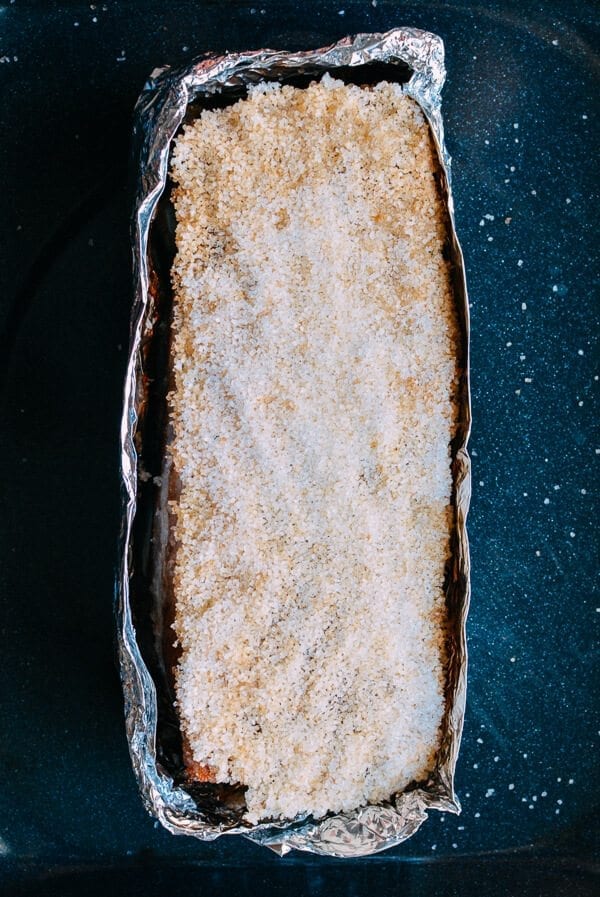
Take the pork out of the oven, turn on the broiler to low, and position the oven rack in the lowest position. Remove the top layer of sea salt from the pork belly, unfold the foil, and place a roasting rack on the pan. Place the pork belly on the rack and put it back under the broiler to crisp up into a crispy pork belly.
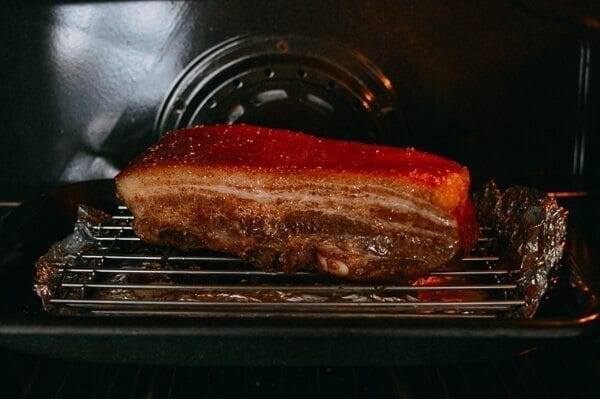
This should take 5-10 minutes. The broiler should ideally be on “low” so that this process can happen gradually.
If your broiler gets pretty hot, keep a close eye on it and be sure to keep the pork as far away from the heat source as possible.
When the skin has puffed up and gotten crispy, remove from the oven. Let it rest for about 15 minutes, and then slice. Wait for it….
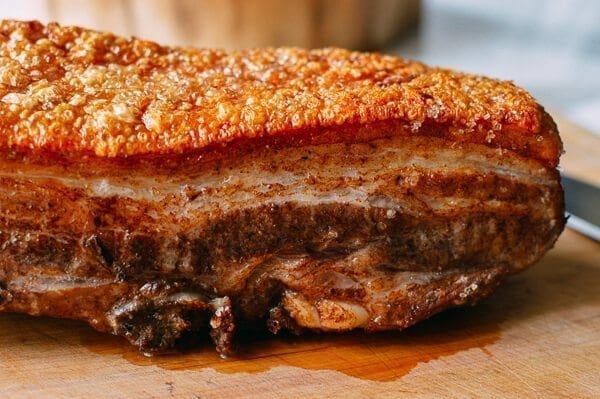
BOOM.

Amazing. We’re a fan of this crispy pork belly on its own, but it’s often served with sugar and/or mustard. Enjoy this one, everyone!

If you want to try the Shanghai clan’s best pork belly recipe, then I suggest you check out my mom’s (i.e. Judy’s) Shanghai braised pork belly (hong shao rou) recipe!
Looking for more authentic recipes? Subscribe to our email list and be sure to follow us on Pinterest, Facebook, Instagram, and Youtube!
Recipe

Cantonese Roast Pork Belly
Equipment
- Sharp metal skewer
Ingredients
- 3 lb slab of pork belly with the skin on
- 2 teaspoons Shaoxing wine
- 2 teaspoons salt
- 1 teaspoon sugar
- 1/2 teaspoon five spice powder
- 1/4 teaspoon white pepper
- 1 1/2 teaspoons rice wine vinegar
- 1/2 cup coarse sea salt
Instructions
- Rinse the pork belly and pat dry. Place it skin-side down on a tray, and rub the Shaoxing wine into the meat (not the skin). Mix together the salt, sugar, five spice powder and white pepper. Thoroughly rub this spice mixture into the meat as well. Flip the meat over so it’s skin-side up.
- So, to do the next step, you'll need a sharp metal skewer. Systematically poke holes ALL over the skin, which will help the skin crisp up, rather than stay smooth and leathery. The more holes there are, the better, really. Let it dry out in the fridge uncovered, for 12-24 hours.
- Preheat the oven to 375 degrees F. Place a large piece of aluminum foil (heavy duty foil works best) onto a baking tray, and fold up the sides around the pork snugly, so that you’re creating a kind of box all around it, with a 1-inch high border going around the sides.
- Brush the rice wine vinegar on top of the pork skin. Pack the sea salt in one even layer over the skin, so the pork is completely covered. Place in the oven and roast for 1 hour and 30 minutes. If your pork belly still has the rib attached, roast for 1 hour and 45 minutes.
- Take the pork out of the oven, turn on the broiler to low, and position the oven rack in the lowest position. Remove the top layer of sea salt from the pork belly, and unfold the foil. Put the pork back under the broiler to crisp up. This should take 5-10 minutes. The broiler should ideally be on “low” so that this process can happen gradually. If your broiler gets pretty hot, be sure to keep the pork as far away from the heat source as possible. Keep a close eye on it to prevent burning!
- When the skin has puffed up and gotten crispy, remove from the oven. Let it rest for about 15 minutes and then slice.


