Do you love eating dumplings? Let’s be real…who doesn’t? In this post, we’re going to show you how to fold a Chinese dumpling using four different techniques, ranging from incredibly easy up to the classic pleats.
A Note On Our Dumpling Recipes
We have several dumpling recipes on The Woks of Life, all of which have garnered a special place in the hearts of our readers!
Nothing says love like cooking up a batch of dumplings for family and friends, so if you haven’t already, give one of these recipes a try:
- “The Only Dumpling Recipe You’ll Ever Need” (our family’s go-to classic recipe)
- Vegetable Dumplings (for all vegans/vegetarians, though we honestly think they’re just as good as pork or chicken dumplings)
- Pork & Chive Dumplings (another classic, along with a homemade dumpling wrapper recipe to boot)
- Chicken & Mushroom Dumplings (a personal favorite!)
- Chicken Zucchini Dumplings (a great recipe if you can’t get to the Chinese grocery store for specialty vegetables)
- Shandong Pork & Fish Dumplings (a Chinese New Year specialty––it’s coming up in a couple months!)
- Pork & Celery Dumplings (a surprisingly delicious combination)
You can use the dumpling folding techniques in this post with any of the above recipes, or with recipes for your own preferred dumpling filling.
All you need is some water, your filling, and dumpling wrappers, whether they’re store-bought or homemade/hand-rolled.
Finally, A Complete Guide to Dumpling Wrapping!
In our dumpling recipes, we’ve included some instructions on how to fold and wrap them, but this post is by far the most comprehensive treatment of the topic we’ve ever done.
We’ve included step-by-step instructions, photos, AND videos of each technique, so you can see clearly how each is done.
Let’s get to it! We’ll go in order, starting with the easiest method and working our way up to classic dumpling pleats.
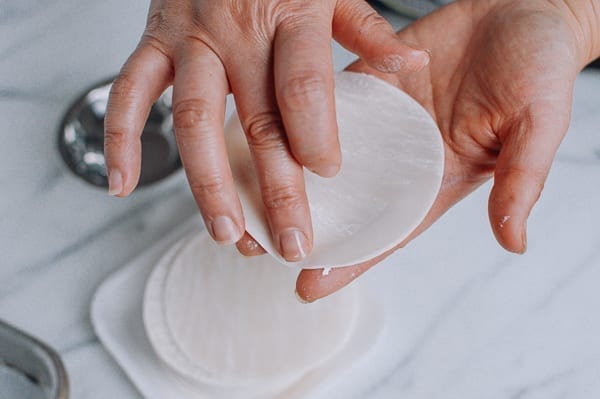
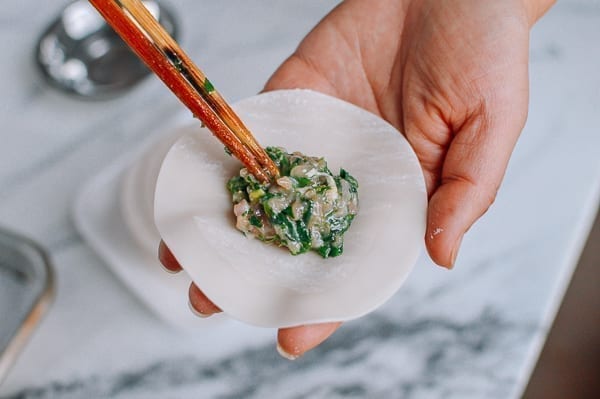
Preparing a Dumpling for Folding
All of these methods for how to fold a Chinese dumpling start with the same first two steps.
For that reason, I’ve separated out this “dumpling starting point” below. After you’ve completed these two steps, you’re ready to try any of the four techniques!
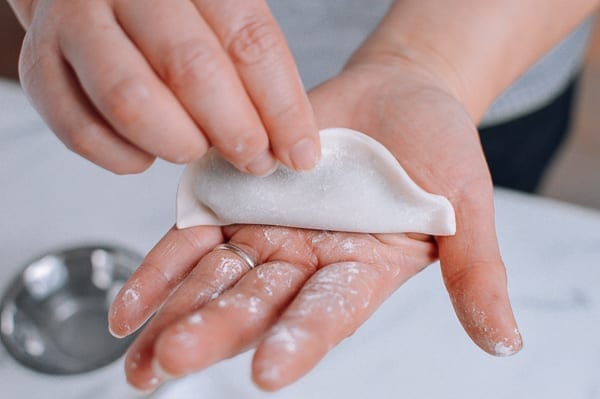
To prepare a dumpling for folding:
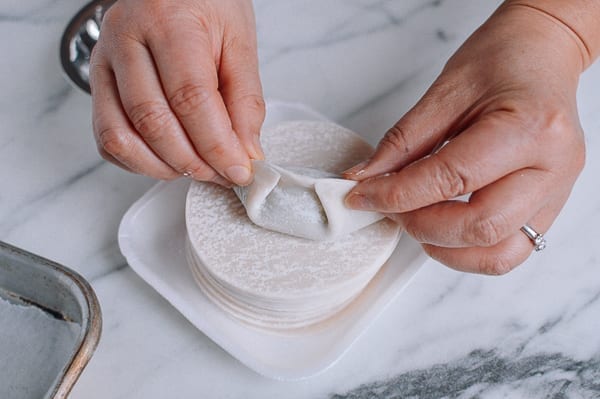
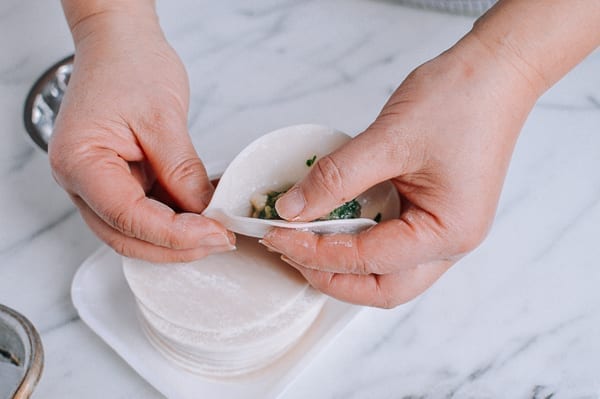
Dip your finger in a bit of fresh water and moisten the outer edges of half the dumpling wrapper (in a semi-circle).
Place about a tablespoon of filling in the middle.
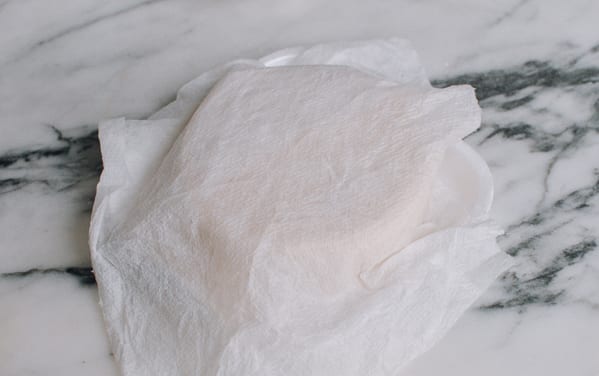
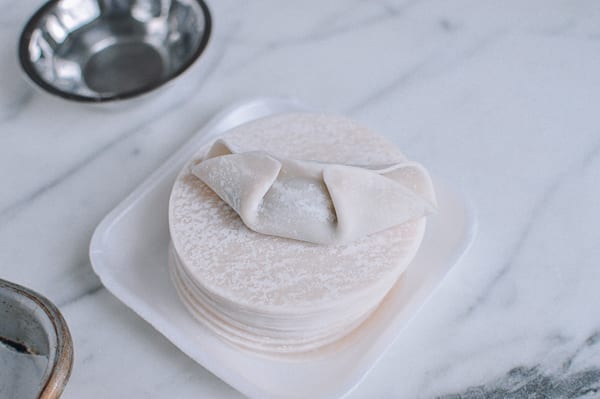
One more quick tip is to keep the wrappers under a damp paper towel, as they tend to dry out quickly, which makes folding more difficult:
Ok, now onto the techniques.
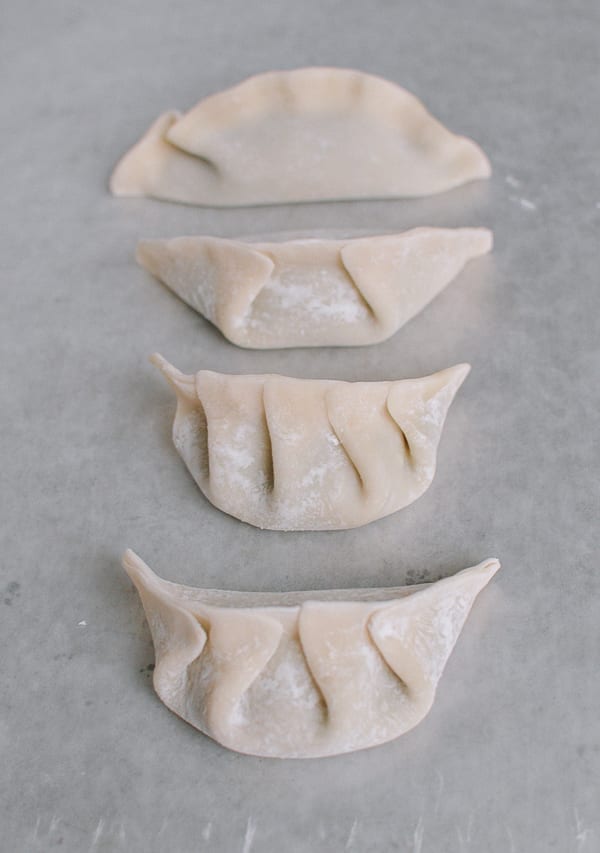
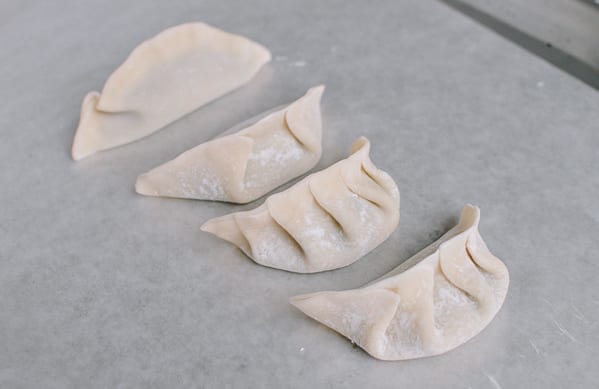
How to Fold a Chinese Dumpling: 4 Techniques!
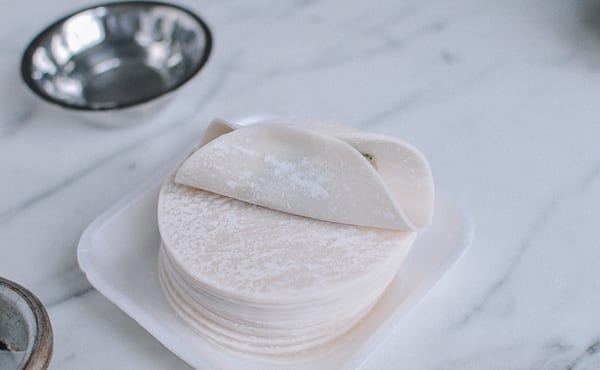
Dumpling Folding Technique 1: The Half Moon
This technique is exactly what it sounds like. You simply fold the circular dumpling wrapper in half!
This is for the total beginner to dumpling making, or those who want to make a lot of dumplings very quickly.
It may seem like a bit of a cop-out, but believe me, even these simply-made dumplings will cook up great. In fact, this is how many frozen packaged dumplings are folded by machine.
Here’s how to do it:
1. Fold the wrapper in half.
2. Thoroughly press the edges together so you get an airtight seal.
Because there are no pleats in this dumpling, it is especially important to ensure that they are tightly sealed so they don’t come apart during cooking.
Make sure your wrappers are under a damp towel and don’t dry out. Dried out dumpling wrappers are difficult to seal!
3. Use the palm of your hand to flatten the bottom of the dumpling, so it sits upright.
That’s it!
Here’s a video showing Technique 1 in action:

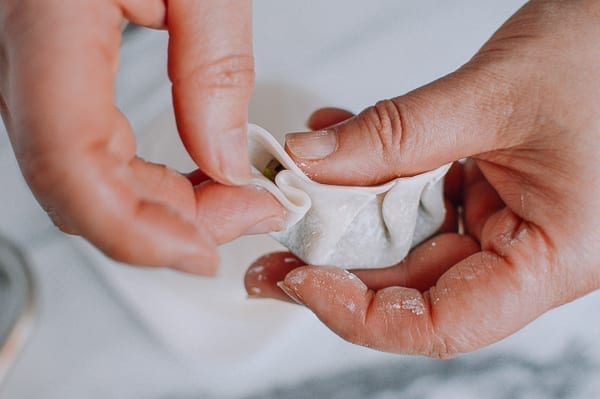
Dumpling Folding Technique 2: The 2-Pleat
This method is for those who are ready to try their hand at a beginner pleating technique. It involves just two pleats, and can really up the appearance of your dumplings with a couple simple folds.
Here’s how to do it:
1. Fold the dumpling wrapper in half, pinching it together at the meeting point at the top.
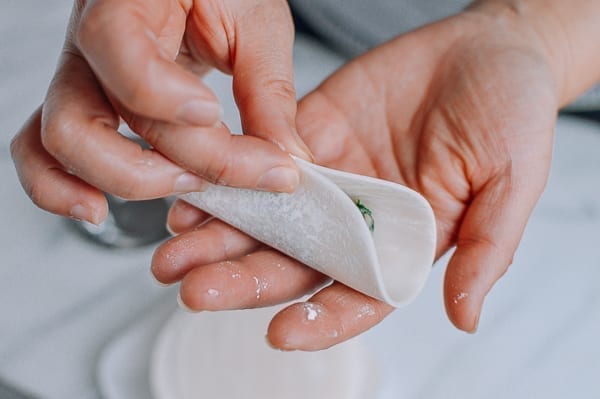
2. Take the side of the wrapper facing away from you, and fold one side of it in towards the middle.
3. Do the same on the other side.
(In the photo below, you can see more clearly what I mean by folding it in towards the middle.)
This is what the dumpling should look like at this point:
4. Finally, press and seal to make sure it’s airtight.
That’s it!
Here’s a video showing Technique 2 in action:

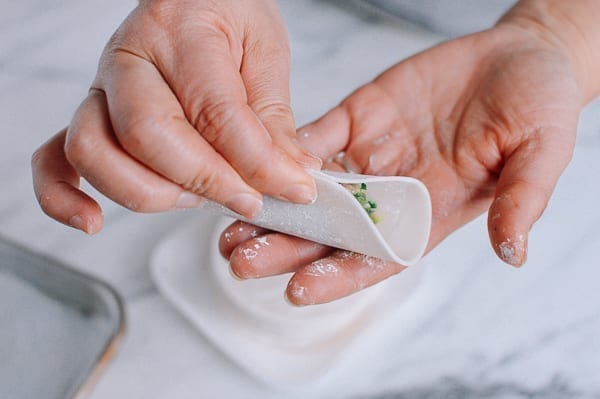
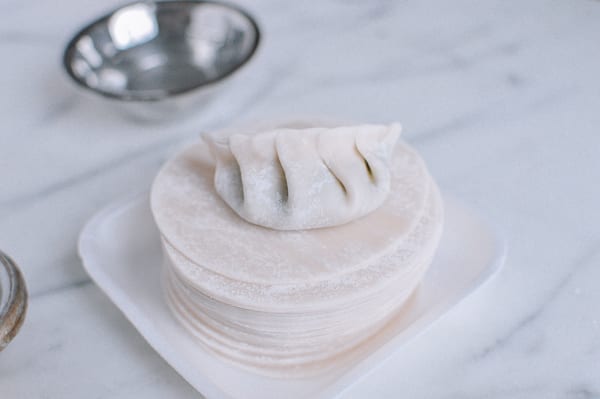
Dumpling Folding Technique 3: The One-Directional Pleat
This method is how I’ve been making dumplings for years. It’s how my grandma originally taught me to make them, and I think they’re quite pretty!
Basically, you make several equally spaced pleats, all going in the same direction (left to right, or right to left). As you get better at it, you can put more pleats into your dumplings to make them even more delicate and pretty-looking.
Have your dumpling wrapper ready and moistened, with a spoonful of filling in the middle?
Here’s how to do it:
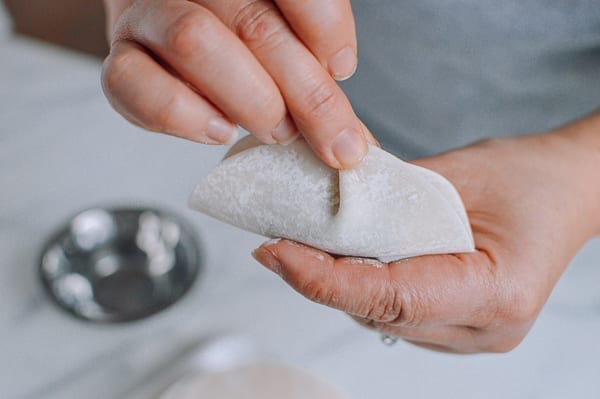
1. Start by pinching the dumpling wrapper together at one of the bottom corners. (Left or right doesn’t matter, just do what feels natural.)
2. Take the side of the dumpling wrapper facing away from you, and pleat it towards the corner you’ve already sealed.
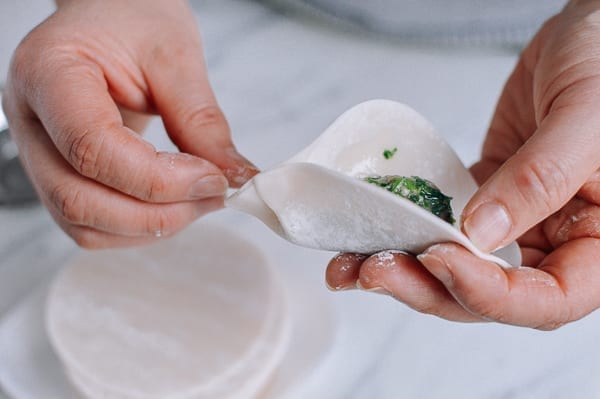
3. Continue pleating in that direction.
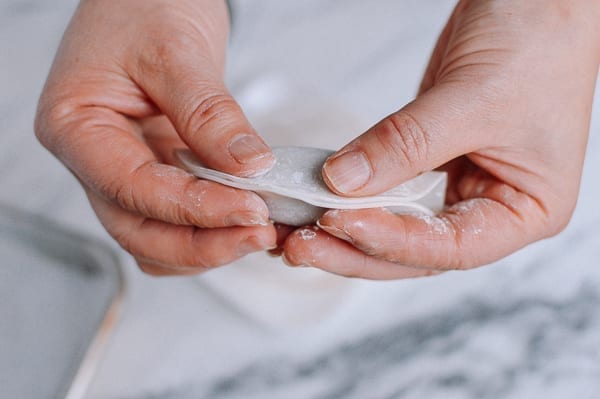
4. When you’ve reached the other end, seal the dumpling completely, making sure that it is airtight. You may need some additional water to ensure that the pleats stay closed.
Just make sure none of the oily filling or moisture from the filling gets elsewhere on the outside of the wrapper, or it may be difficult to seal.
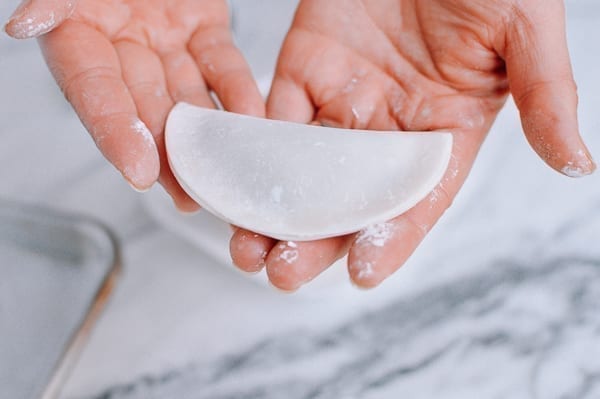
That’s it!
Here’s a video showing Technique 3 in action:

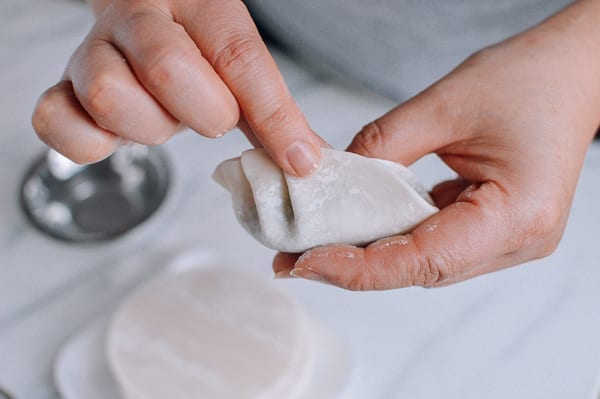
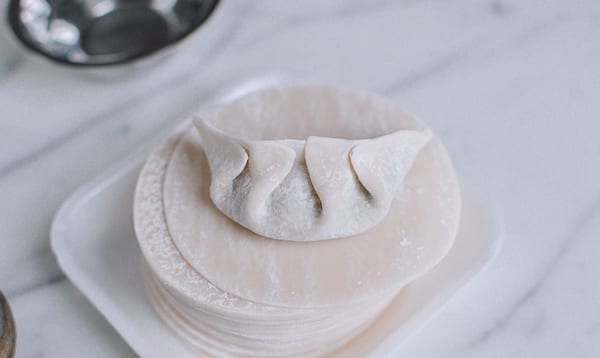
Dumpling Folding Technique 4: The Bi-Directional Pleat
This looks similar to the one-directional pleating method, but is perhaps a little bit more elegant. Basically, pleats are folded in towards the middle of the dumpling. This means that the folds are going in two directions—left to right and right to left (again, with all folds going in towards the middle).
The easiest way to do this is to do two pleats on each side, so you have four pleats total. That said, as you get even better at it, you can create more smaller pleats to make your dumplings look even more professional!
Here’s how to do it:
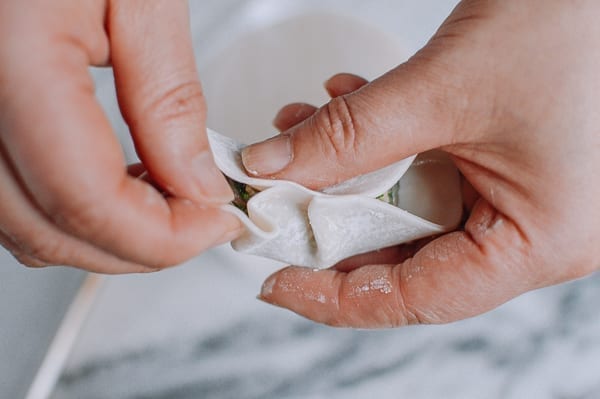
1. Start by folding the dumpling in half and pinching the wrapper together at the meeting point at the top.
(This meeting point is the “middle” of the dumpling. The pleats will go towards that mid-point, from each side.)
2. On each side of the dumpling, make two pleats starting with the inside (closest to the middle).
3. Then make another two pleats on the outer corners of the dumpling, again towards the middle.

3. Make sure that all seams are sealed.
(You may need some additional water to ensure that the pleats are fully pressed together and sealed.)
That’s it! The completed look is a lot like the one-directional pleat, but with this method, it’s easier to make the dumpling symmetrical.
Here’s a final video, showing Technique 4 in action:

There you have it. Four simple ways to fold a Chinese dumpling, from easy/fool-proof to classic!
Have your own folding techniques, dumpling-related memories to share, or additional questions? Let us know in the comments!
Looking for more authentic recipes? Subscribe to our email list and be sure to follow us on Pinterest, Facebook, Instagram, and Youtube!
Recipe

How to Fold a Chinese Dumpling: 4 Techniques
Ingredients
- dumpling wrappers
- dumpling filling
- water
Instructions
Preparing the dumpling for folding:
- Start by dipping your finger in a bit of fresh water and moisten the outer edges of half the dumpling wrapper (in a semi-circle).
- Place a tablespoon of filling in the middle.
Technique 1: The Half Moon
- Fold the wrapper in half. Thoroughly press the edges together so you get an airtight seal. (Because there are no pleats in this dumpling, it is especially important to ensure that they are tightly sealed so they don't come apart during cooking. Make sure your wrappers are under a damp towel and don't dry out. Dried out dumpling wrappers are difficult to seal!)
- Use the palm of your hand to flatten the bottom of the dumpling, so it sits upright.
Technique 2: The 2-Pleat
- Fold the dumpling wrapper in half, pinching it together at the meeting point at the top. Take the side of the wrapper facing away from you, and fold one side of it in towards the middle. Do the same on the other side. Finally, press and seal to make sure it's airtight.
Technique 3: The One-Directional Pleat
- Start by pinching the dumpling wrapper together at one of the bottom corners. (Left or right doesn't matter, just do what feels natural.)
- Take the side of the dumpling wrapper facing away from you, and pleat it towards the corner you've already sealed. Continue pleating in that direction.
- When you've reached the other end, seal the dumpling completely, making sure that it is airtight. You may need some additional water to ensure that the pleats stay closed.
Technique 4: The Bi-Directional Pleat
- Start by folding the dumpling in half and pinching the wrapper together at the meeting point at the top.
- On each side of the dumpling, make two pleats starting with the inside (closest to the middle). Then make another two pleats on the outer corners of the dumpling, again towards the middle.
- Make sure that all seams are sealed.


