
Nothing is quite as daunting as walking into the kitchen with the expectation of churning out bakery-quality bread. However, this deliciously soft multigrain bread recipe will help you do just that!
We make our multigrain bread with our favorite homemade 9-grain blend. We have all the detailed instructions you need for foolproof results.
If you’d rather not make your own multigrain cereal mix, you can buy one ready-made, such as Bob’s Red Mill hot cereal mixes, which come in 5-grain, 6-grain, 7-grain, 8-grain, and 10-grain varieties. Beyond that, you just need 7 additional ingredients and some boiling water.
This homemade bread is as indulgent as it is nutritious. It’s ready for sandwiches, buttery morning toast, and grilled cheese. It really is the perfect everyday sandwich bread! That said, we usually demolish a whole loaf when it comes out of the oven, because who can resist fresh warm bread with butter!
Note: This updated version of our original recipe (published April 23, 2014) includes new photos, more detailed instructions, and a few minor recipe improvements! We hope you give it a try and enjoy our family’s favorite soft homemade multigrain bread!
The Perfect Multigrain Bread Recipe (Even for Beginner Bakers)
I have a very vivid image of my first attempt at homemade bread. A yeast-loaded black hockey puck was what came out of the oven. Hard as a rock and pitch black, the thing resembled a football—only not as soft!
To this day, my family is still milking that incident for all it’s worth. But I learned three things:
- Don’t start making bread at 10:00 PM.
- Don’t take naps while making bread.
- Our smoke detectors work really well.
If that sounds like something that would happen to you, there’s hope yet! My bread-burning reputation has improved in recent years.
All you need is a little extra patience and attention to detail—and a killer recipe.
Learning to Bake Bread
I’ve redeemed myself from that horrible hockey puck with many bread recipes on our blog, including this homemade multigrain bread. I developed the skill during the few years we lived in Beijing.
When we first moved there, we looked for a high quality multigrain sliced bread, but couldn’t find anything that suited our tastes (and let’s be honest—standards).
Naturally, we turned to our own kitchen. During those years, we mastered all our favorite breads, from this multigrain bread to English muffins (plain English muffins, multigrain English muffins, and even pumpkin English muffins), and our famous Asian milk bread.
This recipe, however, was our go-to morning toasting bread, and I would make it every other week!
Making Homemade Multigrain Flour or HOT Cereal Mix
After some online research, I found out that you can grind your own grains to make a homemade multigrain flour. Since then, I’ve never looked back. Now, I make large batches of the multigrain mix and store it in the refrigerator for easy future use.
Some quick points:
- You can put as many or as few whole grains as you want: whether you’re making a 7-grain, 9-grain, or 12-grain mix, it’s all good! I’ve even seen 20-grain bread.
- Once you’ve got your selection of preferred grains, all you have to do is use a powerful blender or grinder (see our cooking tools page) to grind each grain to a powdery flour. Then, simply mix everything together to make your multigrain flour.
- Store it in an air-tight container in the refrigerator to keep it fresh and take out a cup or two whenever you need to whip up a fresh batch of bread!
- Alternatively, you can also buy a multigrain hot cereal mix, like this Bob’s Red Mill 10-Grain Cereal.
Over the years, Bill has perfected our family’s go-to multigrain flour recipe. It’s a 9-grain blend that is well-rounded, nutty, nutritious, and overall, delicious! It includes brown rice, millet, barley, quinoa, oats, flaxseed, cornmeal, buckwheat flour, and whole wheat flour.
To make it, you just need a powerful blender such as a Vitamix or Blendtec to grind the grains down to a flour. Again, if you’d rather not make your own mix, you can also buy one ready-made. Bob’s Red Mill is the most common brand offering multigrain cereal mixes.
Or, if you’d prefer something even simpler, you can try our Perfect Whole Wheat Bread. However, once you try this nutrient packed multigrain bread recipe, you may never go back!
Recipe Notes Before You Begin…
…A proofing reminder: The proofing time given is just a guideline. It depends on the temperature and humidity in your kitchen, and you may need more or less time. Keep in mind that proofing is done only when the dough has doubled in size.
…Make sure you have plenty of time: This is the perfect recipe to do on a lazy day. There’s some waiting time between steps, but each step is very quick and easy.
…Figure out your preferred equipment: You can use a KitchenAid mixer with a dough hook attachment, or make the dough the old-fashioned way. If you use a bread maker, you will need to halve the recipe, as this makes 2 loaves, and most bread machines can only make the equivalent of one loaf at a time.
…Get the right yeast and make sure it’s fresh: Rather than active dry yeast, we’re using instant yeast here, which does not need to be activated (stirred with warm water and sugar until bubbly) before adding it to the dough. You can just add Instant Yeast directly to the dough mixture. Find it near the active dry yeast in the baking aisle of the grocery store. As always, make sure your yeast is fresh/within date!
Multigrain Bread Recipe Instructions
Add the multigrain flour to the bowl of a stand mixer or a large heat-proof mixing bowl. Pour in the boiling water…
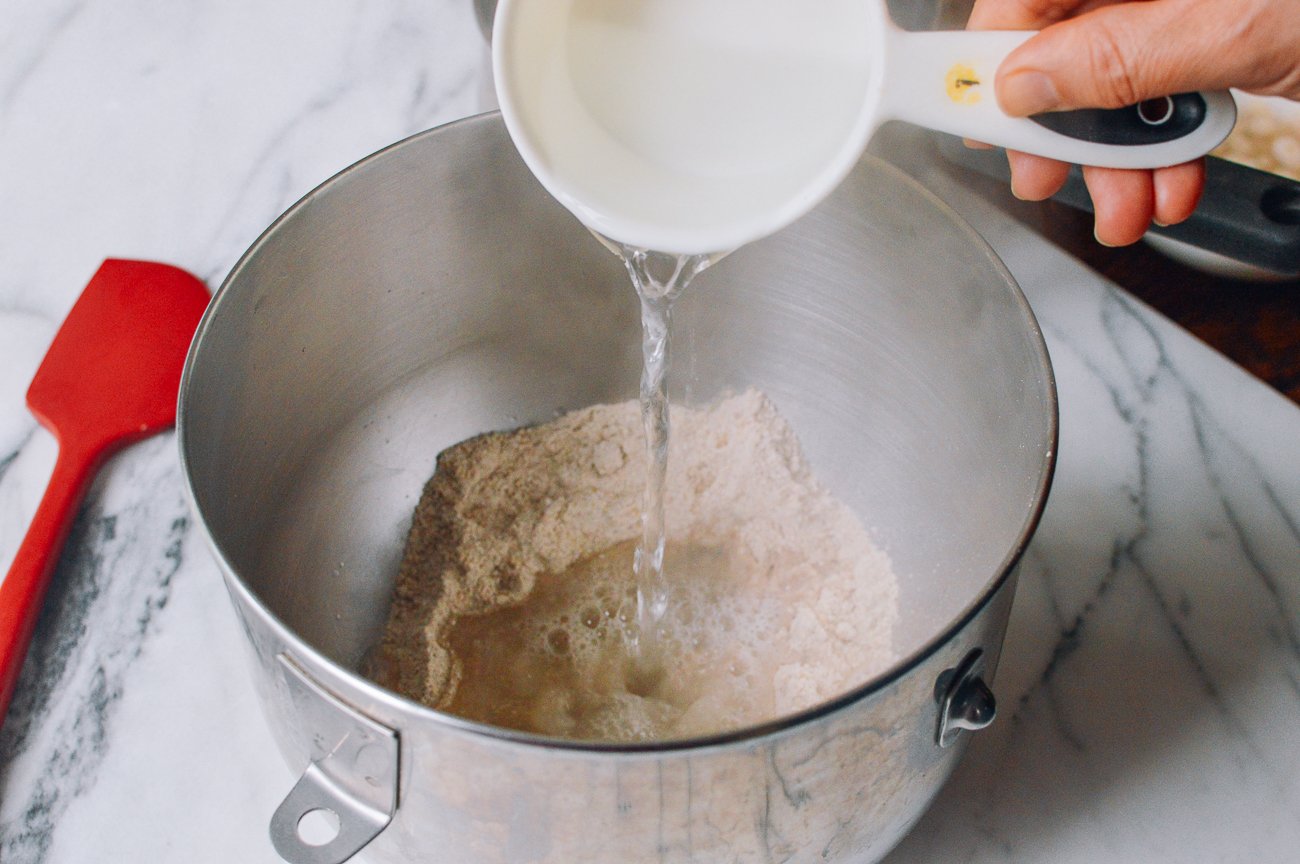
And carefully stir the flour and water with a rubber spatula until it forms a thick paste.
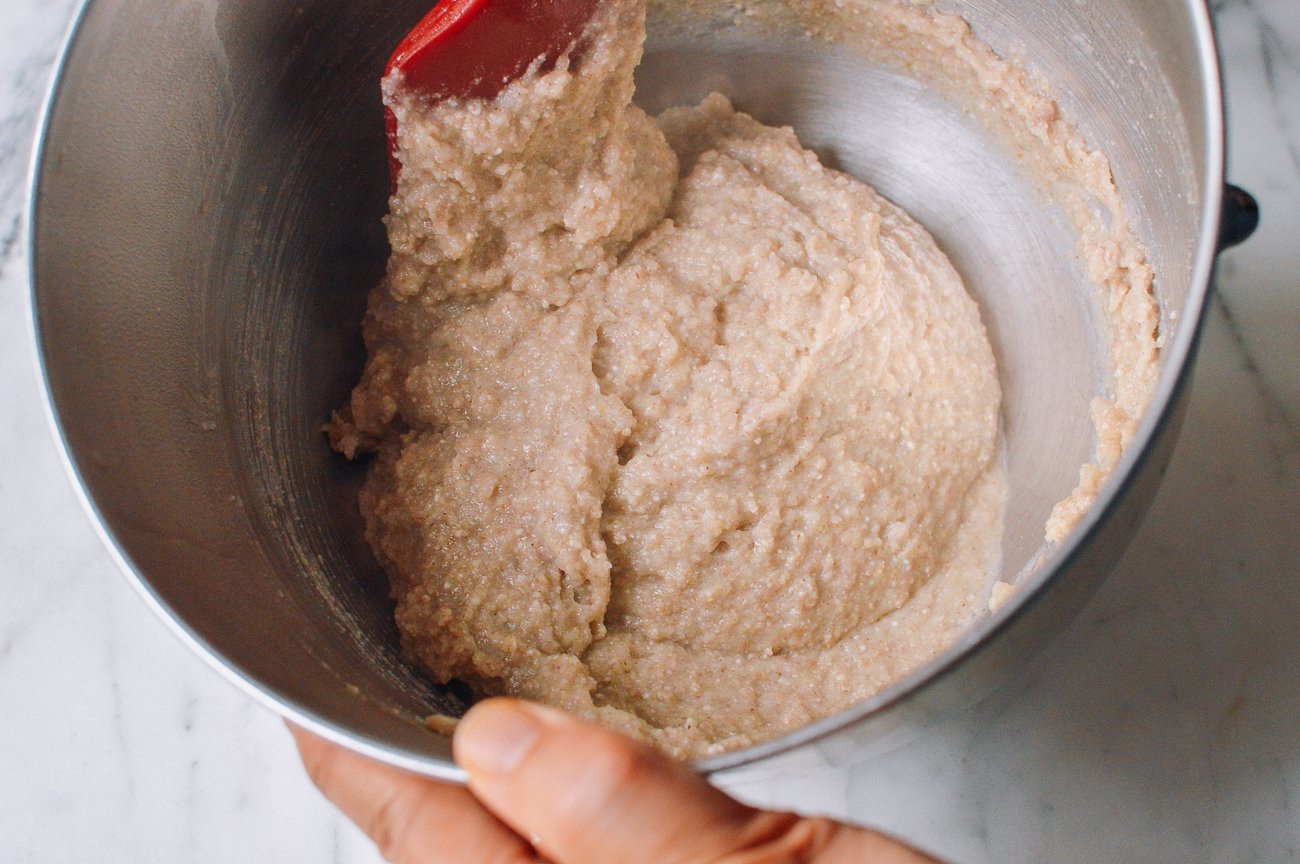
Stir in the butter until well combined. You’ll be surprised at how much flavor 4 tablespoons of butter adds to the bread (2 tablespoons per loaf)!
Let the mixture cool for about 20 minutes.
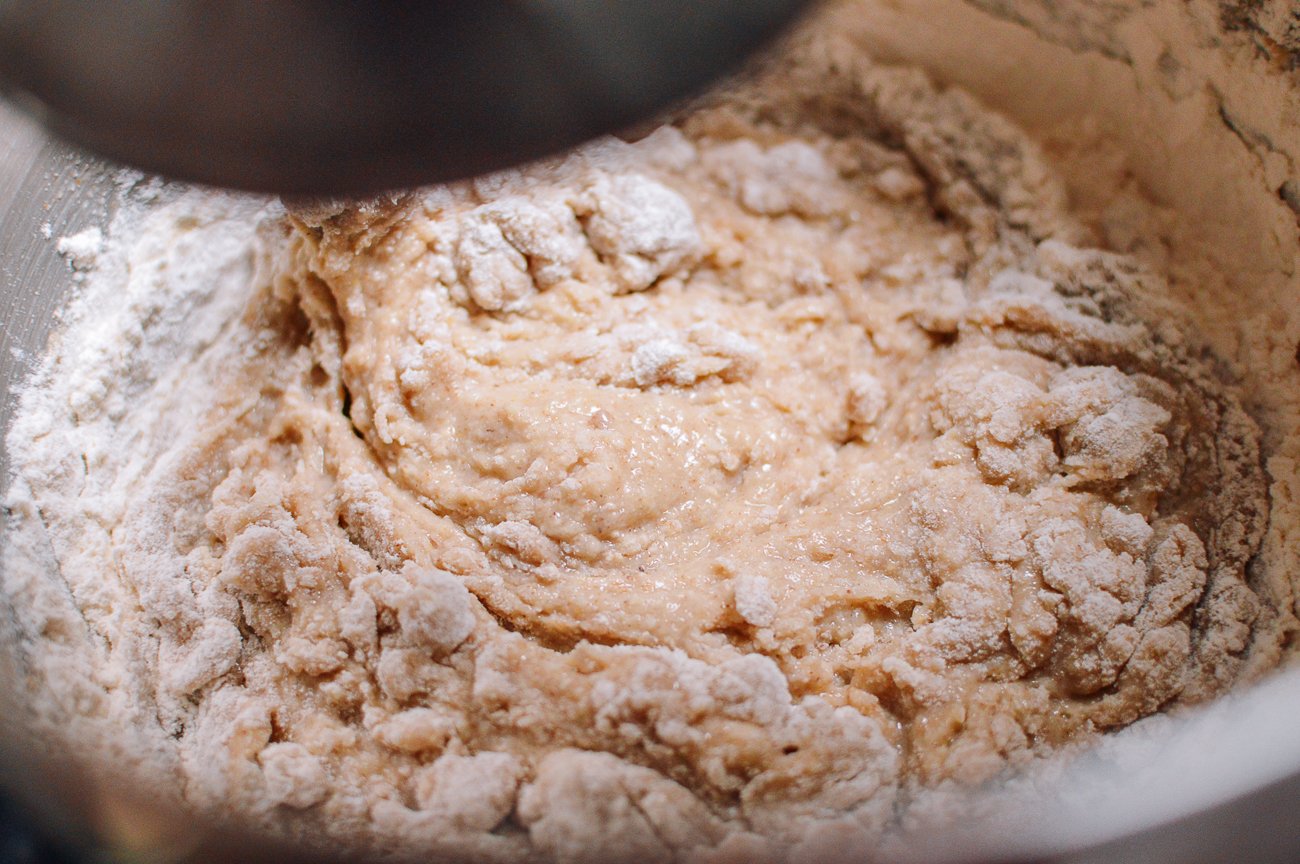
Once the multigrain mixture is warm to the touch and not hot, stir in the honey until thoroughly combined. Stir in the instant yeast (and vital wheat gluten if using, in that order). It’s important to make sure the mixture truly is lukewarm before adding the yeast. Let stand for 10 minutes to activate the yeast.
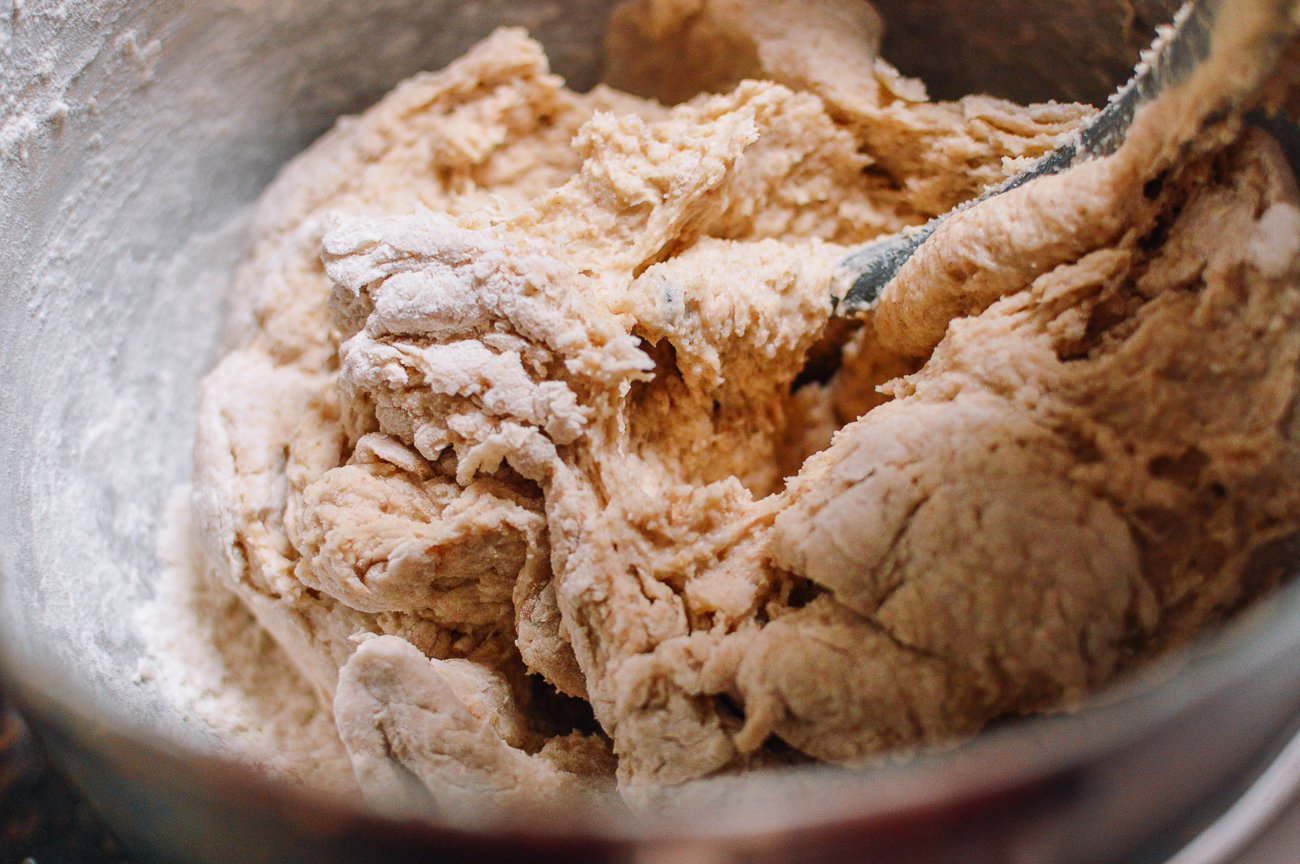
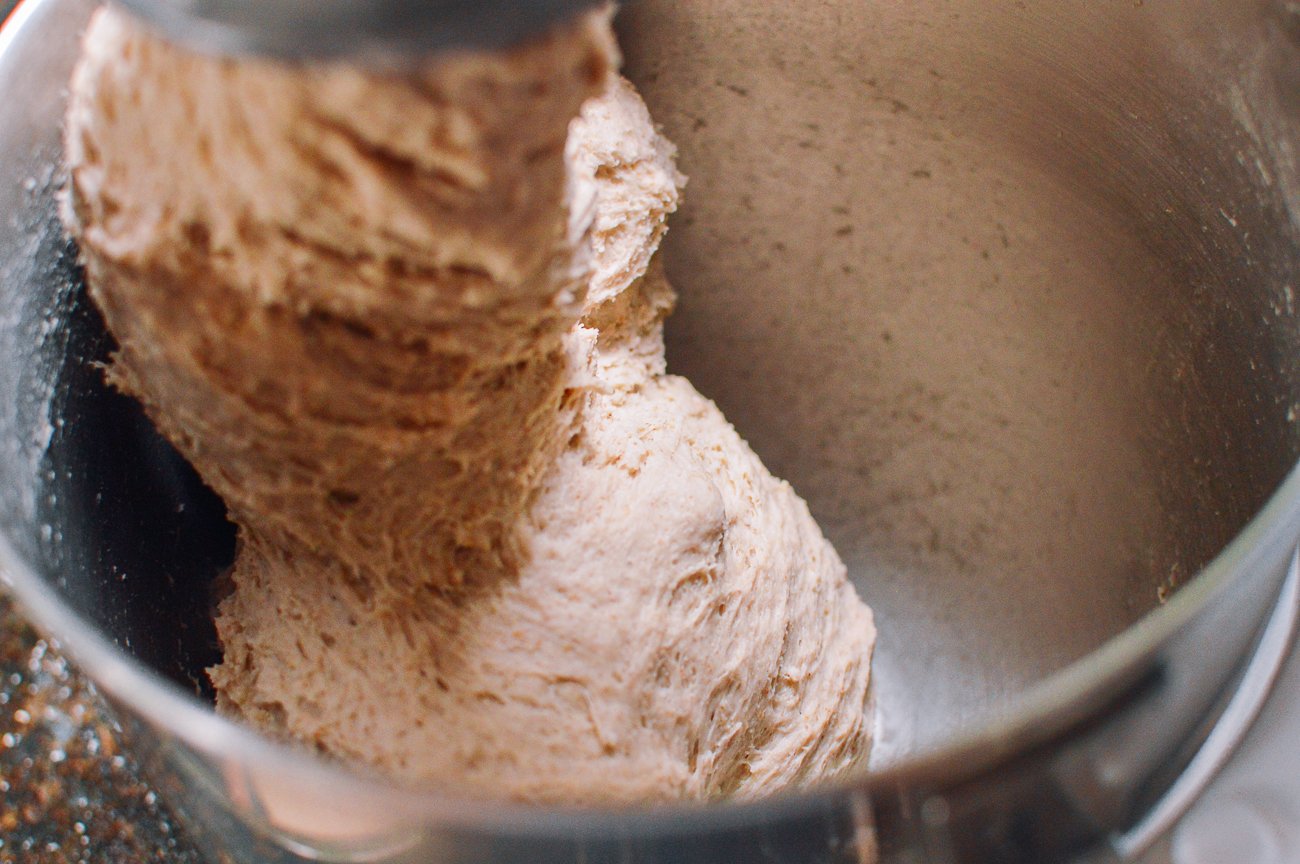
Add the all purpose flour, ¼ cup at a time, and knead until the dough ball is smooth.
This will take about 10-15 minutes. The dough should be slightly sticky, but should not stick to a rubber spatula. Soft dough makes soft bread, so do not use more flour than necessary!
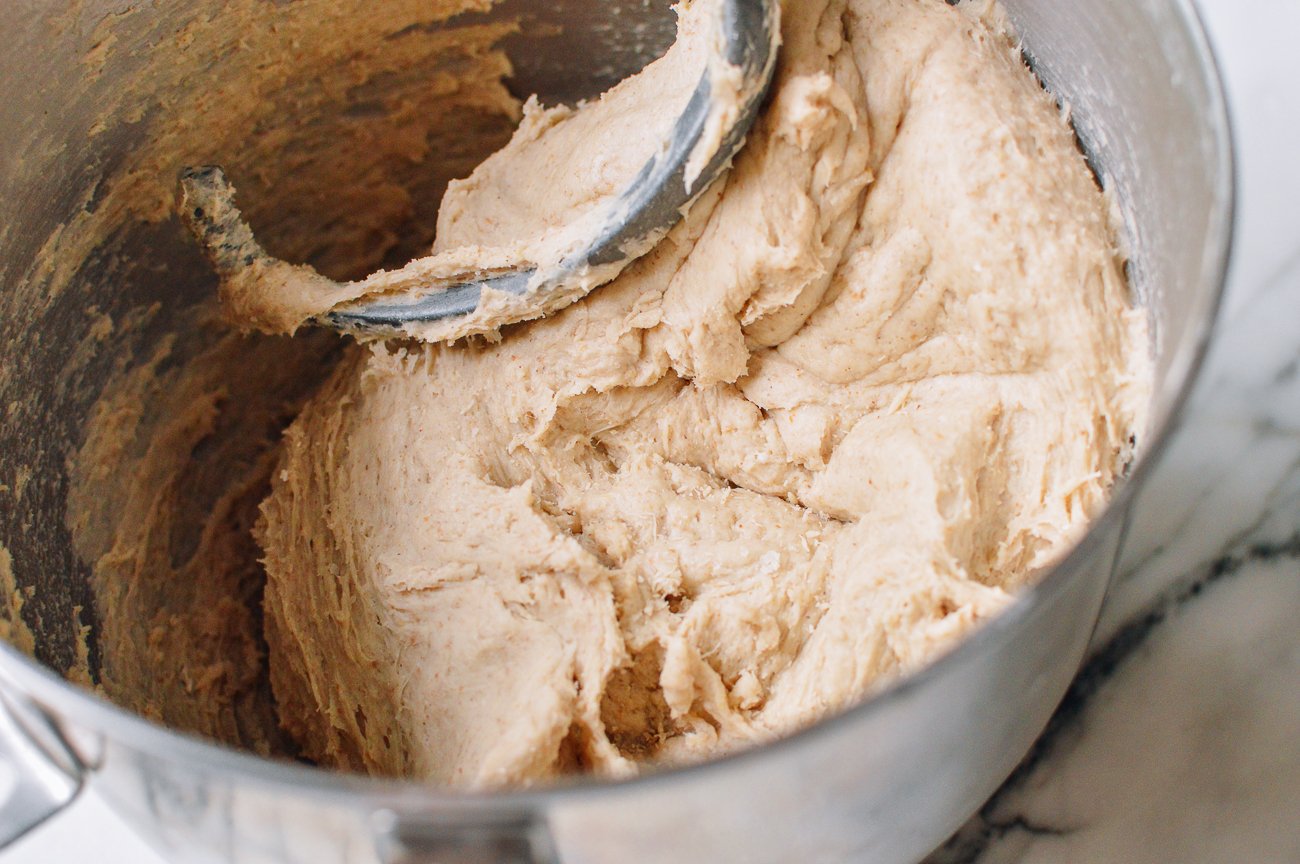
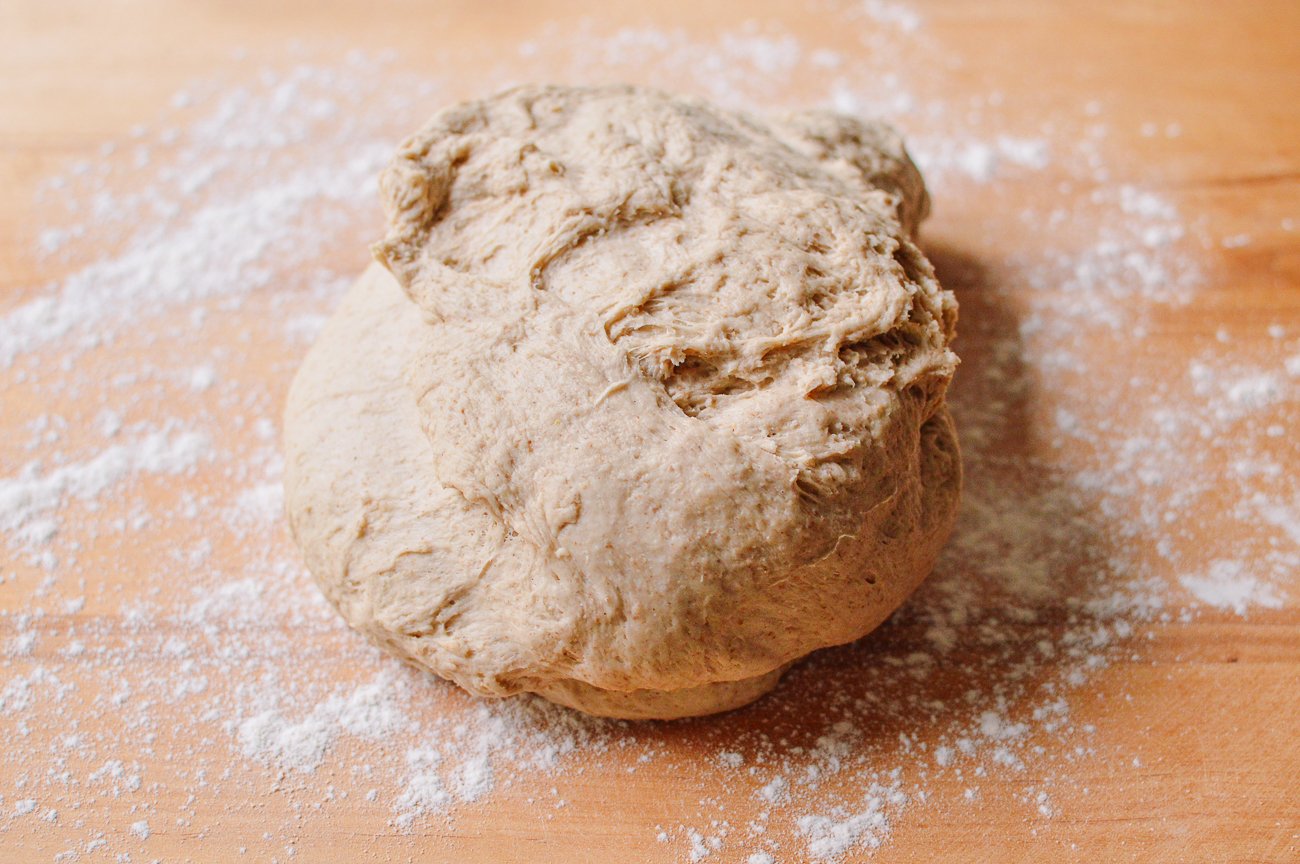
Use the rubber spatula to clean the sides of the bowl, and form the dough into a smooth ball.
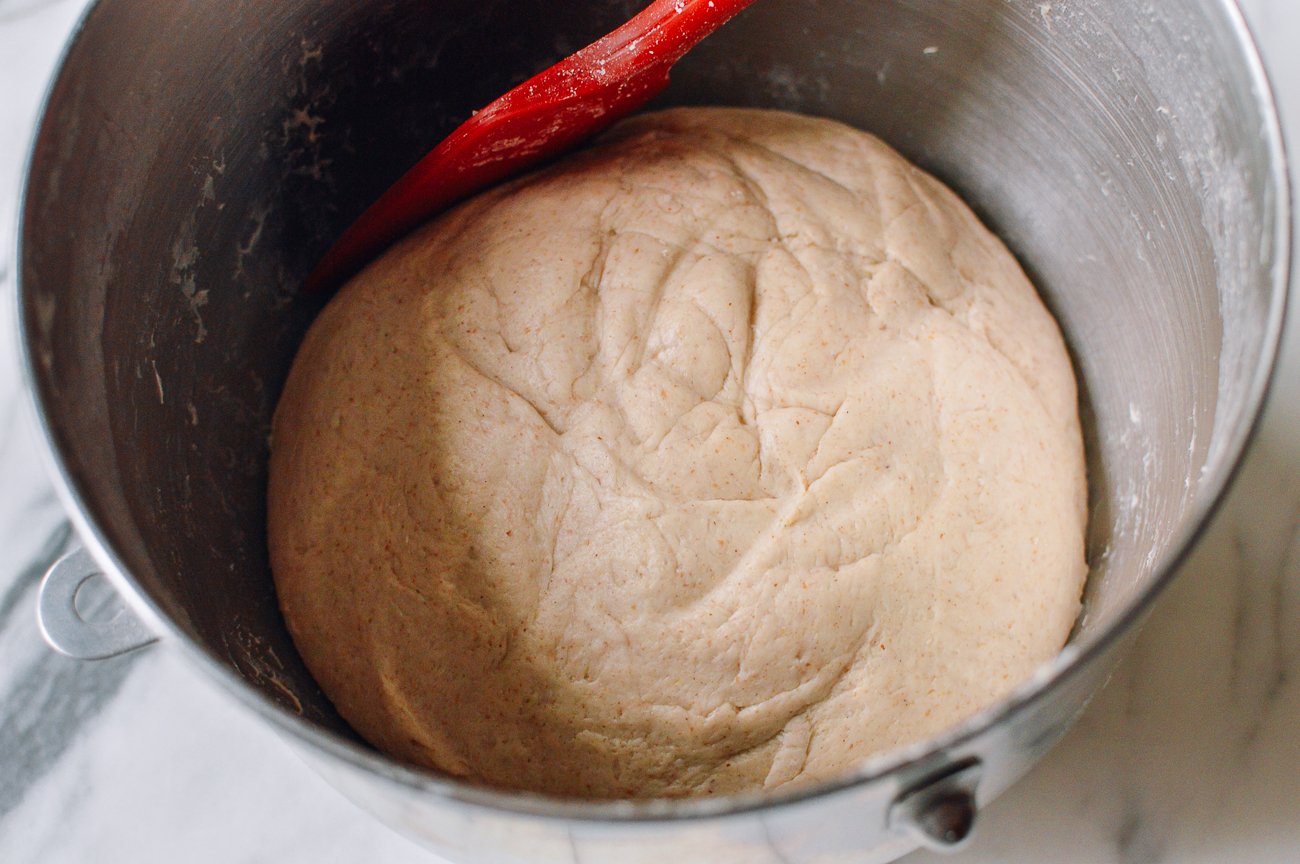
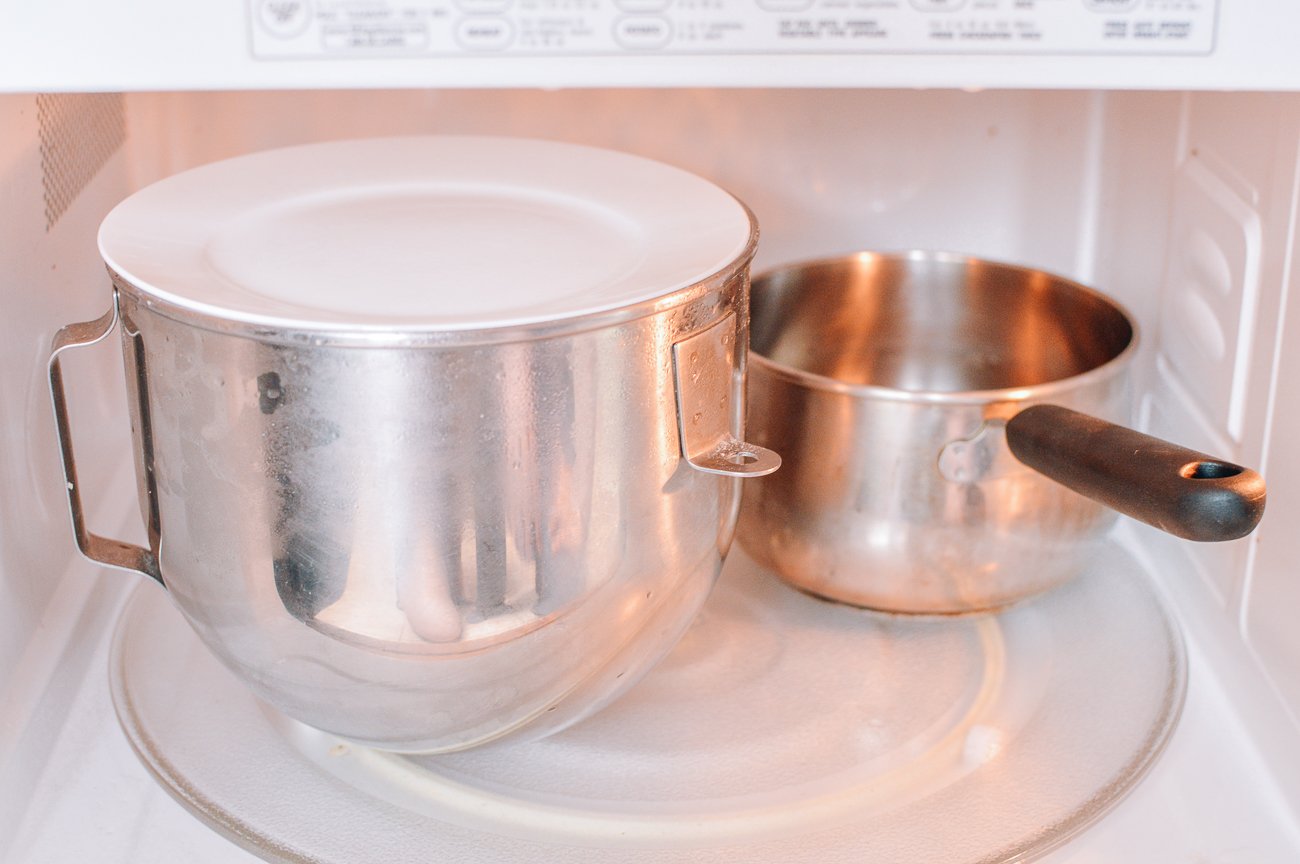
Cover the bowl with a plate, and let it rise in a warm place for 45 minutes to 1 hour, or until the dough doubles in size.
I proof my dough in a closed microwave with a large mug of boiling water next to it to make a warm, humid environment.
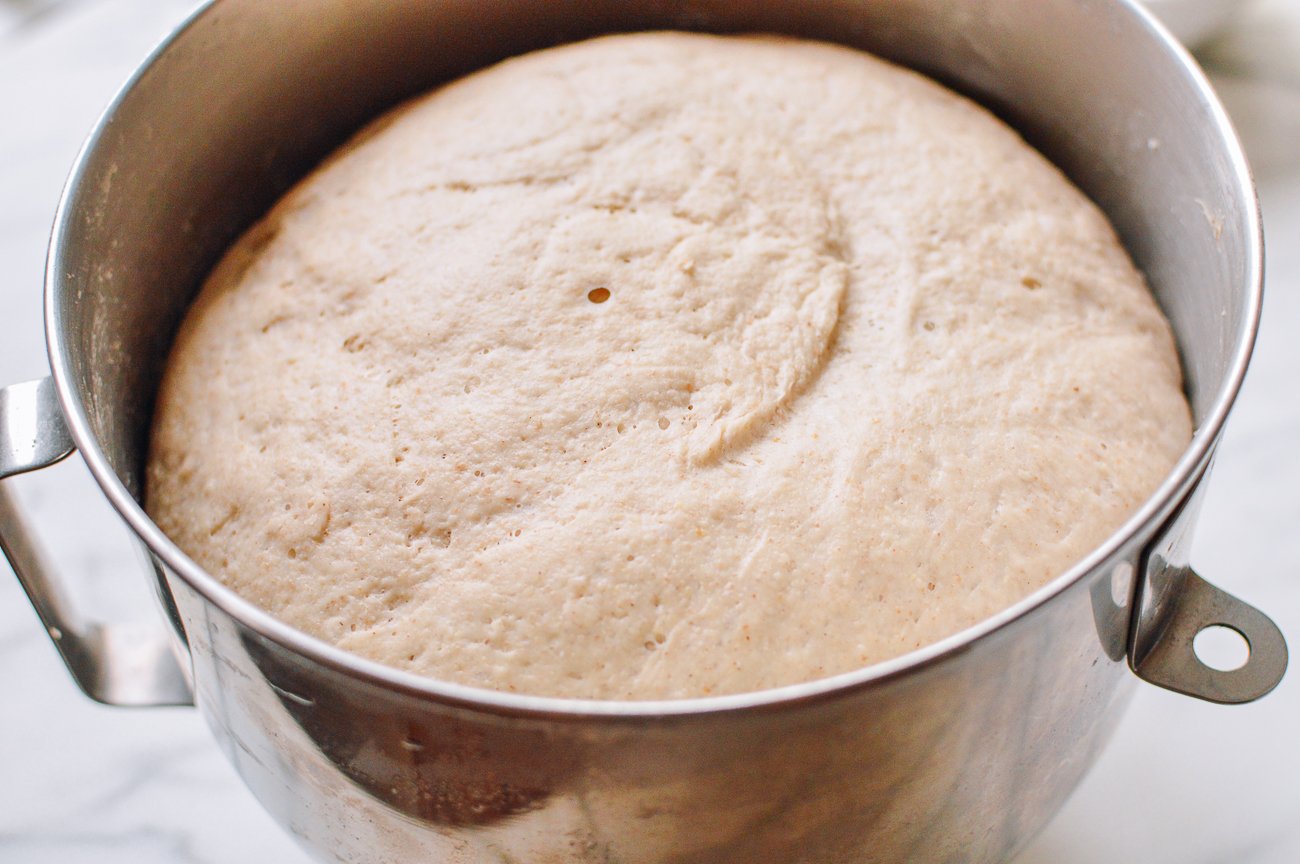
Once the first proofing is done, the dough will have doubled in size:
Sprinkle 1 teaspoon salt over the dough and knead again for another 5 minutes to make sure the salt is evenly distributed.
Shape the dough into a smooth dough ball, cover with a plate, and let it rise again in a warm place for 45 minutes to 1 hour, or until the dough doubles in size. If you are proofing the dough in the microwave like I do, you’ll need another large mug of boiling water for the second proofing.
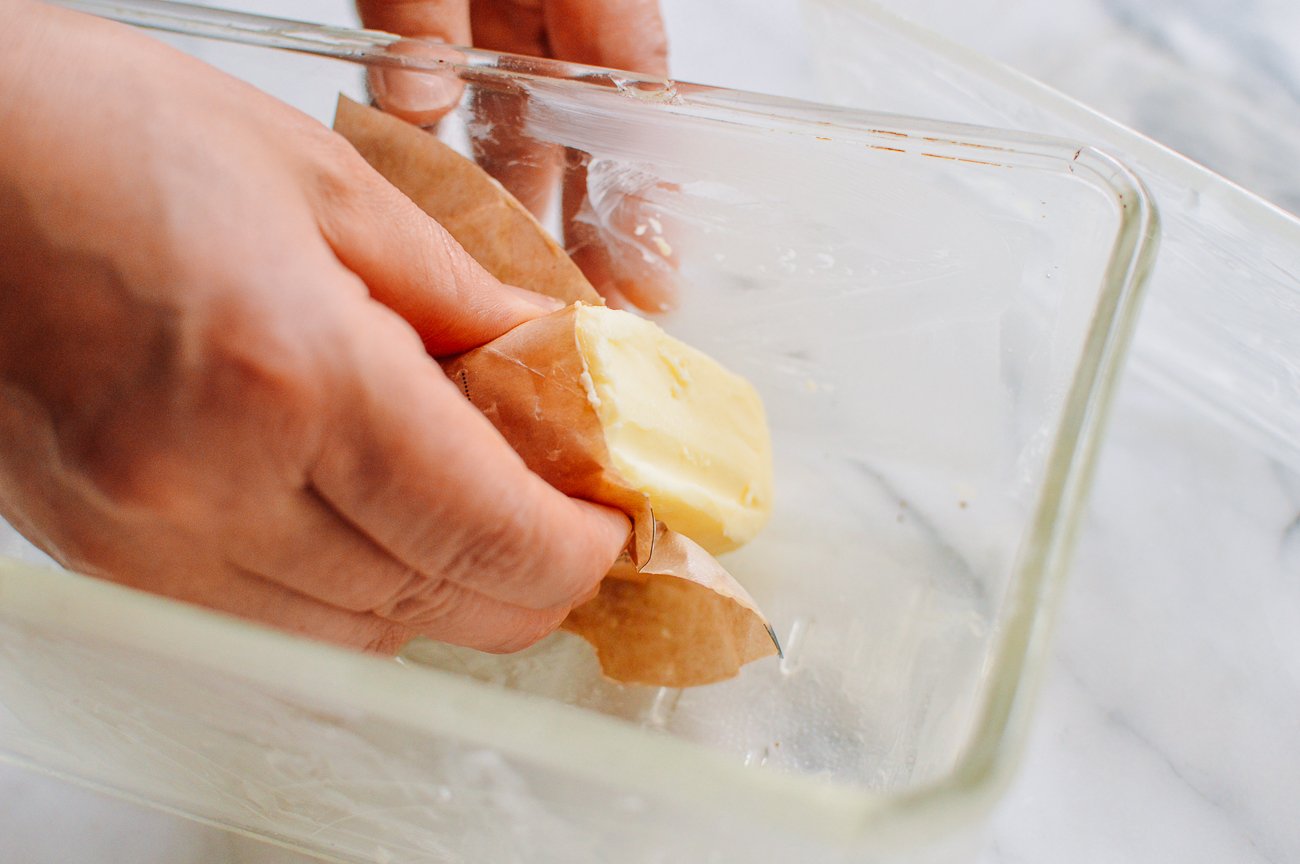
While the dough is proofing, grease 2 loaf pans (9” x 5”) with cold butter and set them aside. I use cold butter, as it’s easier to handle and goes on in a thin layer. I simply take a cold stick of butter, peel back the wrapper, and rub it along the inside of the loaf pans to coat.
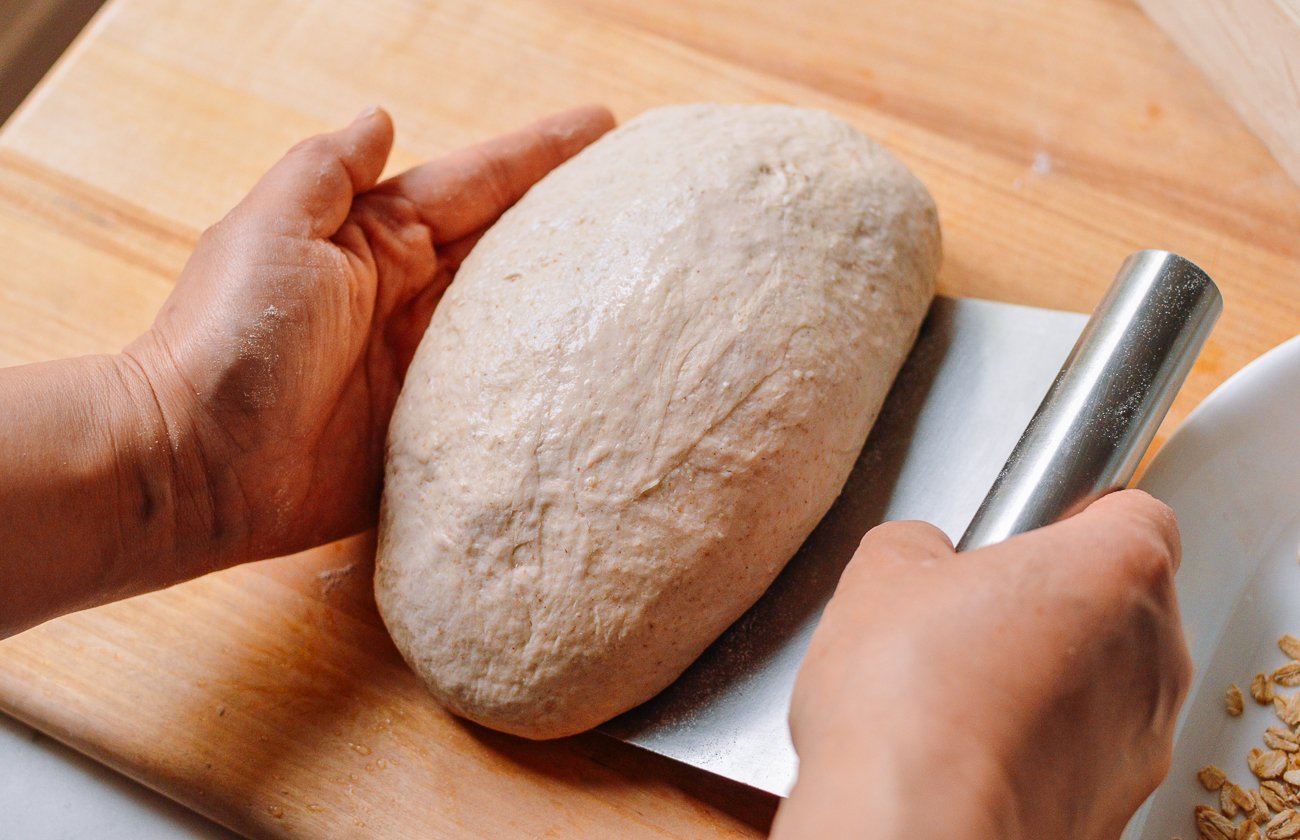
After the second proofing is done, turn the dough out onto a clean, lightly floured work surface.
Cut the dough into two equal portions.

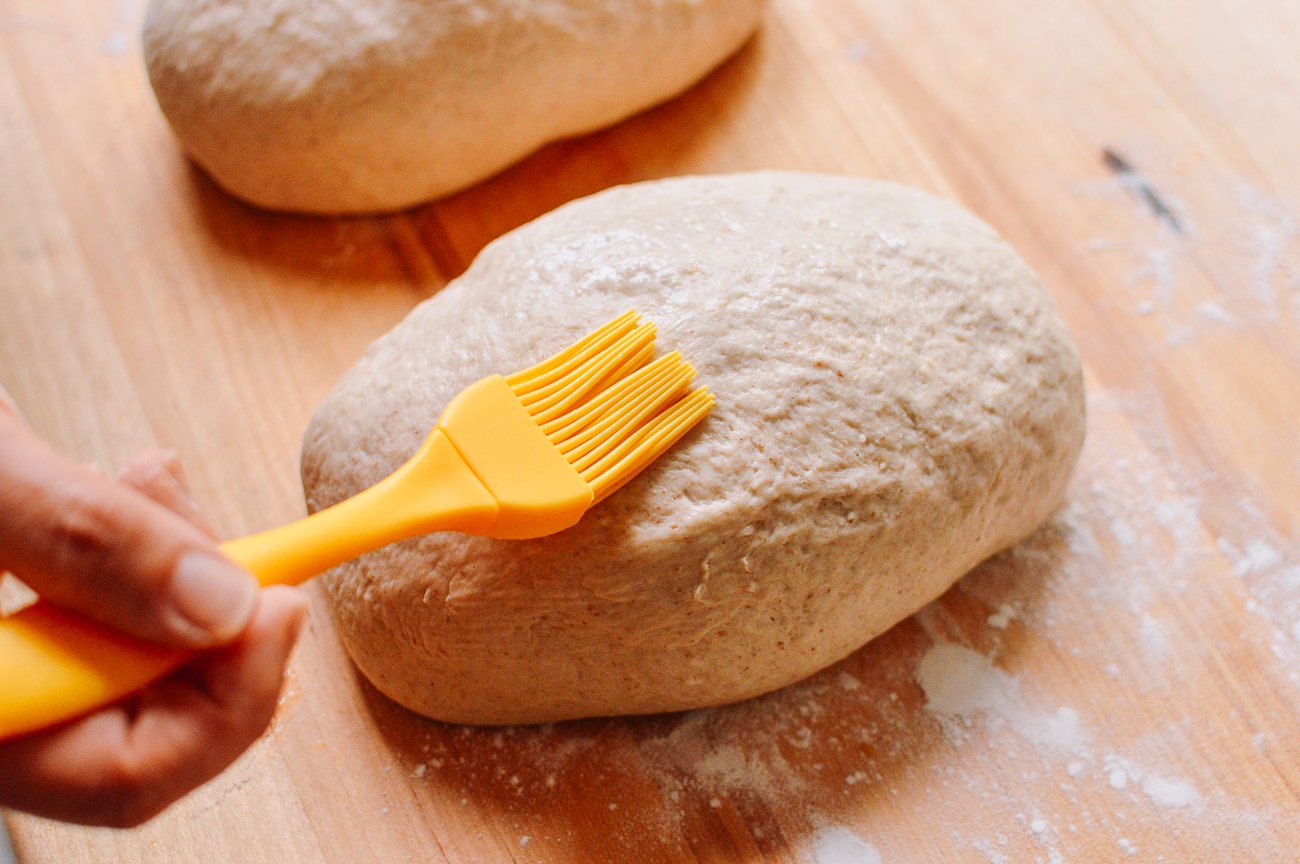
Knead and roll each piece into a loaf shape with a smooth top.
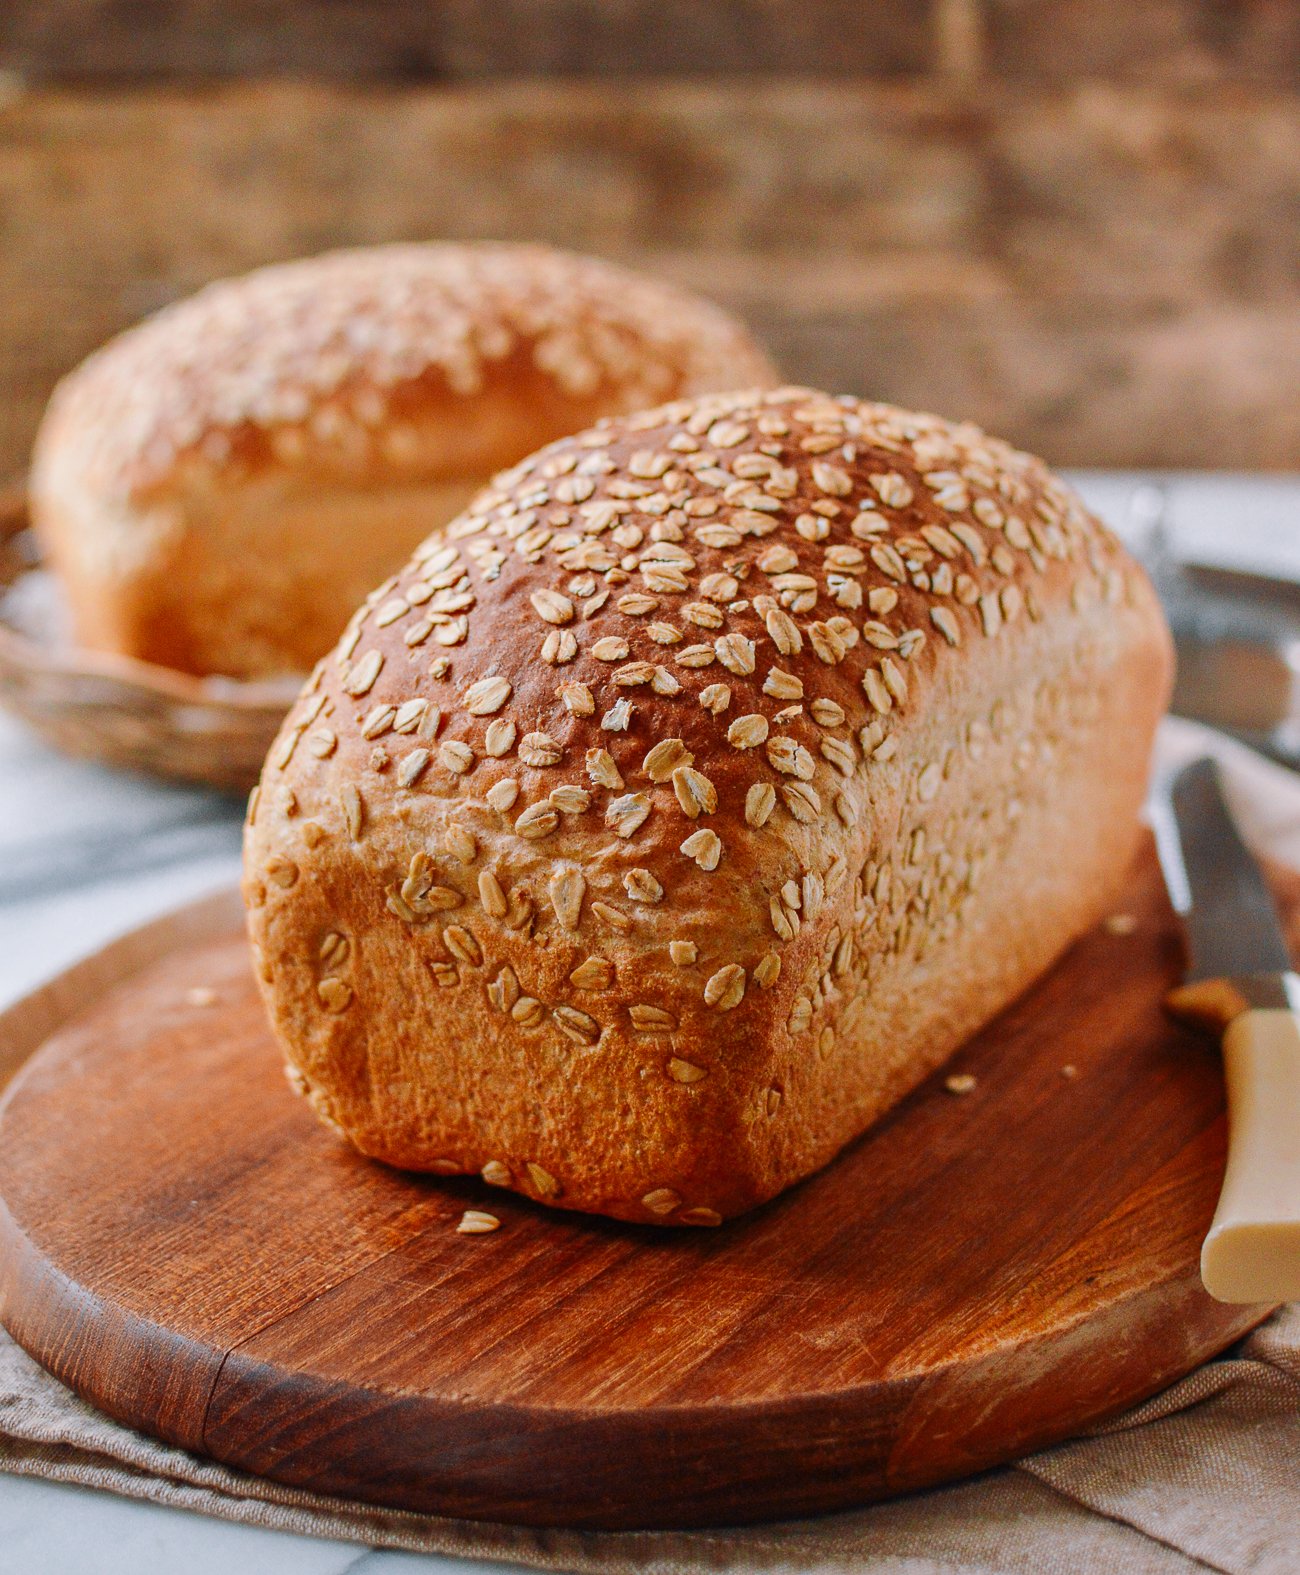
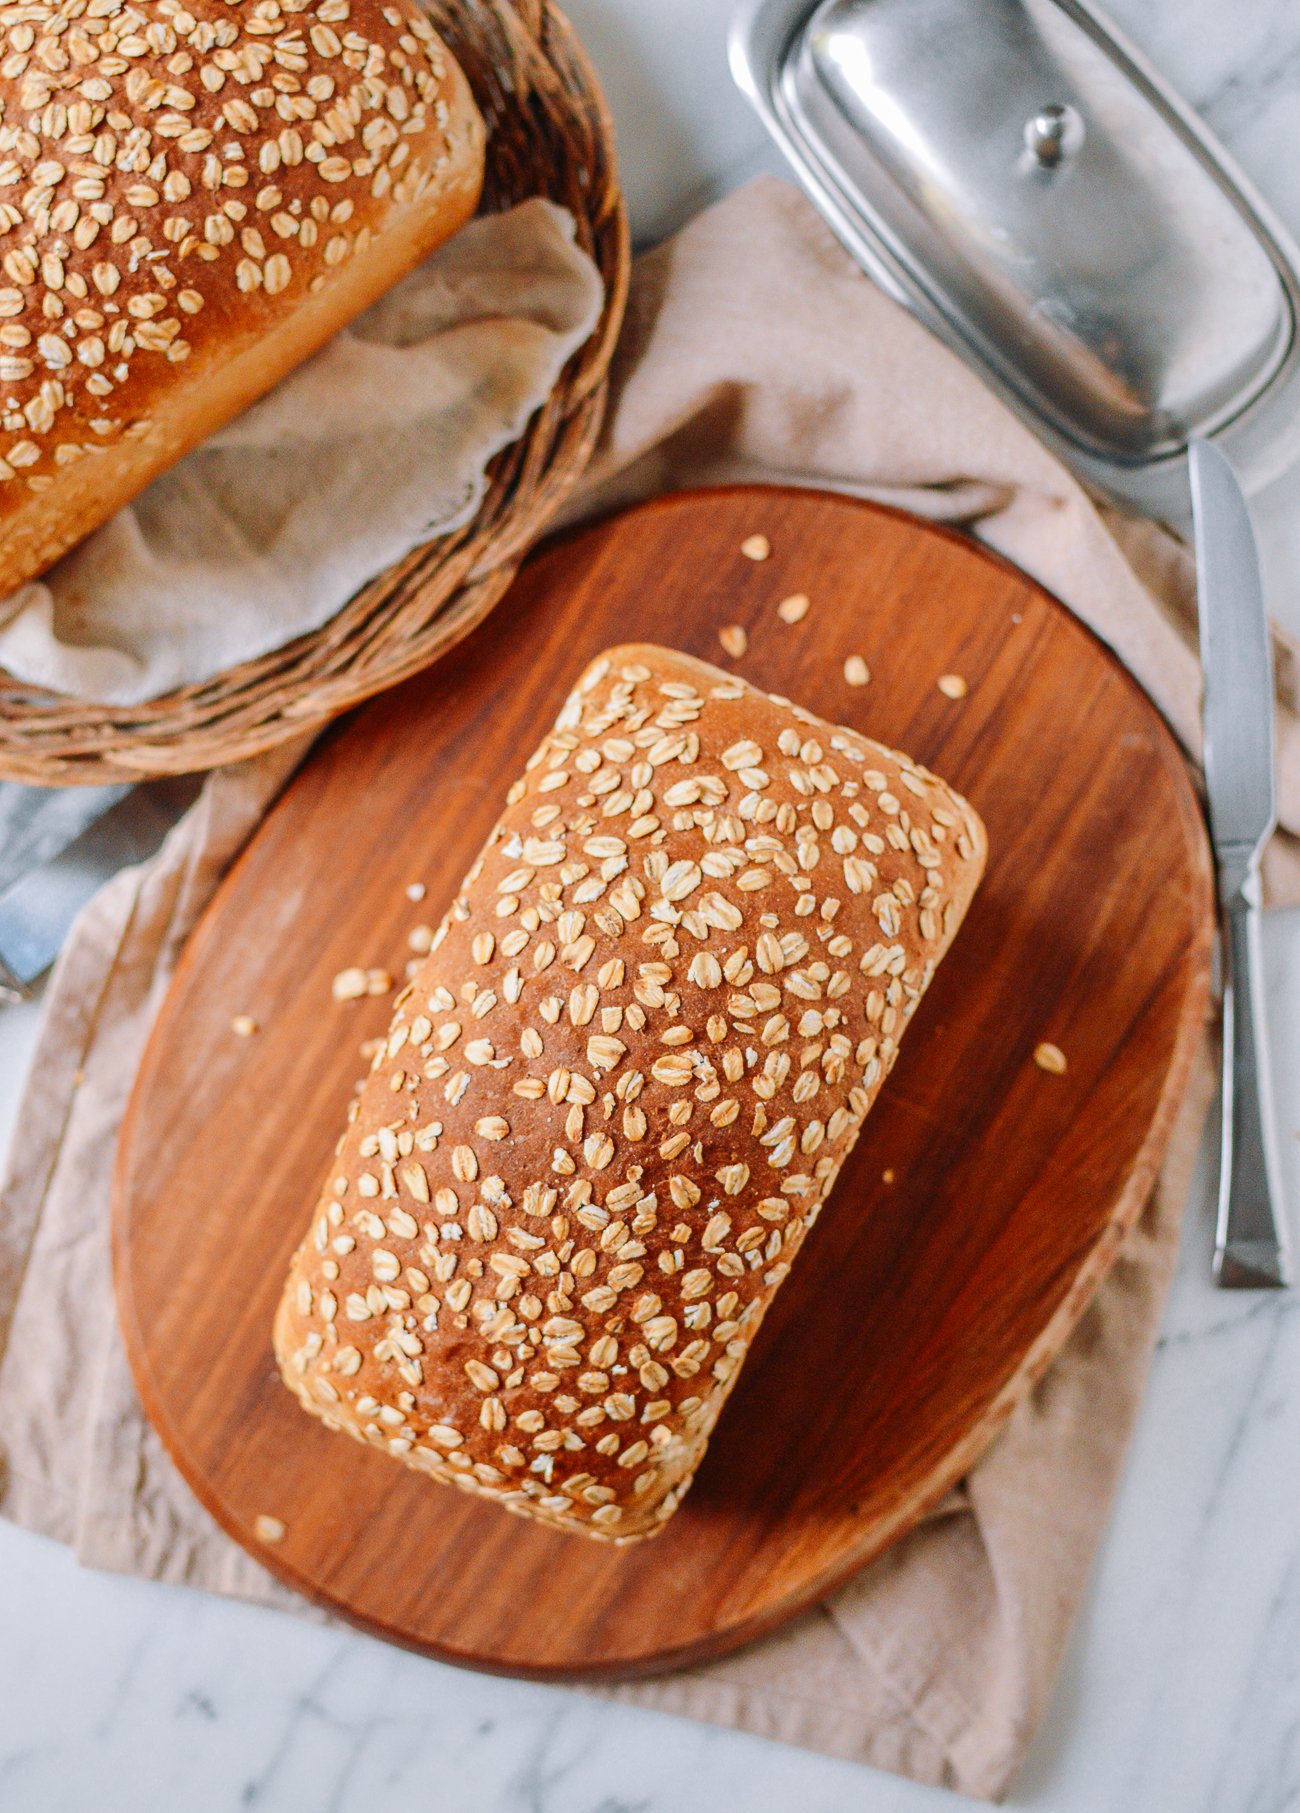
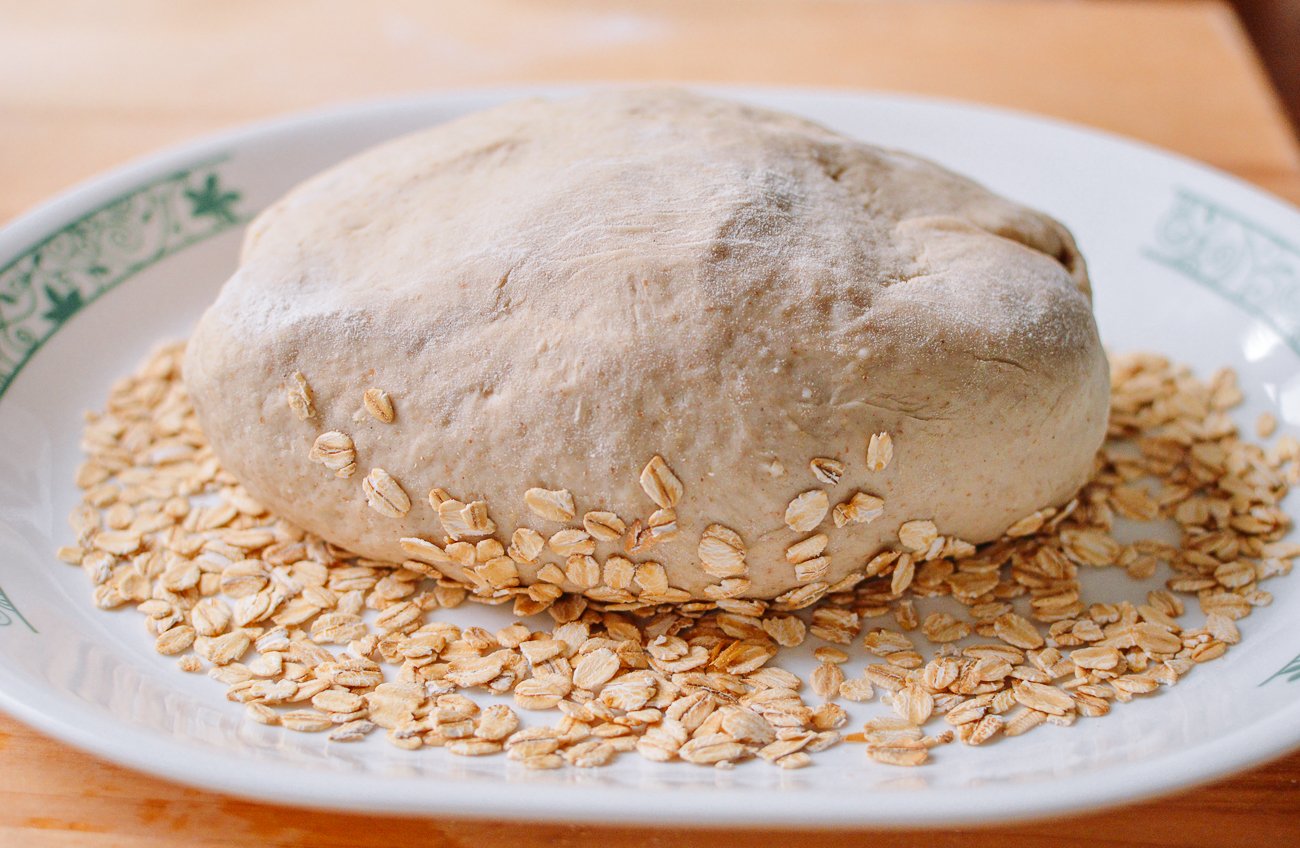
On a clean work surface, spread the rolled oats in a thin layer. This will be for topping the loaf. In addition to rolled oats, you can use flax seeds, sunflower seeds, pumpkin seeds/pepitas, and/or sesame seeds for the topping.
You can skip this step, but it adds a nice texture and additional flavor to the bread, and a contrast to the bread’s soft crumb.
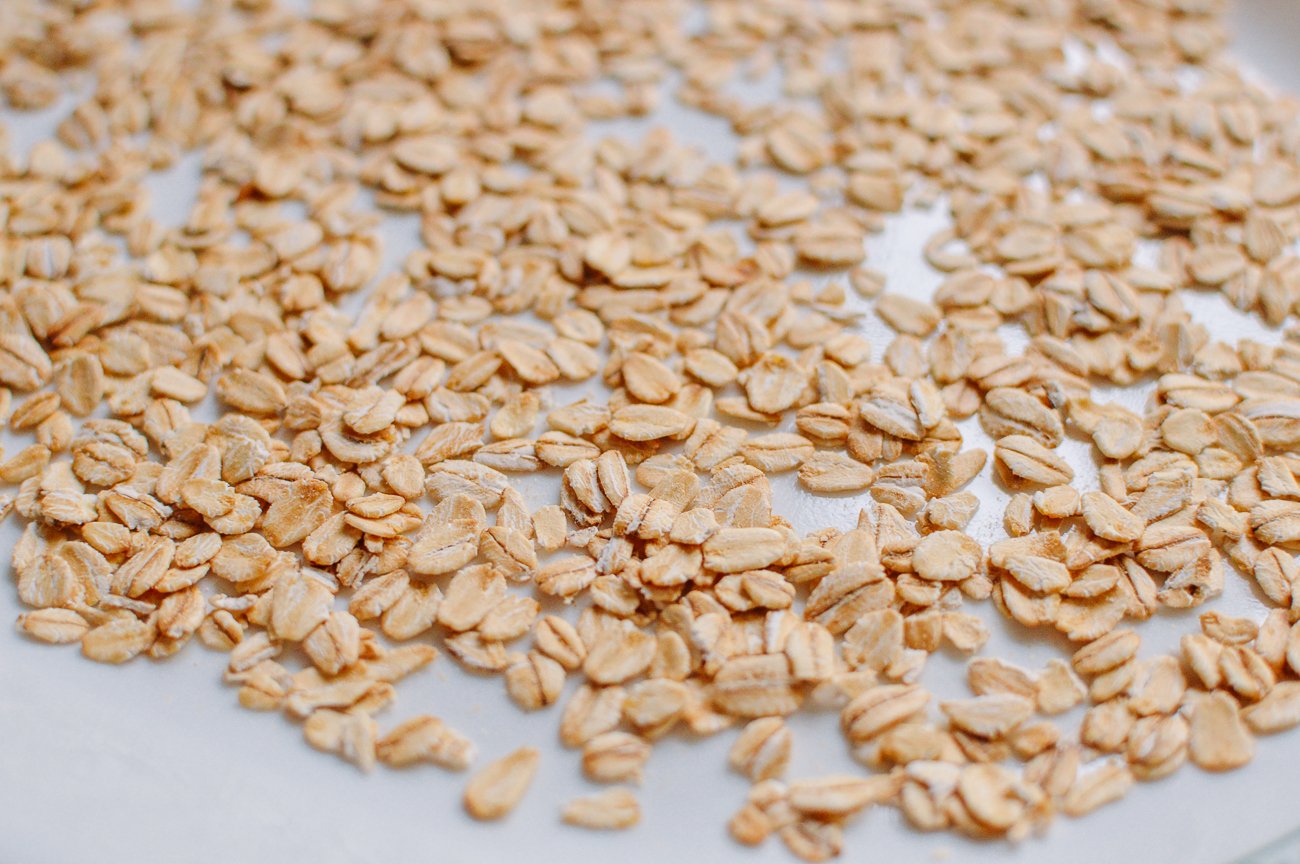
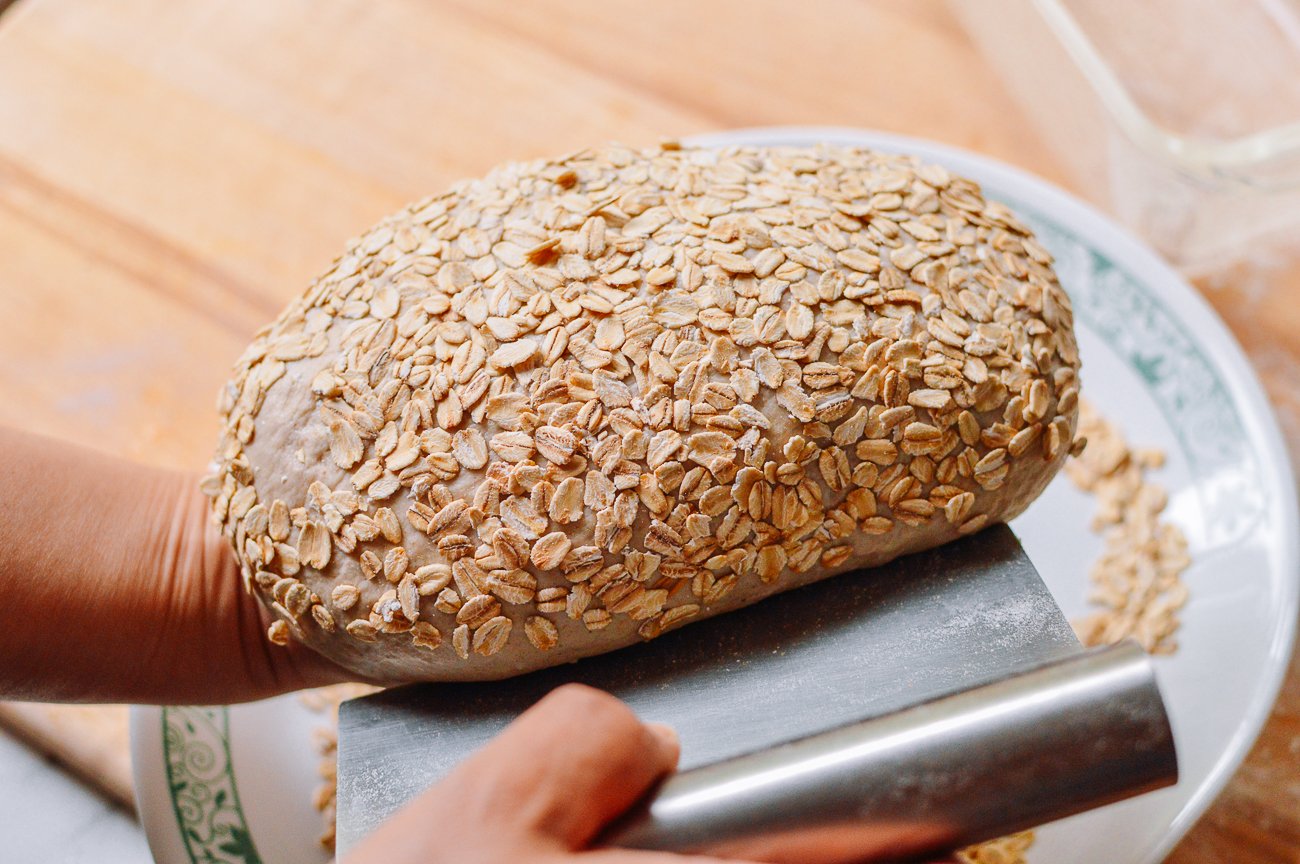
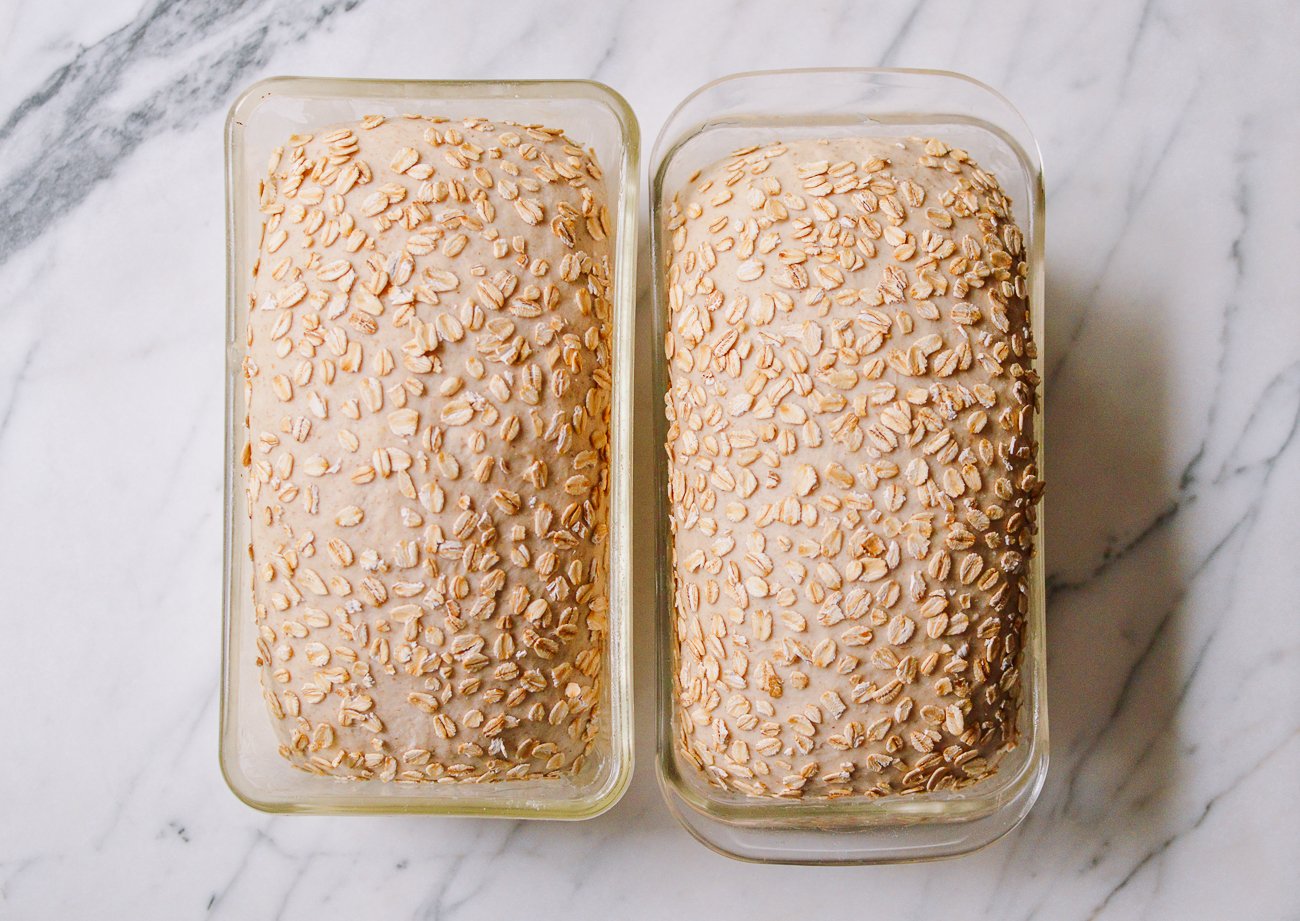
Very lightly brush the top of the loaves with water and gently flip the moistened top onto the thin layer of rolled oats (and whatever other seeds you’ve added). The oats will cling to the loaf.
Then carefully place the loaves, oat-side up into the greased pans.
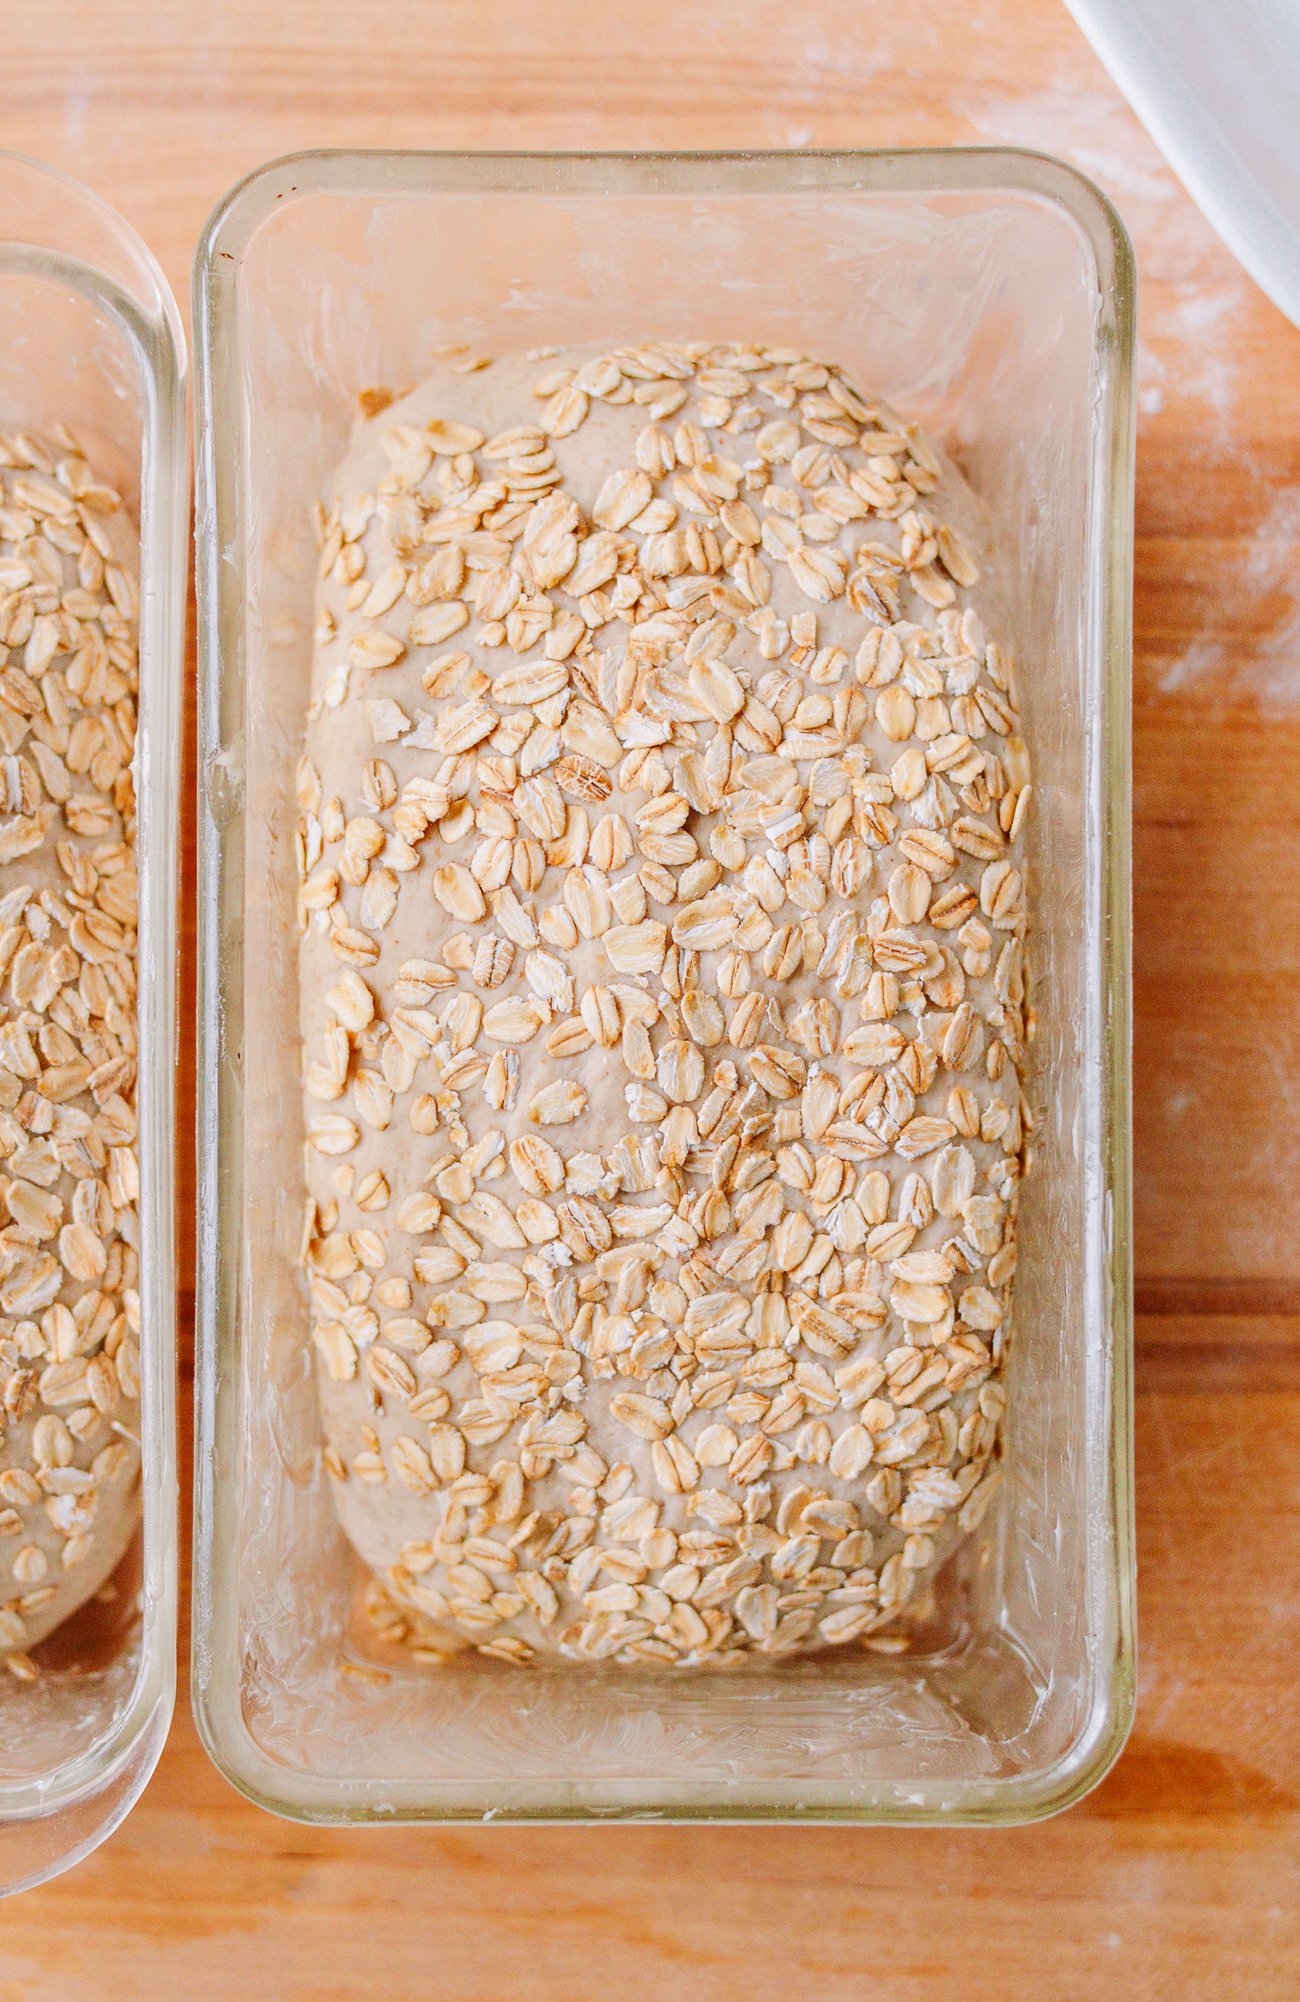

Allow to rise for one more hour before baking, repeating the proofing protocol as in the first and second proofings.
When you’re halfway through the last proofing, preheat the oven to 375°F. When the third proofing is complete, bake the loaves in the middle of the oven for 35 minutes, until golden brown. If you tap the bread, and it sounds hollow, it’s done.
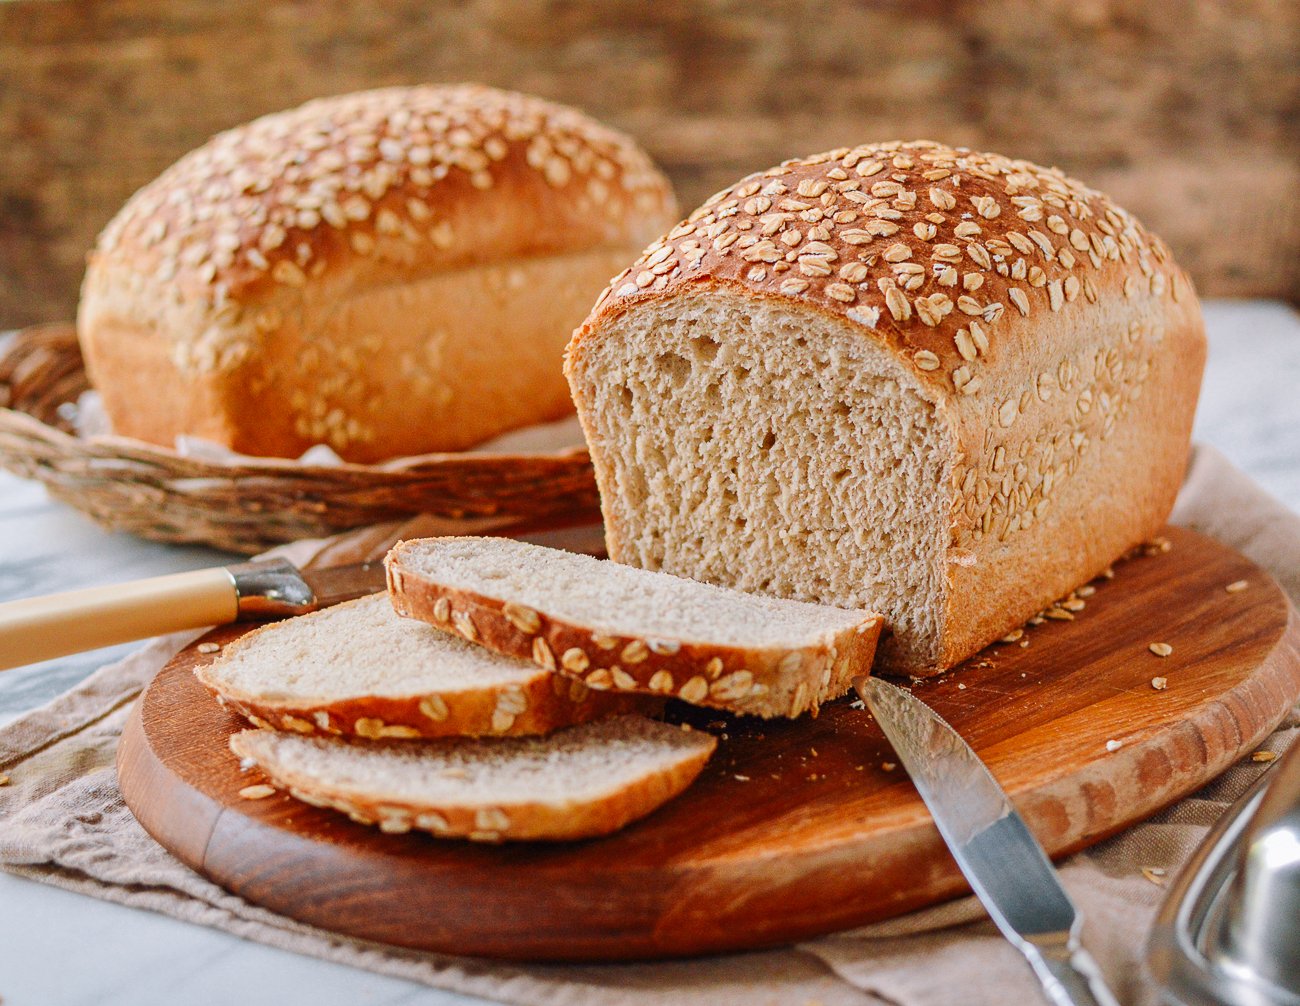
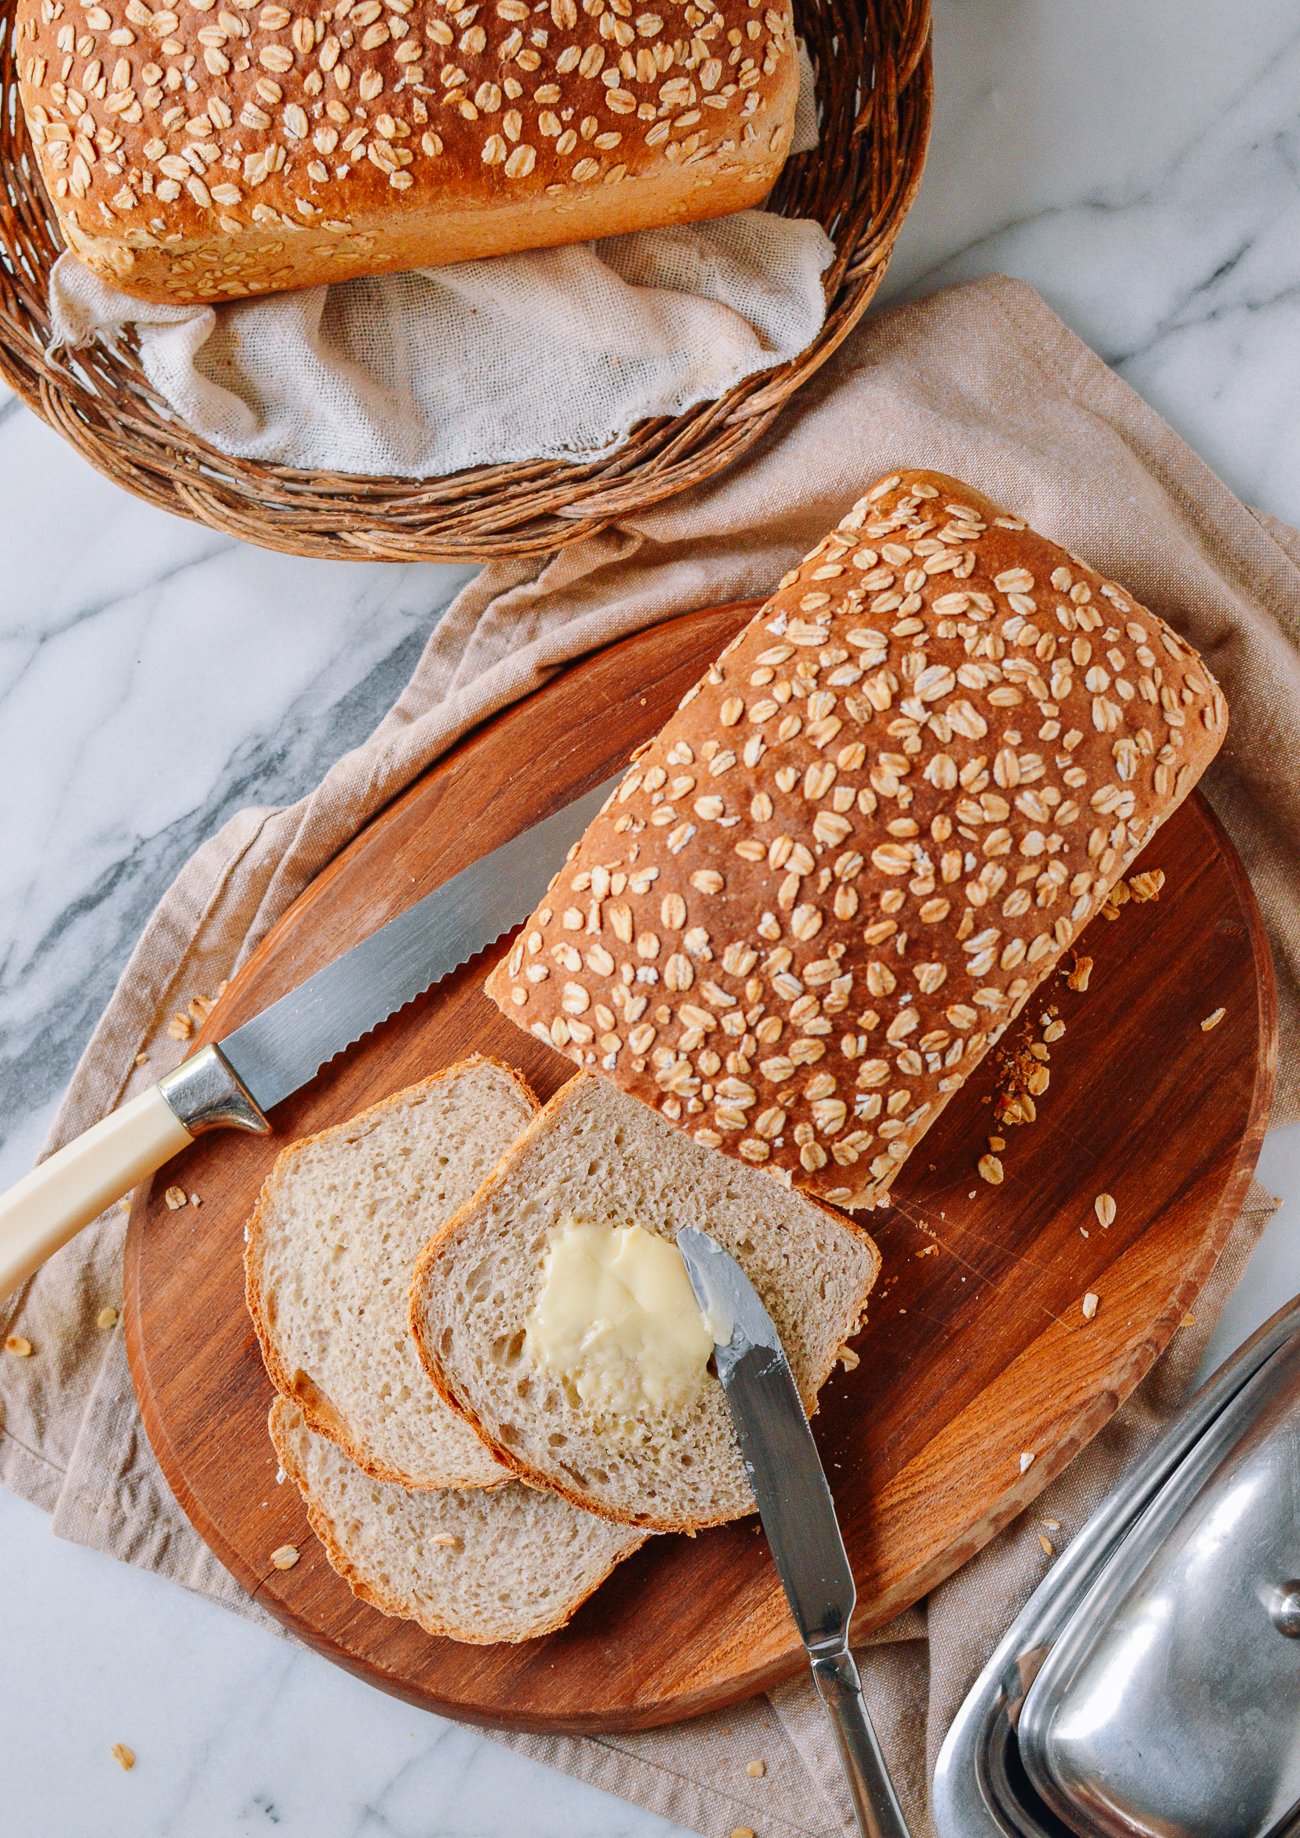
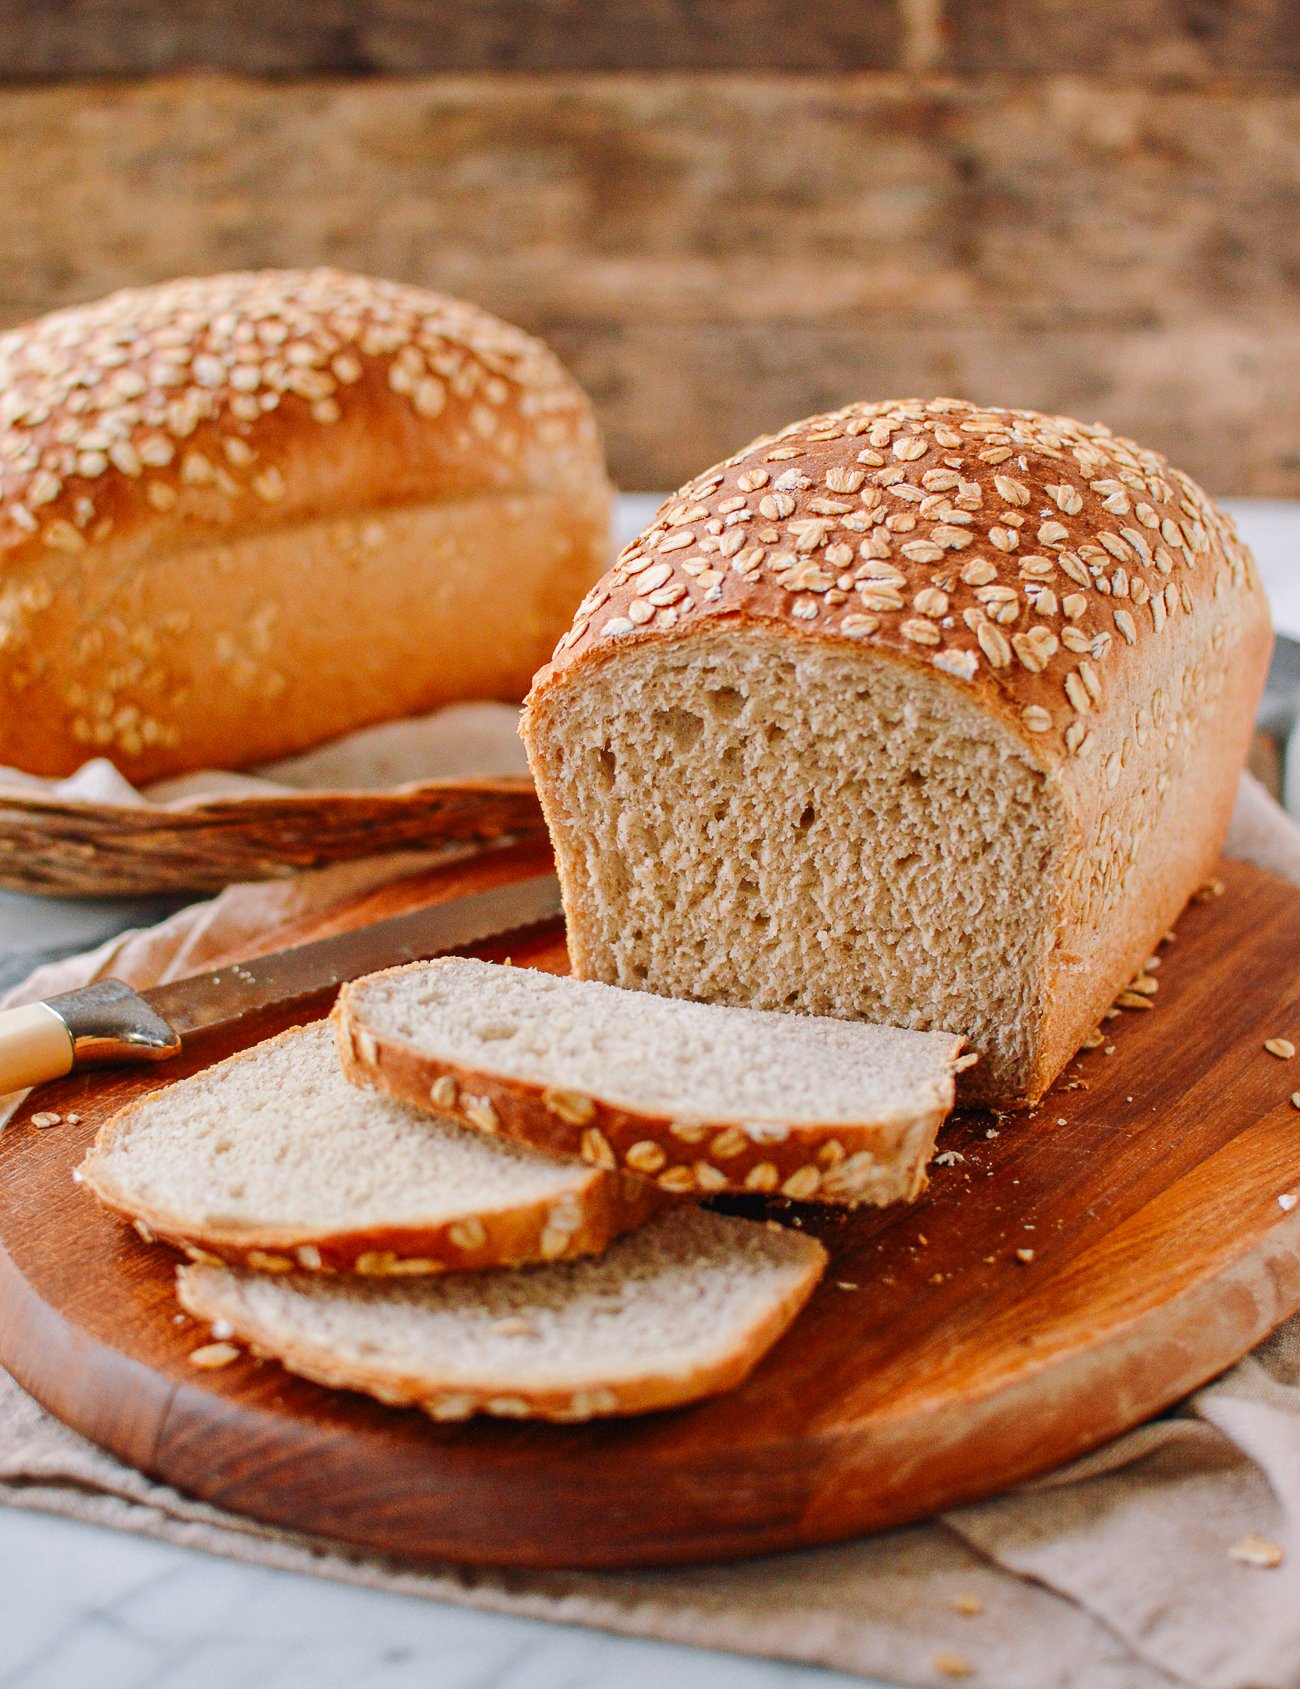
Cool for about 5 minutes, and carefully remove the hot bread from the pans. Transfer to a cooling rack to prevent the bread from steaming inside the loaf pan.
At this point, your house will smell amazing. Is there any better smell than fresh bread baking? Usually, a few slices will get eaten well before the bread has cooled, but this will not hurt the final product. Who can resist a loaf of freshly baked bread with butter?
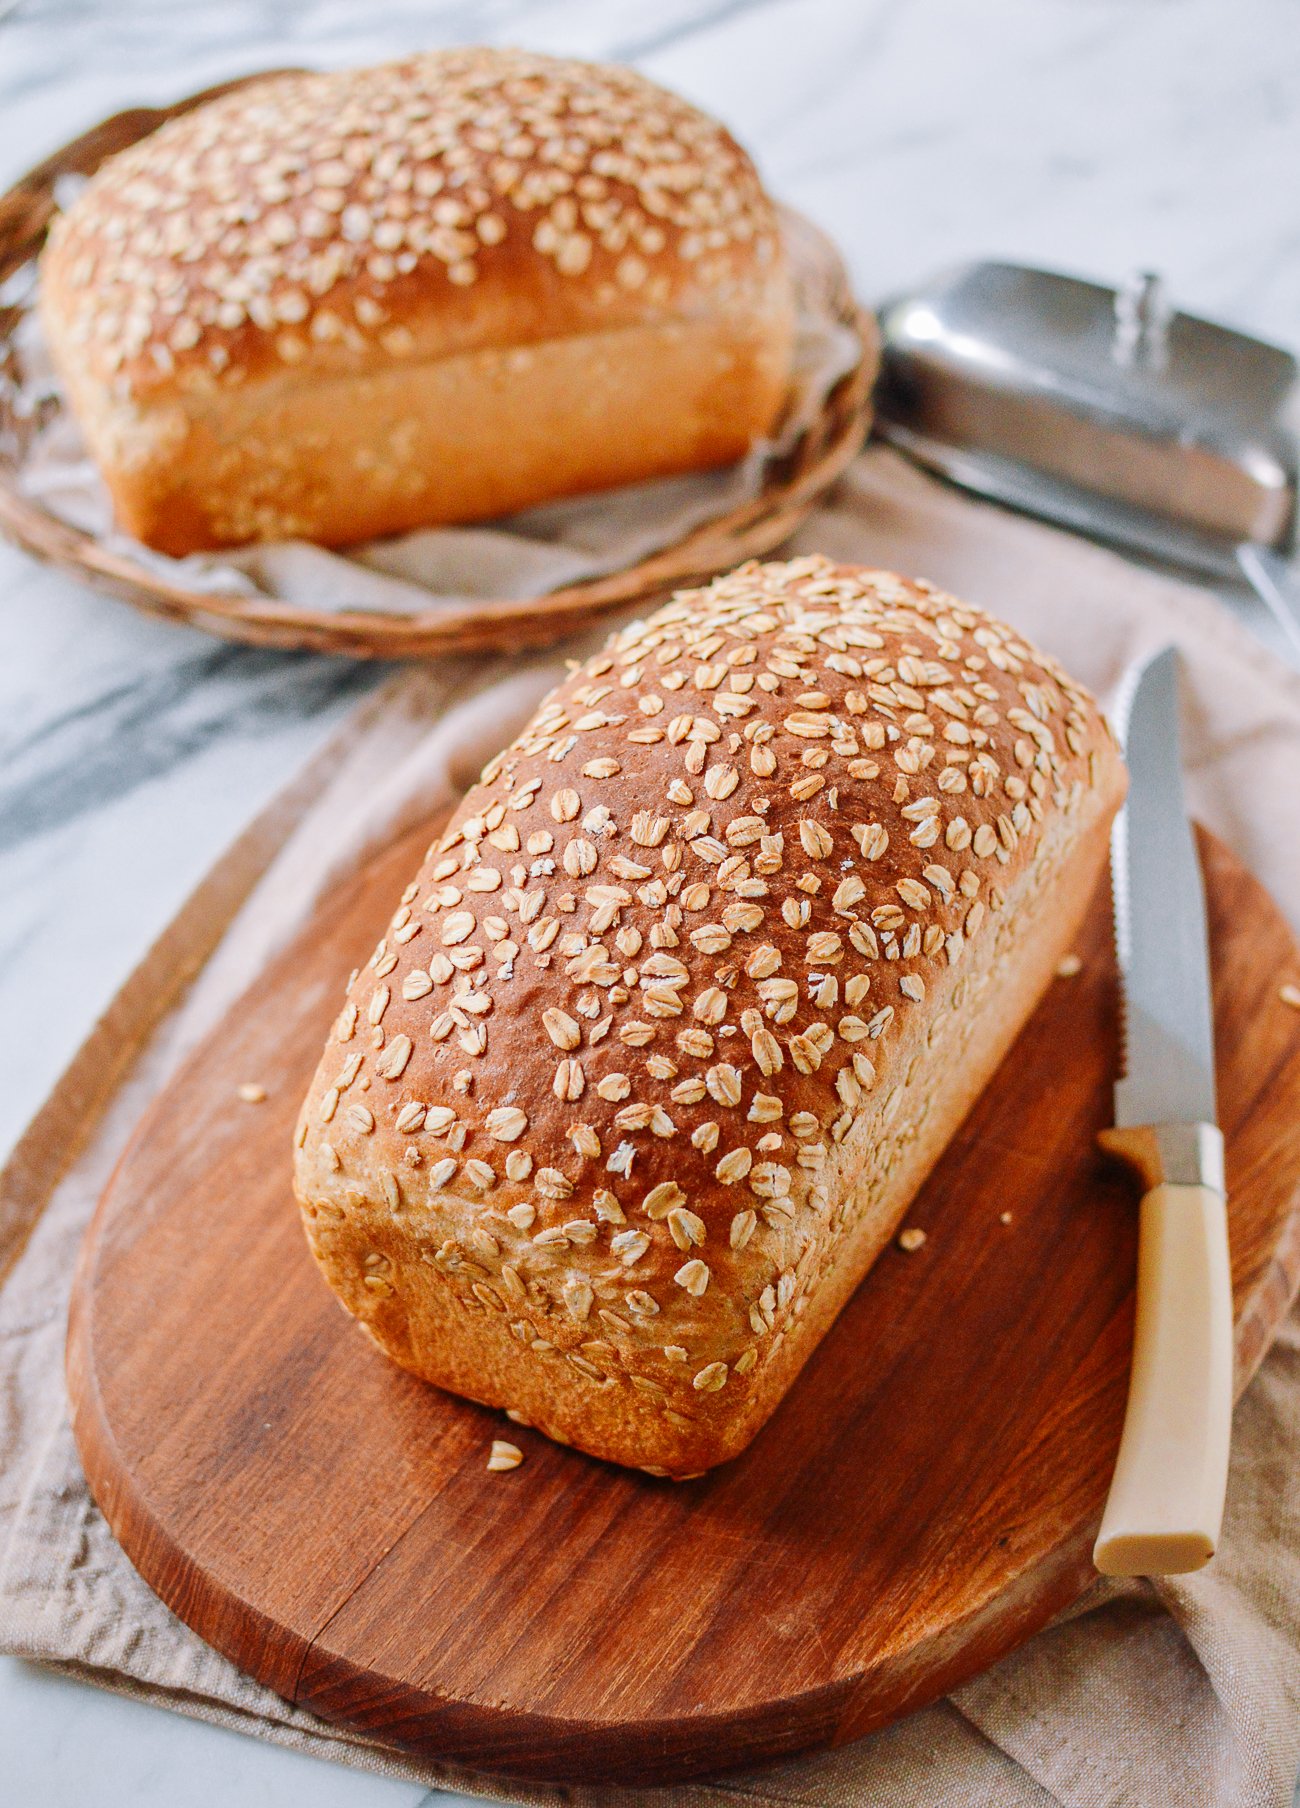
Good thing you made two.
We hope you enjoy this multigrain bread recipe, as so many of our readers have over the years!
Looking for more authentic recipes? Subscribe to our email list and be sure to follow us on Pinterest, Facebook, Instagram, and Youtube!
Recipe

Homemade Multigrain Bread
Ingredients
- 1 1/2 cups multigrain flour or cereal mix (see post on how to make multigrain flour, or purchase ready made multigrain hot cereal mix, such as Bob's Red Mill)
- 2 3/4 cups boiling water
- 4 tablespoons butter (plus more to grease the loaf pans)
- 1/3 cup honey
- 2 1/2 teaspoons instant yeast
- 1 teaspoon vital wheat gluten (optional, but this will make your bread significantly softer)
- 4 ½ cups all-purpose flour
- 1 teaspoon salt
- 1/3 cup rolled oats (for topping the loaves; can also use flax seeds, sunflower seeds, pumpkin seeds/pepitas, and/or sesame seeds)
Instructions
- Add the multigrain flour to the bowl of a stand mixer or a large heat-proof mixing bowl. Pour in the boiling water, and carefully stir the flour and water with a rubber spatula until it forms a thick paste. Stir in the butter until well combined. Let the mixture cool for about 20 minutes.
- Once the multigrain mixture is warm to the touch and not hot, stir in the honey until thoroughly combined. Stir in the yeast (and vital wheat gluten if using, in that order). It’s important to make sure the mixture truly is lukewarm before adding the yeast. Let stand for 10 minutes to activate the yeast.
- Add the all purpose flour, ¼ cup at a time, and knead until the dough ball is smooth. This will take about 10-15 minutes. The dough should be slightly sticky, but should not stick to a rubber spatula. Soft dough makes soft bread, so do not use more flour than necessary!
- Use the rubber spatula to clean the sides of the bowl, and form the dough into a smooth ball. Cover the bowl with a plate, and let it rise in a warm place for 45 minutes to 1 hour, or until the dough doubles in size.
- Once the first proofing is done, sprinkle 1 teaspoon salt over the dough and knead again for another 5 minutes to make sure the salt is evenly distributed.
- Shape the dough into a smooth dough ball, cover with a plate, and let it rise again in a warm place for 45 minutes to 1 hour, or until the dough doubles in size. If you are proofing the dough in the microwave like I do, you’ll need another large mug of boiling water for the second proofing.
- While the dough is proofing, grease 2 loaf pans (9” x 5”) with cold butter and set them aside. I use cold butter, as it’s easier to handle and goes on in a thin layer. I simply take a cold stick of butter, peel back the wrapper, and rub it along the inside of the loaf pans to coat.
- After the second proofing is done, cut the dough into two equal portions. Knead and roll each piece into a loaf shape with a smooth top. On a clean work surface, spread the rolled oats in a thin layer.
- Very lightly brush the top of the loaves with water and gently flip the moistened top onto the thin layer of rolled oats. The oats will cling to the loaf. Then carefully place the loaves, oat-side up into the greased pans. Allow to rise for 1 more hour before baking, repeating the proofing protocol as in the first and second proofings.
- When you’re halfway through the last proofing, preheat the oven to 375°F. When the third proofing is complete, bake the loaves in the middle of the oven for 35 minutes, until golden brown. If you tap the bread, and it sounds hollow, it’s done.
- Cool for about 5 minutes, and carefully remove the hot bread from the pans. Transfer to a cooling rack to prevent the bread from steaming inside the loaf pan. Slice and serve!


