
Croissants are something I never thought I could successfully make at home. But just like our sourdough (first in my list of things I’d never thought I’d be able to make), I’ve figured out a great croissant recipe that even a novice baker can pull-off.
Best of all? It starts with our trusty, easy milk bread, which many of you have already made successfully.
Using our milk bread dough and the techniques I’ll teach you in this post, you’ll make crispy, buttery French croissants that are amazing slathered in jam, with a cup of coffee, or used as a base to make chocolate croissants, almond croissants, or ham and cheese croissants.
Skeptical? Keep reading…
A long journey to learning how to make croissants
Croissant recipes seem quite fussy, and honestly, I just didn’t have the confidence. But over time, I decided I wanted to really practice my baking skills.
After reliably making homemade sourdough bread and easy rough puff pastry (which uses similar rolling and laminating techniques), I decided it was time.
As it turns out, making croissants is a lot like making sourdough. The process requires time, yes, but it’s mostly inactive time. This is a process that you’ll need to tend to in small bursts during breaks in your day, but as long as you follow the instructions, you’ll get a great result.
If this recipe sounds stressful, I’ve realized that rolling and laminating dough is actually quite relaxing. While it took me a few batches to really get the hang of rolling and shaping, my croissants looked better and better with every try.

What Are Milk Bread Croissants?
These milk bread croissants are exactly what they sound like—a croissant made from an Asian milk bread dough. In other words, you have a new unexpected use for our popular milk bread recipe!
After reading and trying many croissant recipes, Judy casually suggested that I use her milk bread recipe for the dough. There are many French-style bakeries in China that have already tried this with success.
The idea was even more brilliant because she’s such a pro at making her milk bread, that I simply asked her to make me a batch! From there, she passed the baton to me to transform that standard milk bread dough into croissants.
As it turns out, our Asian milk bread dough isn’t all that different from a croissant dough.
Both contain yeast, and both are types of enriched dough—a bread dough that has been “enriched” with fat and dairy ingredients like milk, eggs, butter, or cream, as well as sugar. Challah, brioche, and cinnamon rolls are all examples of baked goods made with enriched dough. (Check out Kaitlin’s excellent recipe for milk bread cinnamon rolls!)
Croissant recipes usually call for milk, butter, and sugar. Our milk bread recipe contains milk, heavy cream, sugar, and half an egg. It’s actually quite similar in composition to a croissant dough.
But our milk bread is so simple—with an all-in-one mixing method (all the ingredients are added to the mixing bowl and then kneaded).
There is no need to pre-activate the yeast, or mix in butter in a separate step. Just add the ingredients to the order described in the recipe, turn on the mixer, and let it go.
(We also have instructions for kneading by hand if you don’t have a stand mixer with a dough hook.)
A Proven Winner: Thoughts from Friends and Family
One morning during a house closing (more on that later…!), we had an extra freshly baked croissant with us in the car, so we brought it in for our attorney after he proclaimed he had been in the office since 5am without any breakfast.
“You made these?” he said. “These are delicious, and I’m a picky eater.”
We had a similar incident when we had people over for a Sunday brunch. “Try Bill’s croissants!” Judy proclaimed as she brought some of my reheated croissants to the table. Reaction: “Wow, they’re better than what we usually get at most bakeries.”
That’s when I realized to myself, “I can actually make croissants!”
Long story short…if you’ve already tried making Judy’s milk bread, or any of our Chinese Bakery recipes that use milk bread dough, you must try making these milk bread croissants.

NOTE!
The croissant dough is actually ½ of our milk bread dough, so if you’re making a batch of milk bread, you can bake half of it into a loaf or buns, and use the other half to make these croissants.
A note on flour: If you’ve made our milk bread recipe before, you may have noticed that we’re using only all-purpose flour instead of a mix of bread flour and cake flour. We have since extensively tested our milk bread recipe with only all-purpose flour and haven’t found any meaningful differences in the result. However, for a lighter croissant, you can use 1/2 cup of cake flour or pastry flour in place of 1/2 cup of all-purpose flour.
Croissant Recipe Instructions
Step 1: Make the Butter Square
Cut a piece of parchment paper 11 inches (28 cm) long by 15 inches (38 cm) wide (this was the width of our parchment paper roll). Fold the parchment in half so you have a 7 ½” x 11” (19x28cm) rectangle.
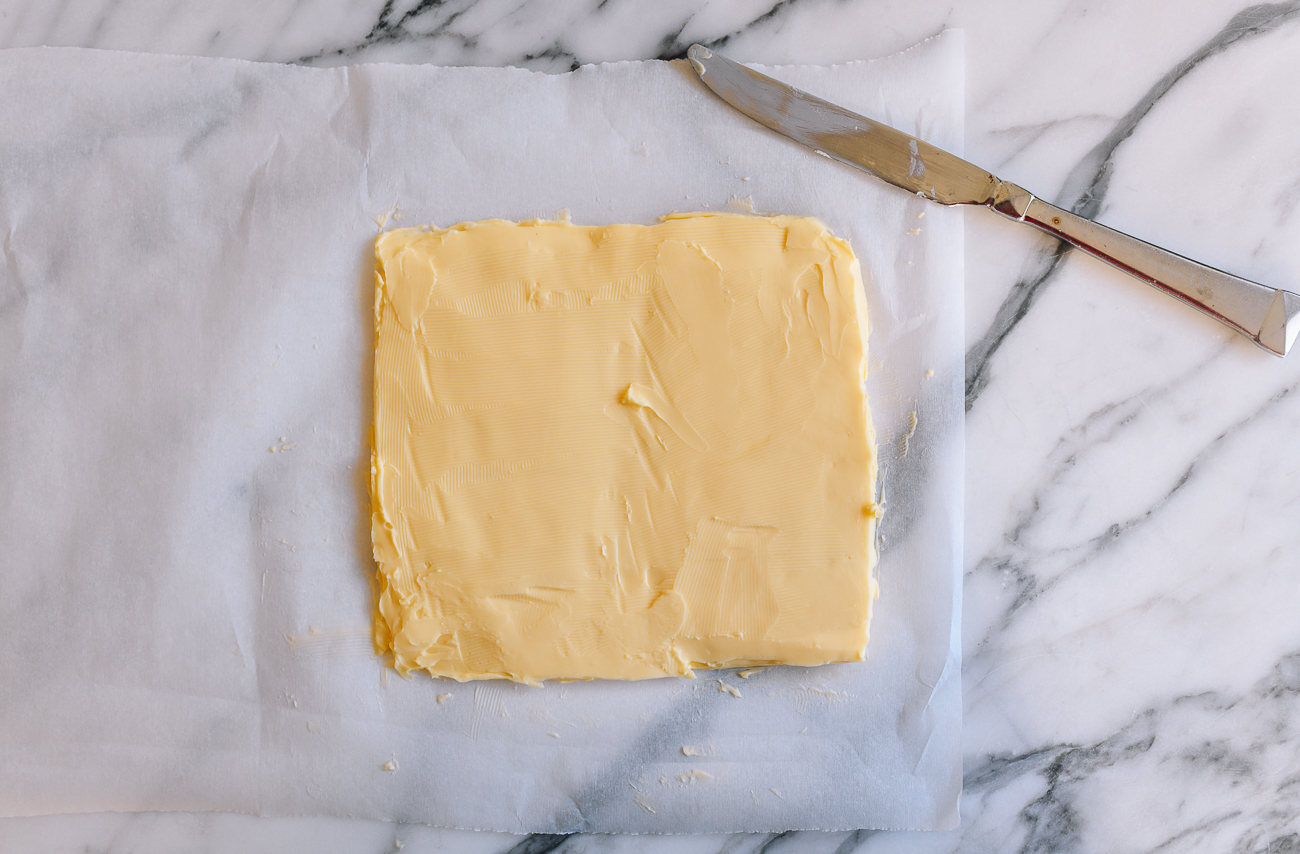
Cut the softened butter into ½-inch (1cm) squares, and arrange them on one side of the paper to form a rough 7×7 inch (18x18cm) square.
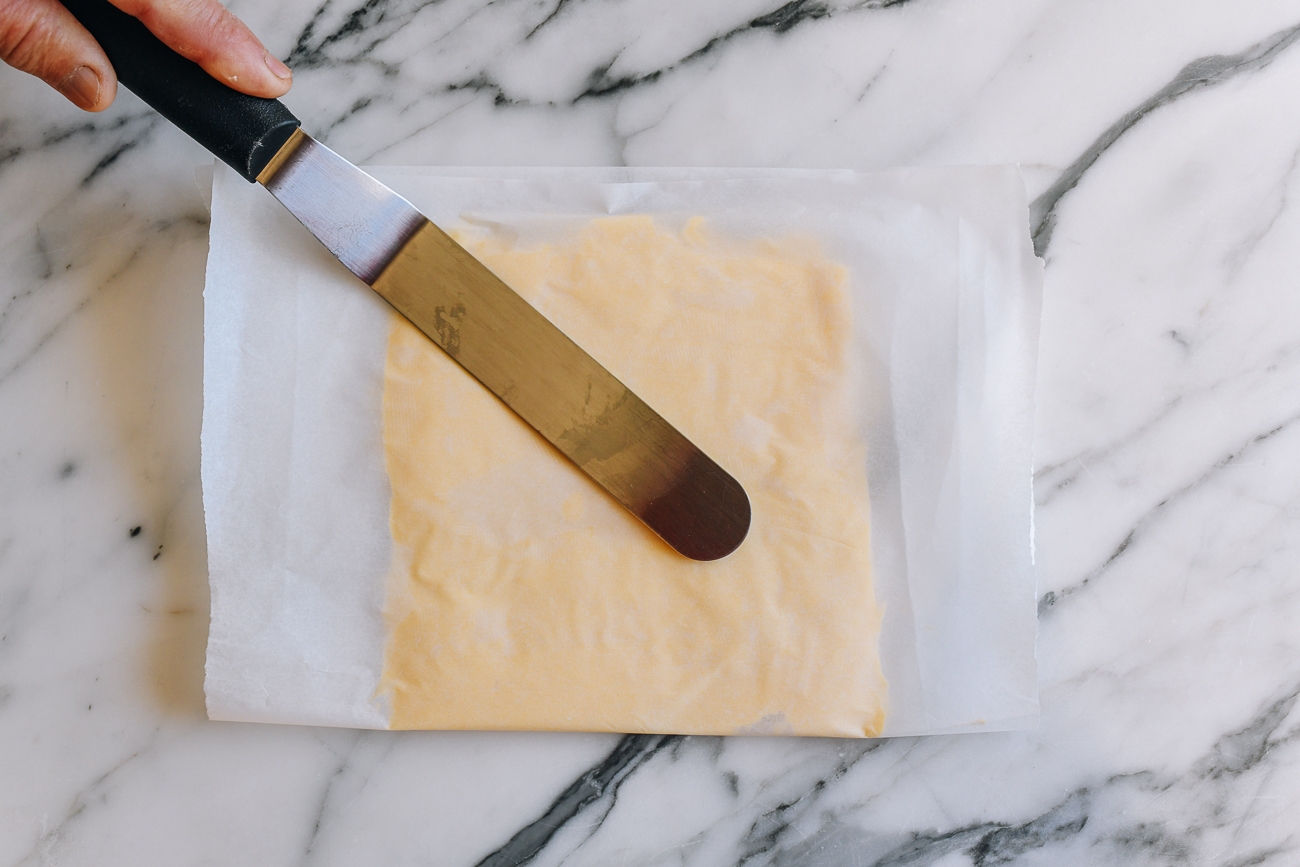
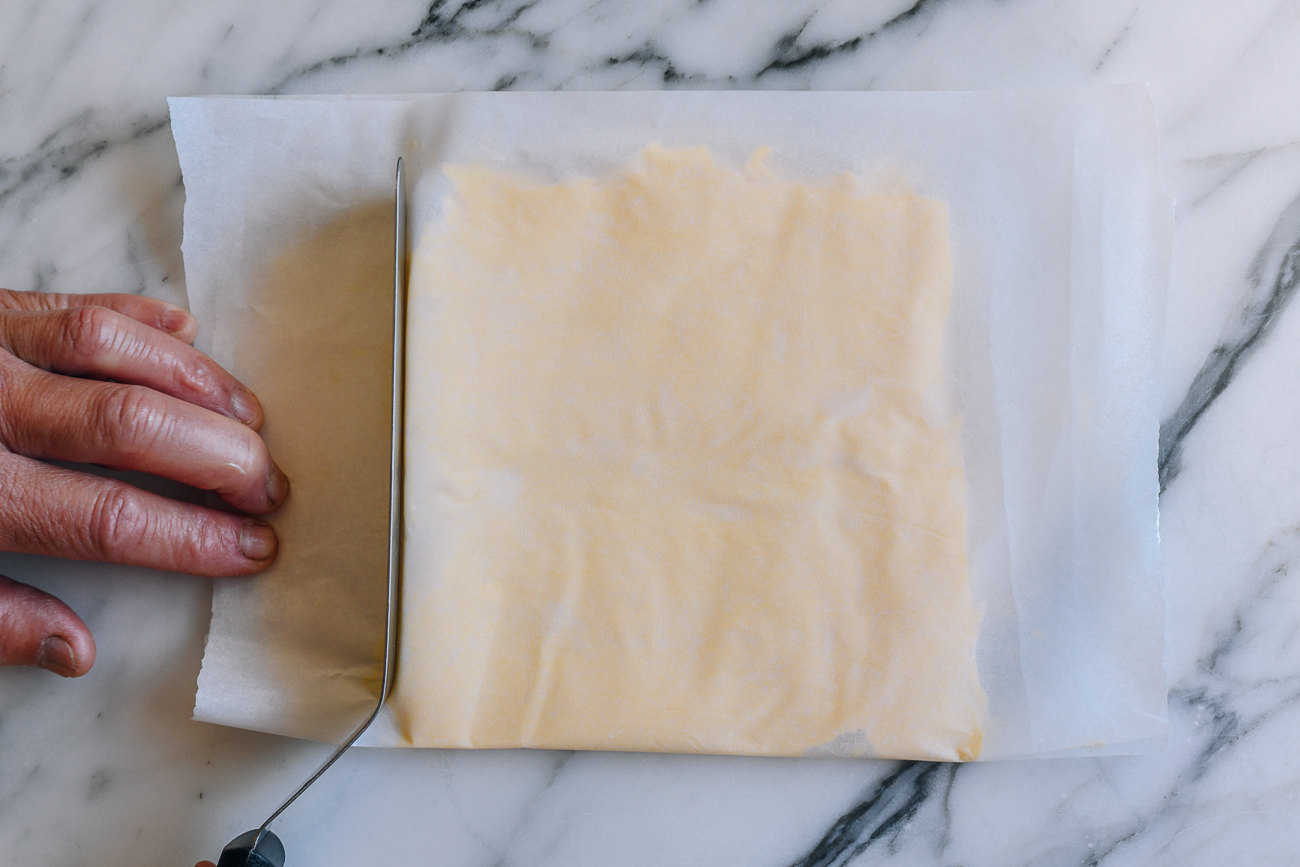
Fold the other half of parchment over the slightly softened butter, and use a rolling pin and something with a flat edge (like a bench scraper/dough scraper or offset spatula) to form the butter into a uniform square, flipping the butter square over a couple times to flatten both sides.
European-style Butter Makes a Huge Difference
Why do you think French croissants always taste so good? The quality of the butter has a lot to do with it! I’ve used both European and American butter to make this recipe, and I can report that using a European-style butter makes a huge difference.
This butter is higher in fat (ranging from 82-85% butterfat), and lower in water content, making it richer and tastier. American butter has about 80% butterfat, and is 16-18% water.
We like Kerrygold Irish butter, which has 82% butterfat and is made from grass-fed cow’s milk, but there are brands out there with even higher butterfat percentages. This butter can be more expensive, but it’s worth it for a recipe like this.
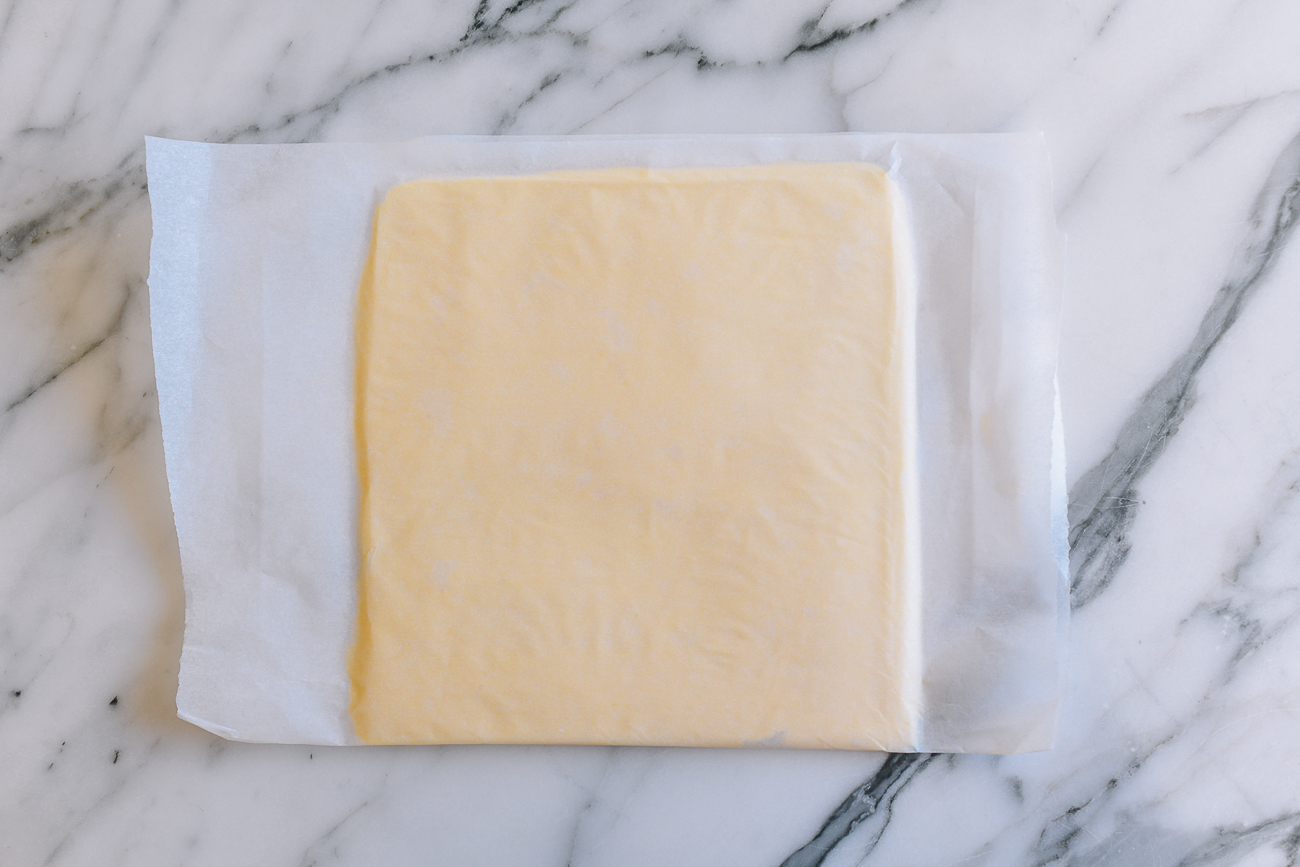
When you have a uniform thickness, place the butter square in the freezer for at least 30 minutes. You can do this step ahead of time, and keep the butter square frozen until you are ready to make your croissants.
Step 2: Make the Milk Bread Dough
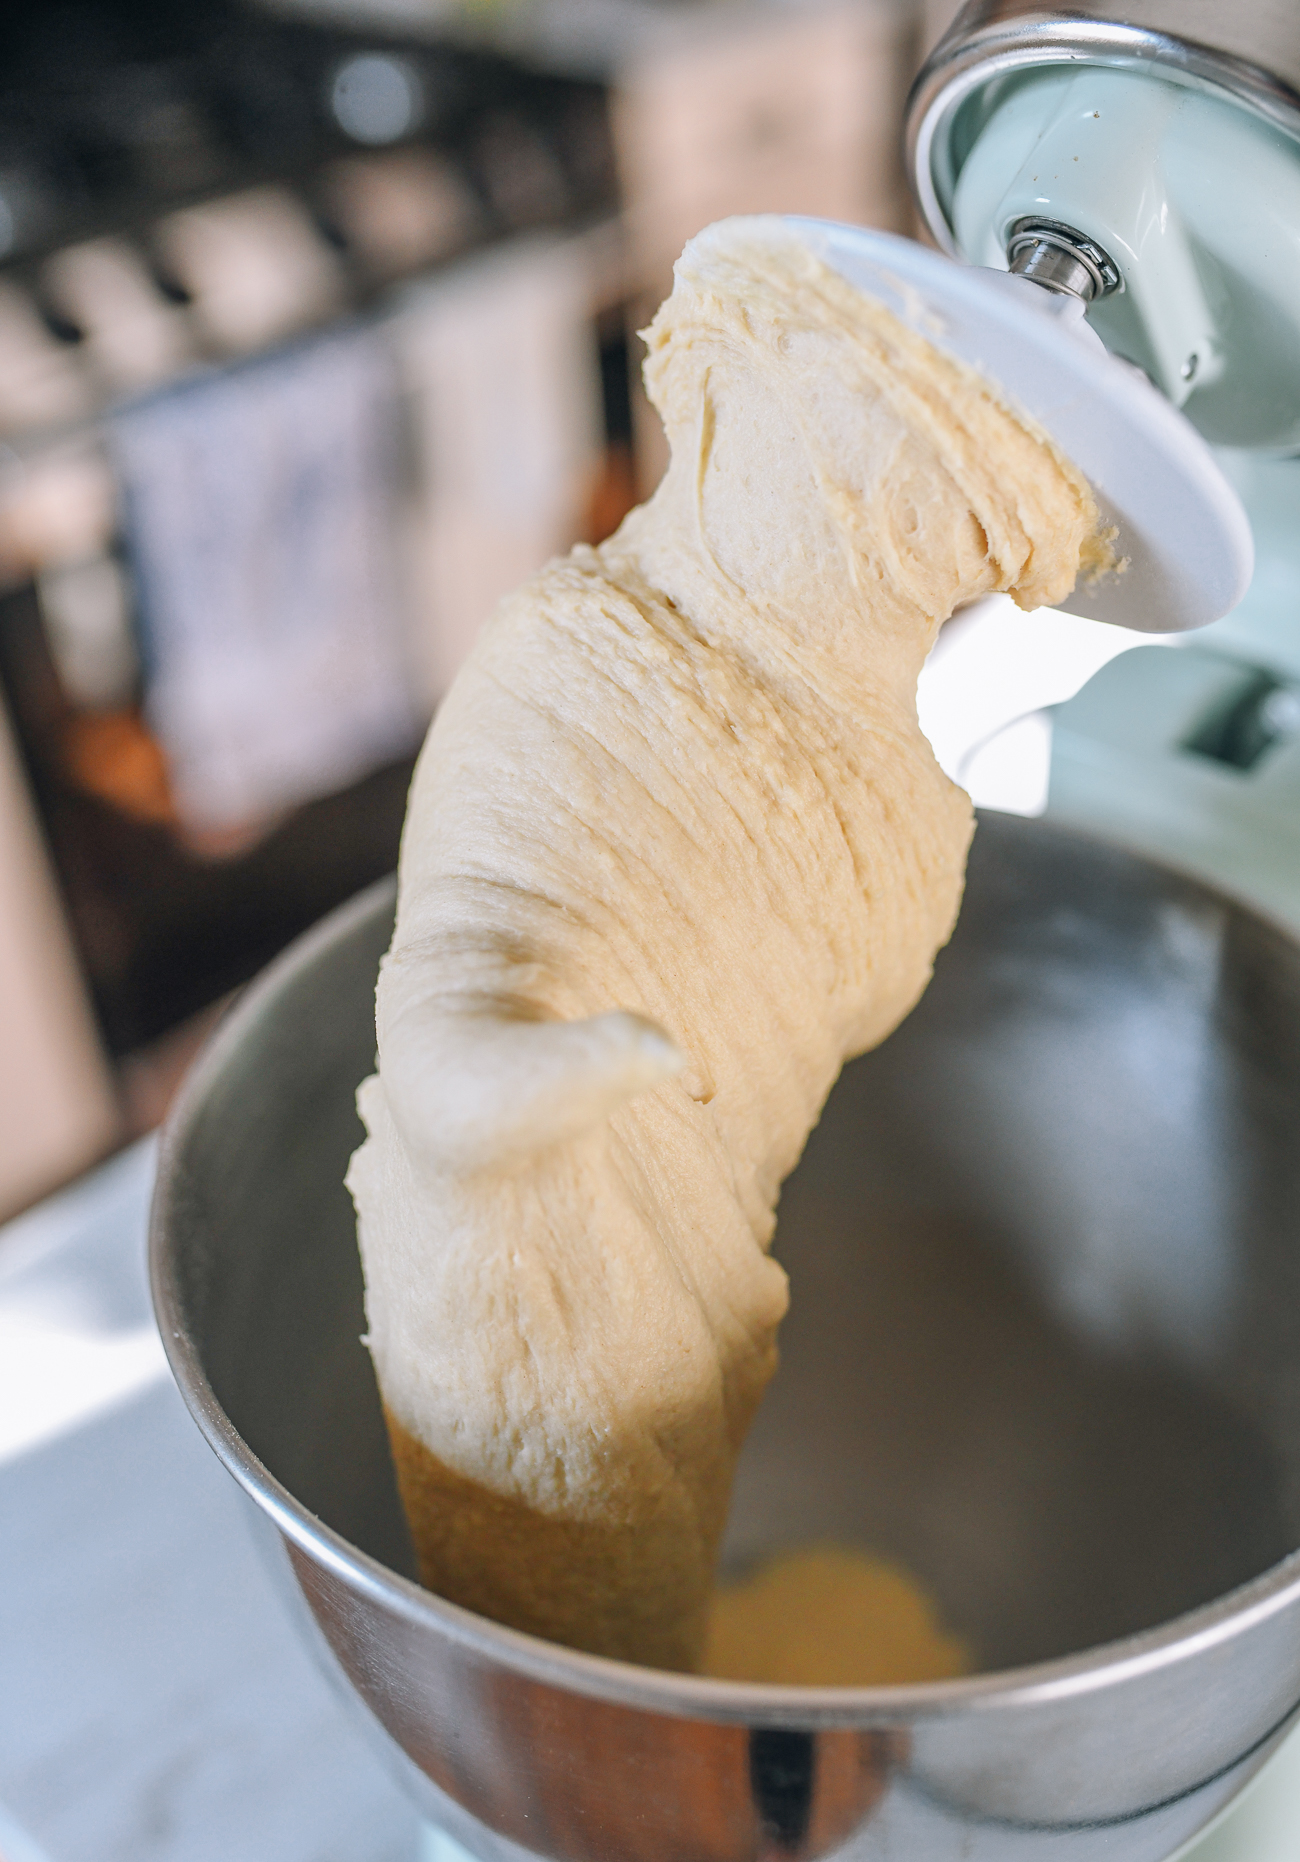
In the bowl of a stand mixer with a dough hook attachment, add the ingredients in the following order: heavy cream, milk, ½ of the egg, sugar, flour, yeast, and salt.
(Set aside the remaining ½ of the egg in a sealed container for the egg wash, which you’ll brush onto the croissants just before baking.)
Turn on the mixer to the lowest setting, and once the ingredients have come together into a dough, knead on low speed for 15 minutes, occasionally stopping the mixer to push the dough together with a stiff rubber spatula.
The dough should stick to the bottom of the mixing bowl, but not the sides. If the dough is sticking to the sides of the bowl, add flour 1 tablespoon at a time until it pulls away from the sides.
Don’t Have a Stand Mixer? Here’s How to Mix By Hand:
If you don’t have a mixer and would like to knead by hand, start by mixing the dough with a stiff rubber spatula before kneading with floured hands, and extend the kneading time by 5-10 minutes.
After kneading, cover the bowl with a damp towel, and place in a warm spot for 1 to 2 hours, until the dough has doubled in size. (We place it in a closed microwave with a mug of just-boiled water next to it).
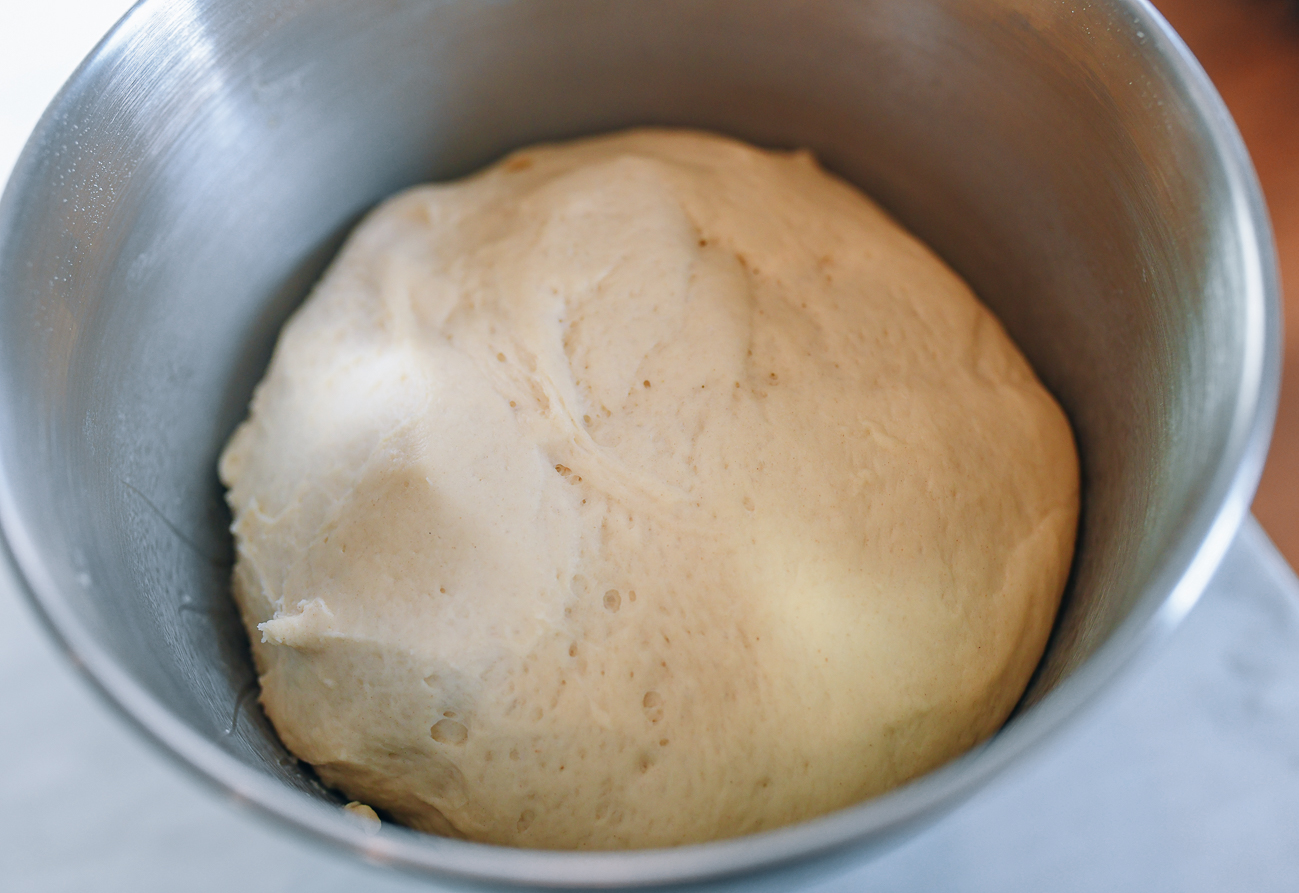
When the dough has doubled in size, use the dough hook once again (or floured hands) to knead for 5 minutes, punching the air out of the dough.

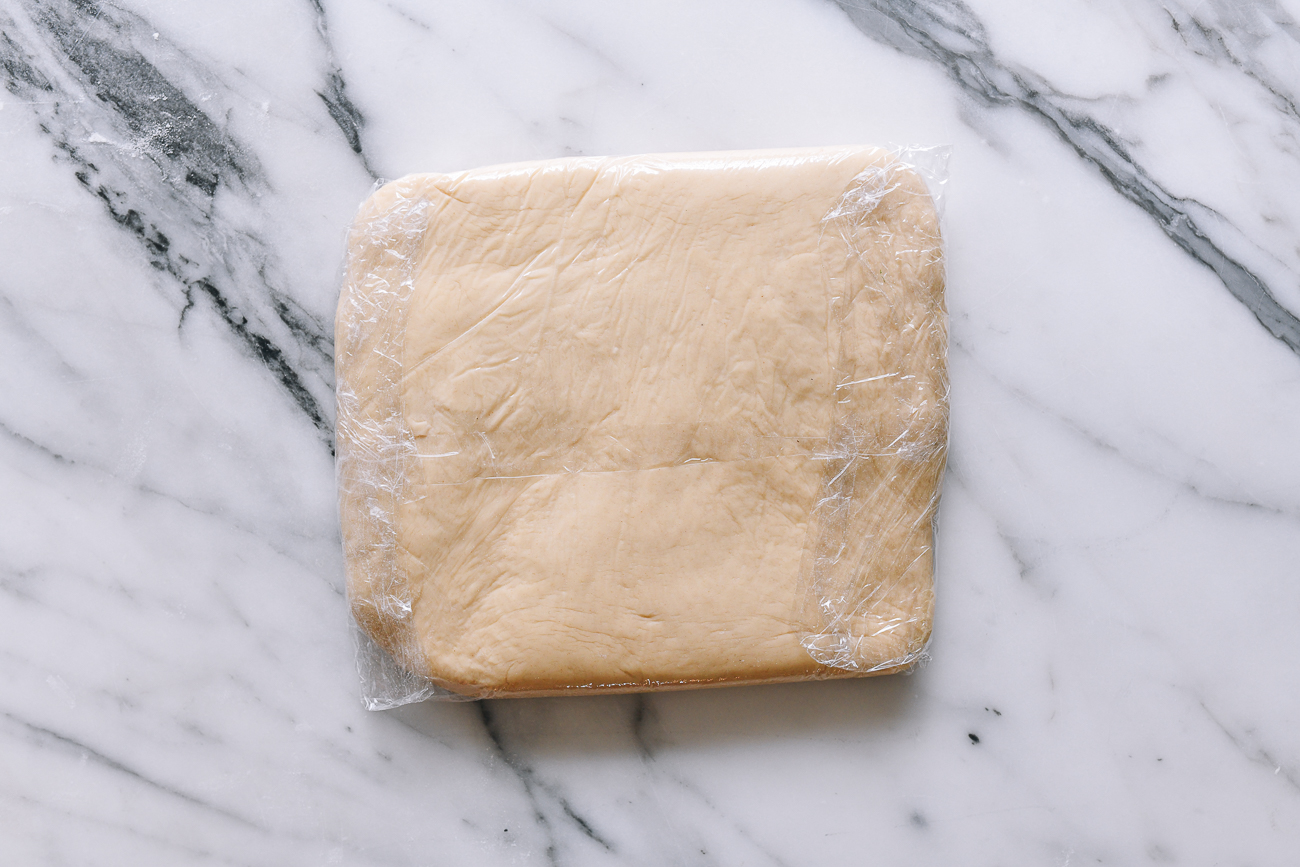
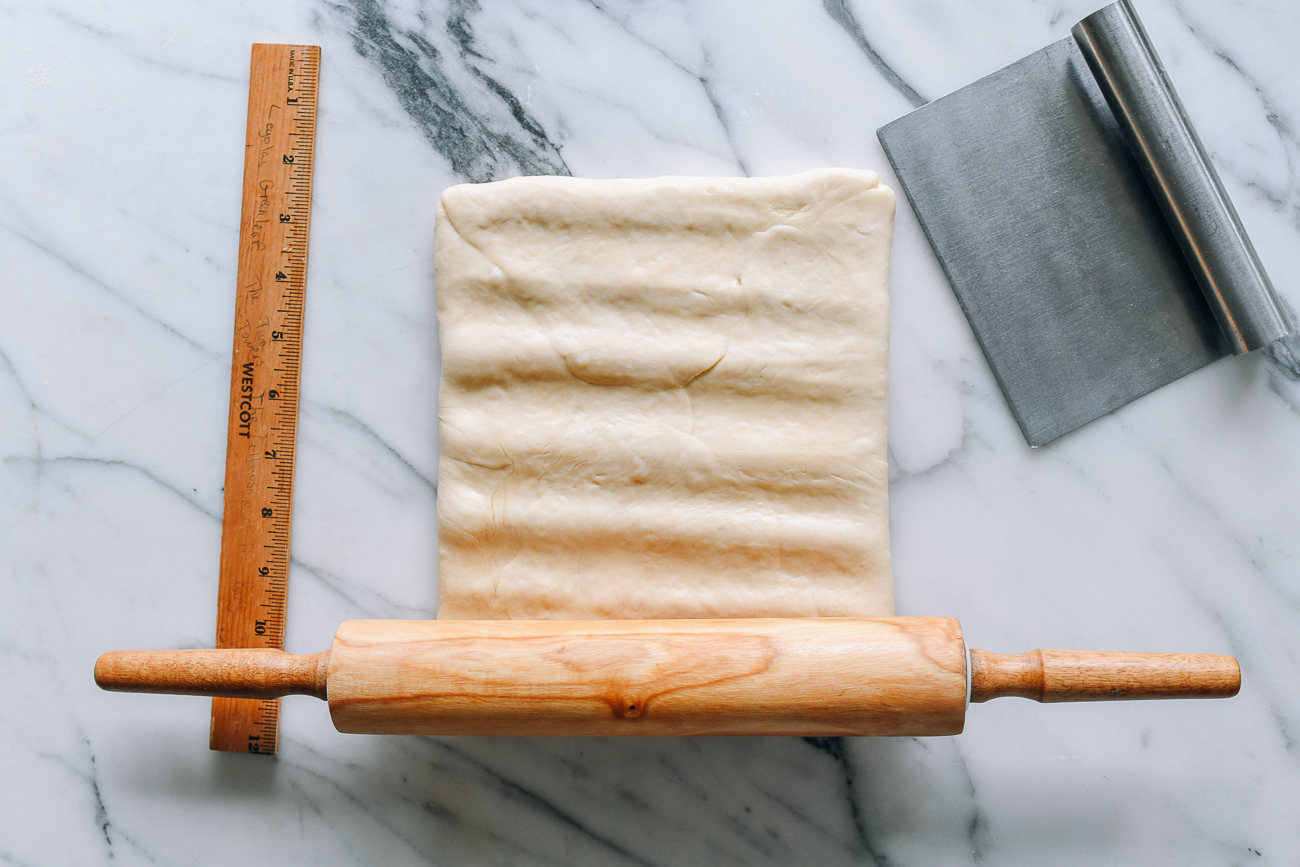
Roll the dough out into a 7- to 8-inch (about 20cm) square of uniform thickness. Use a rolling pin to press and flatten the dough. Use a straightedge to sharpen the sides and corners.
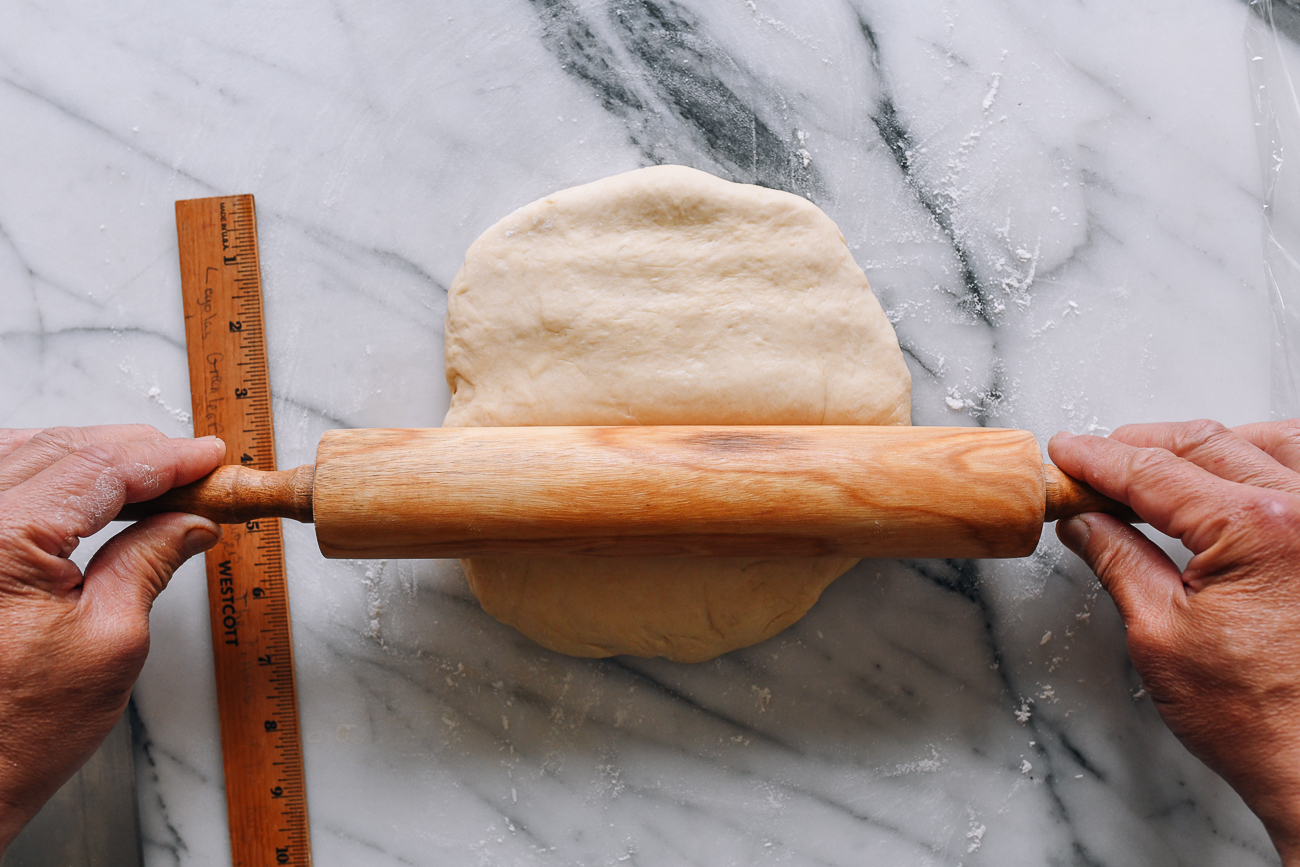
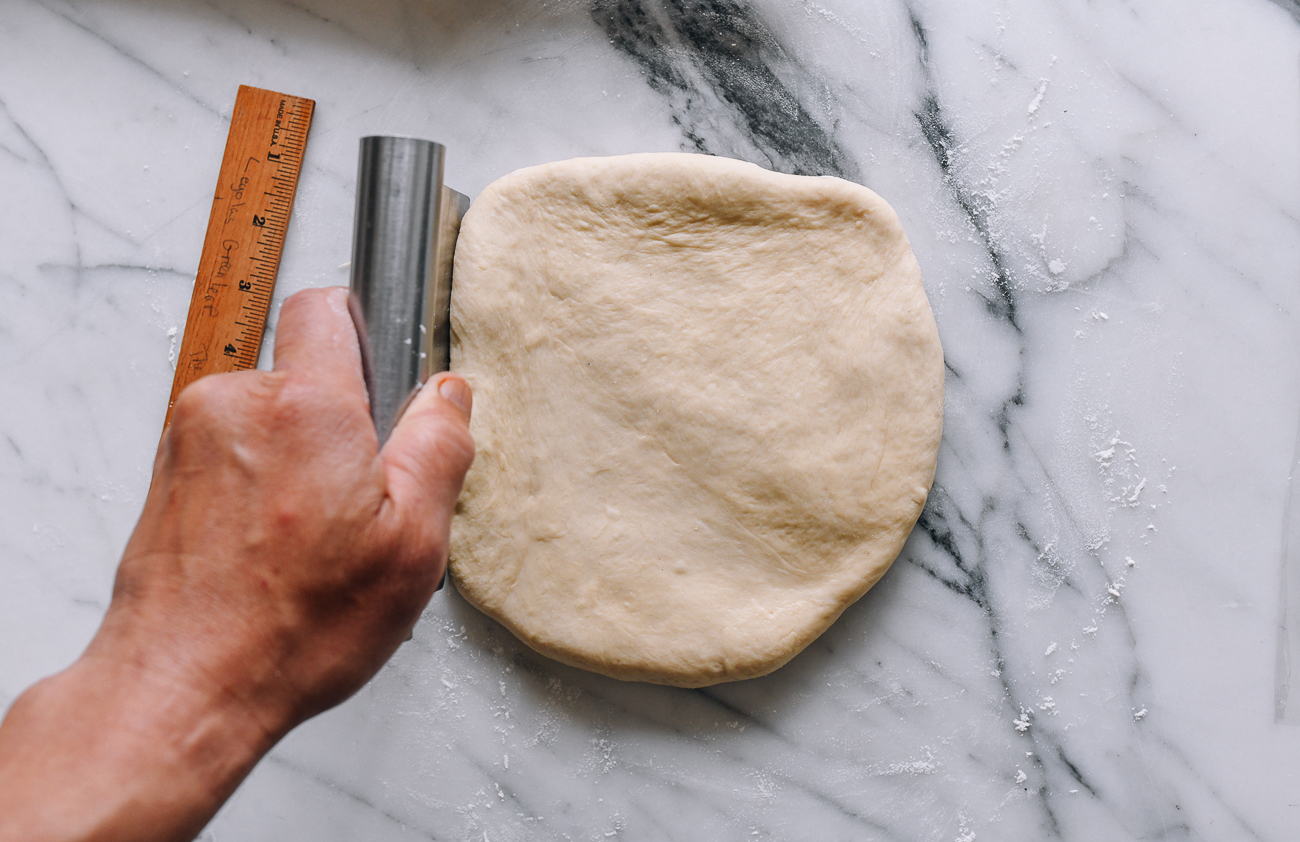
A ruler is an important tool to have throughout this process. I used Kaitlin’s grade school ruler. (If you can’t tell, she liked Lord of the Rings!)

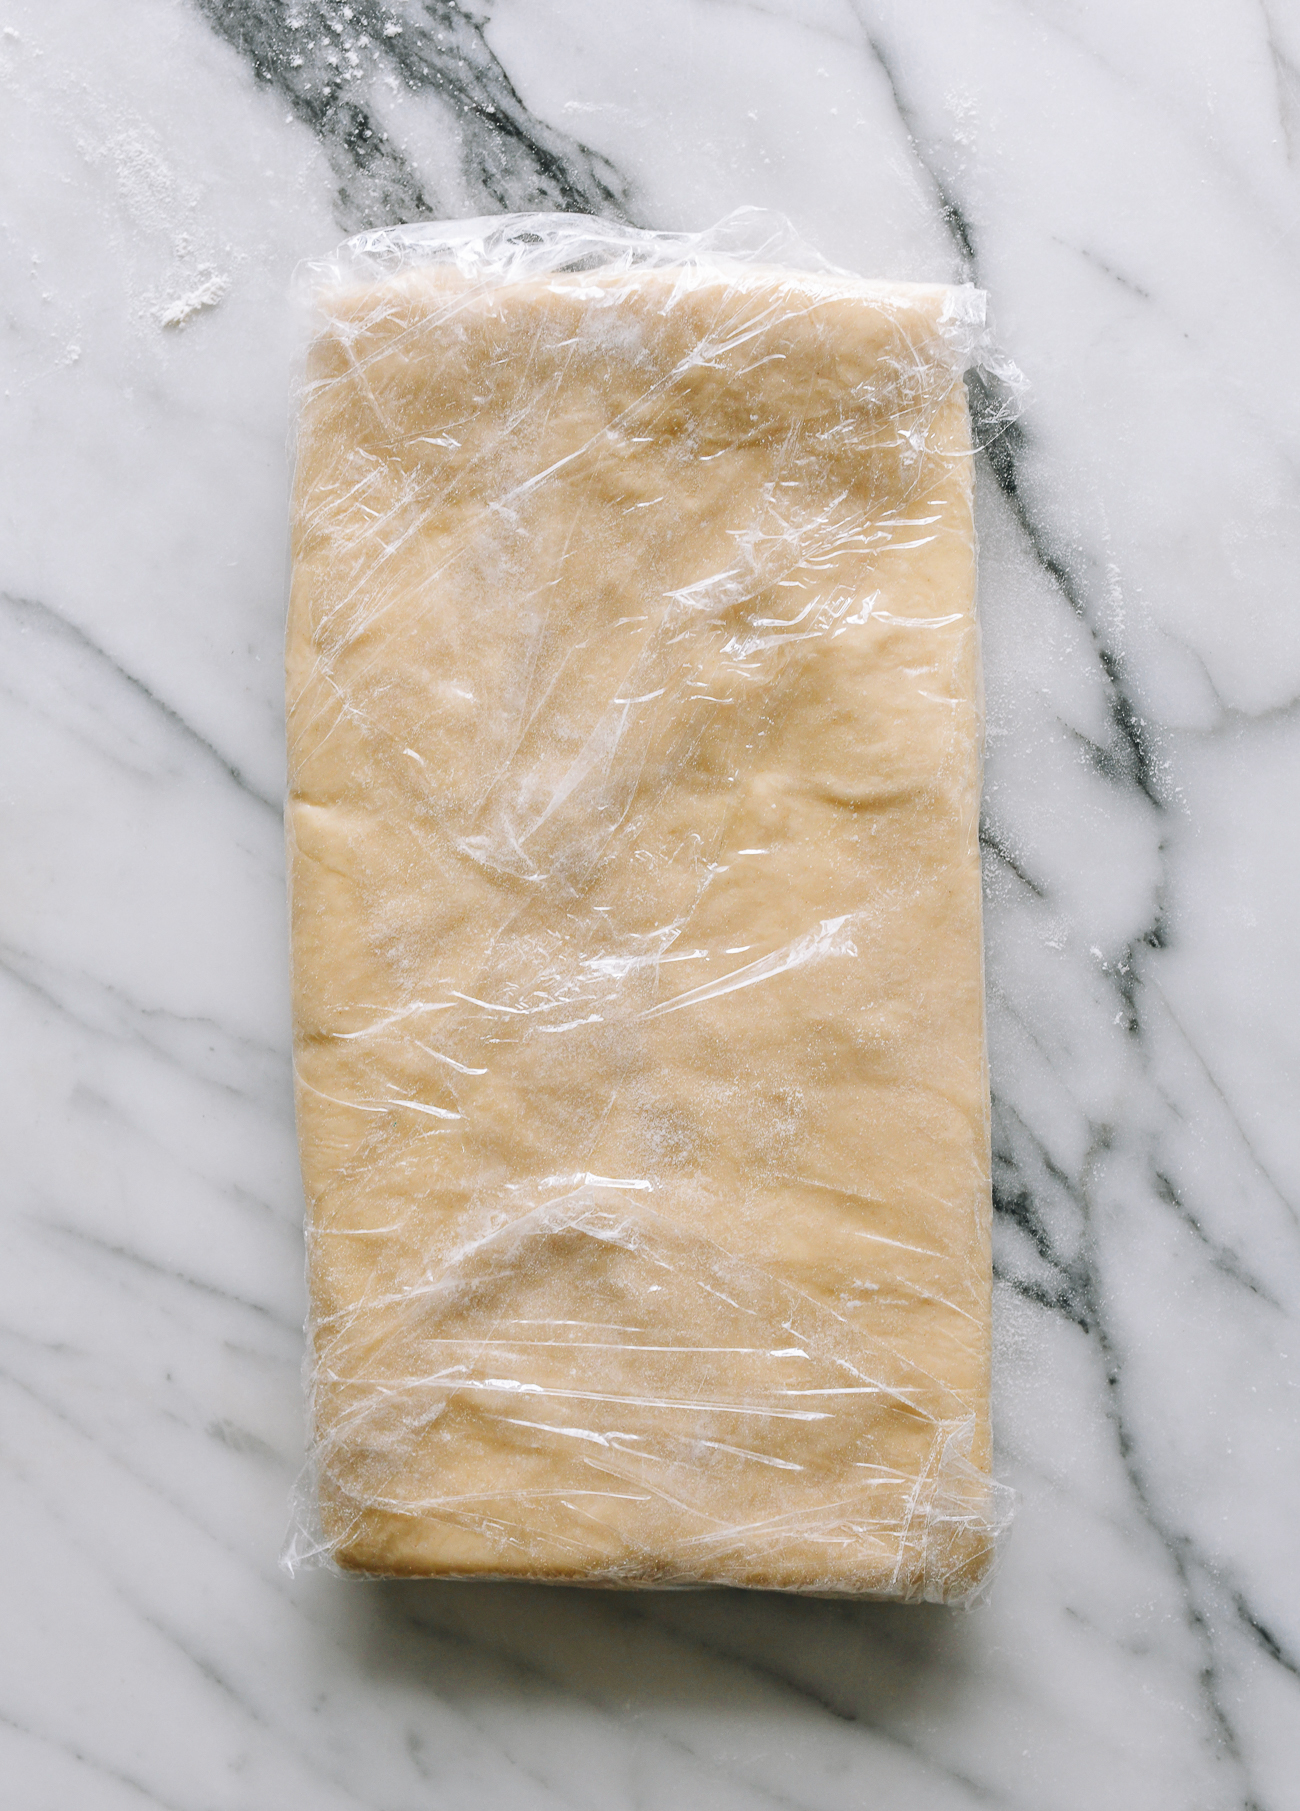
Wrap the dough in plastic wrap, and refrigerate for 30 minutes.
If your butter is frozen solid, you can take it out of the freezer to soften at this point. You want the butter to be cool, but still pliable (about as pliable as your dough). This should take about 30 minutes in a mild ambient temperature (68-70°F/20-21°C).
Step 3: Laminate the Dough with the Butter
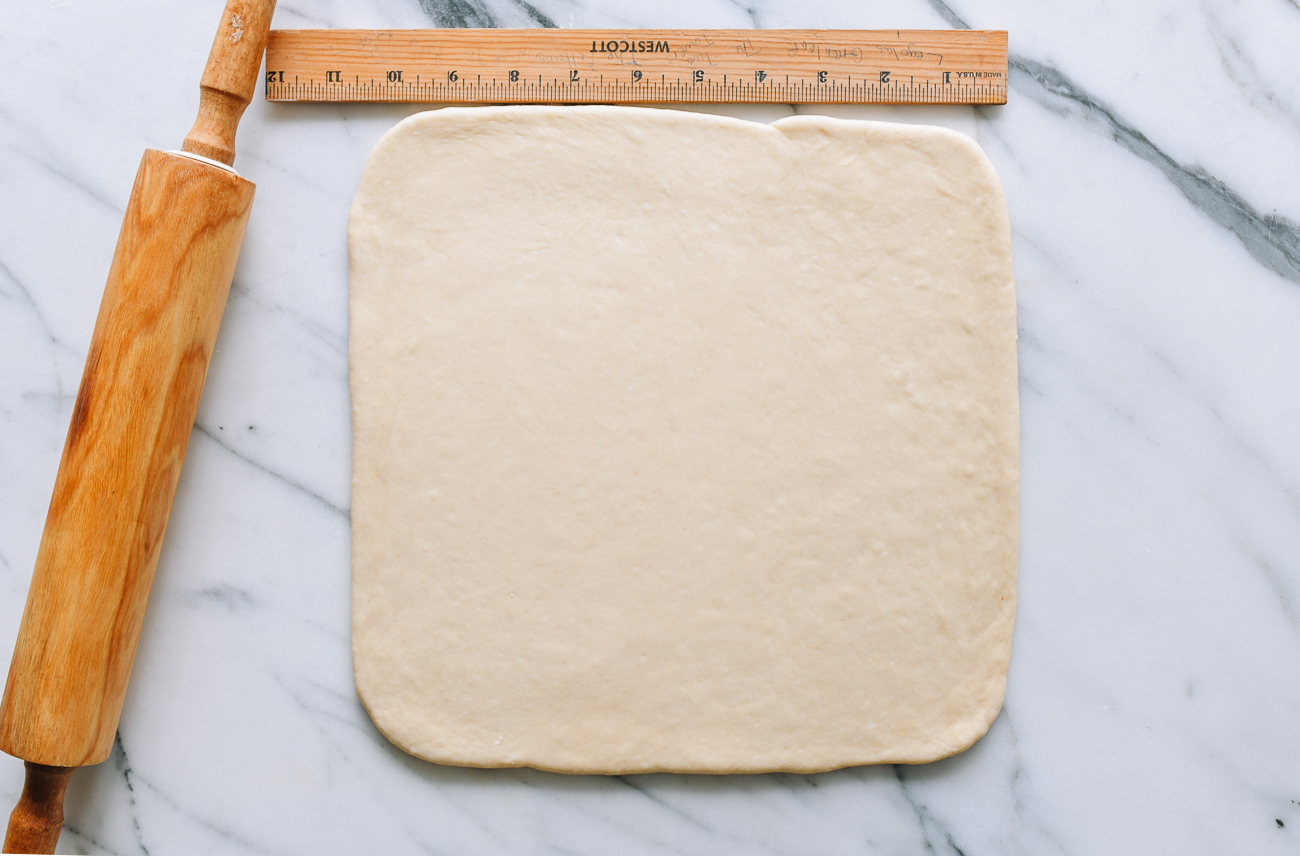
After the dough has been chilled for 30 minutes, unwrap it from the plastic wrap. (Set it aside—you’ll use it again several times.)
Use a rolling pin to roll the dough out to an 11-inch (28cm) square. As you roll, use a dough scraper to form corners as sharp as you can manage.
Place the butter square in the center of the dough at a 45° angle, so it looks like a diamond on top of a square. Fold the corners of the dough into the center of the butter diamond.
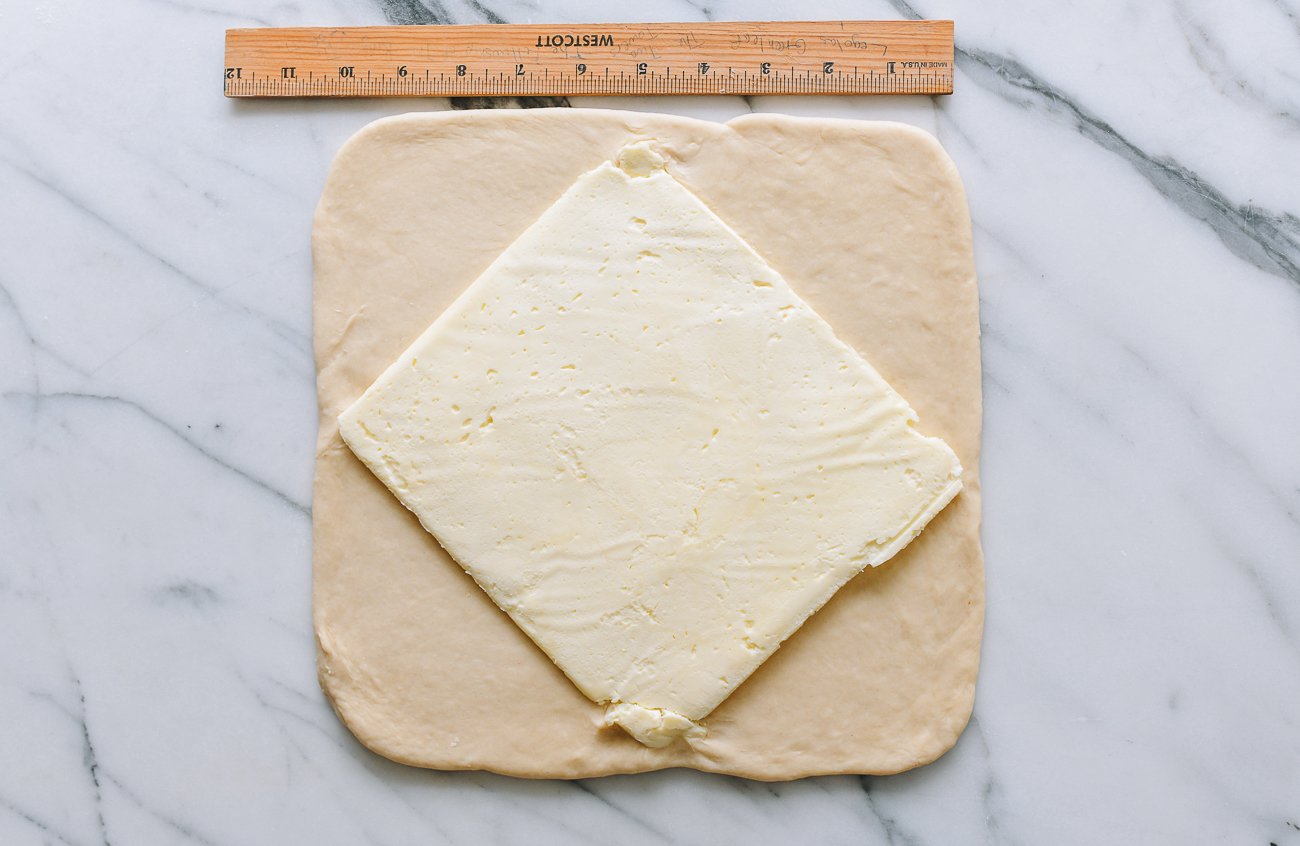
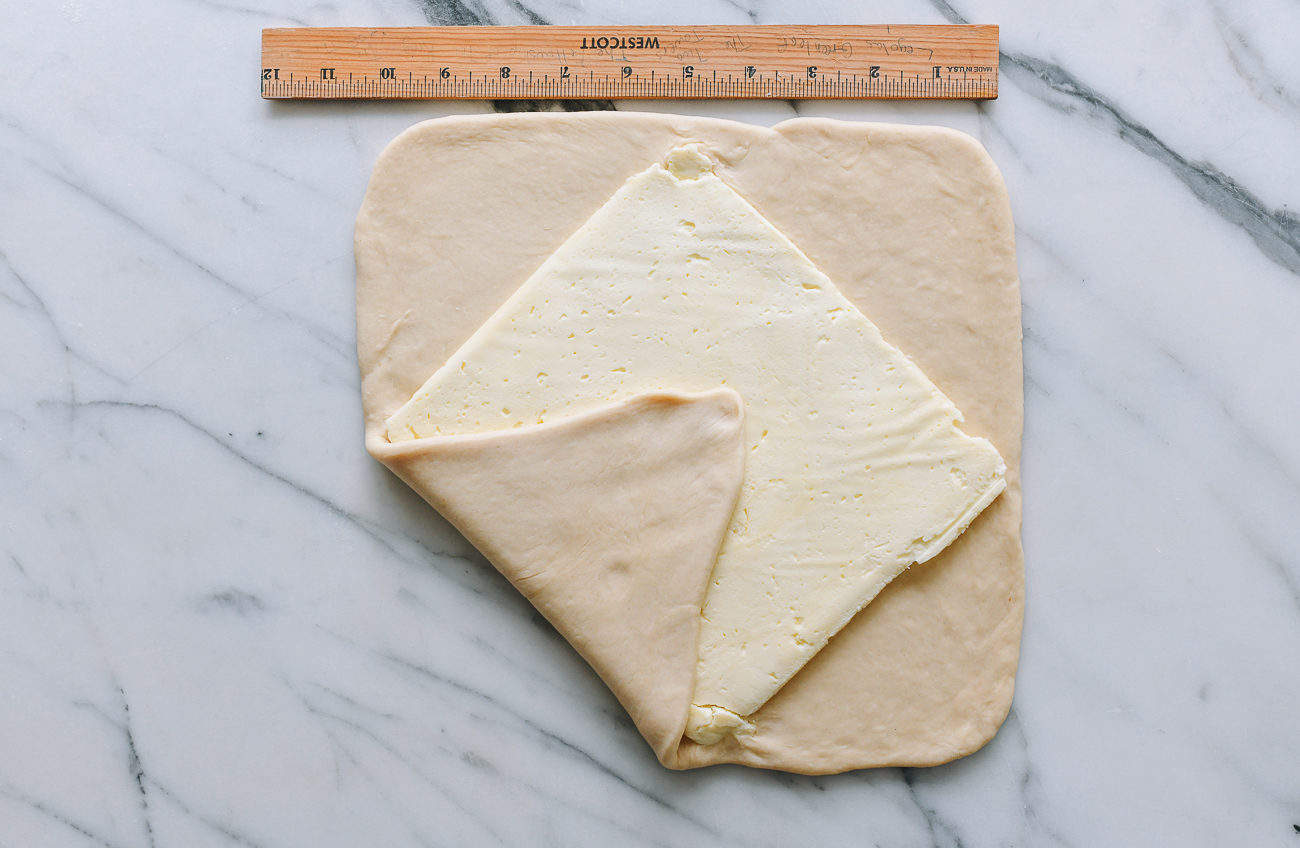
There should be enough overlapping dough (about ½-inch/1cm) that you can easily pinch the seams together to seal the butter. Make sure you don’t have any air pockets that can break the seal and cause the butter to ooze out.

Lightly roll over the seams with a rolling pin to flatten them and seal them further.
If there are any air bubbles, pop them with the tip of a knife or toothpick.
This will minimize butter leakage when rolling out the dough during the lamination process.
What is Dough Lamination?
Lamination is the process of creating multiple layers of dough and fat—in short, those spiraling layers of flaky pastry you expect when you bite into a good croissant.
Flip the dough onto a lightly floured surface, so the seam side is facing down.

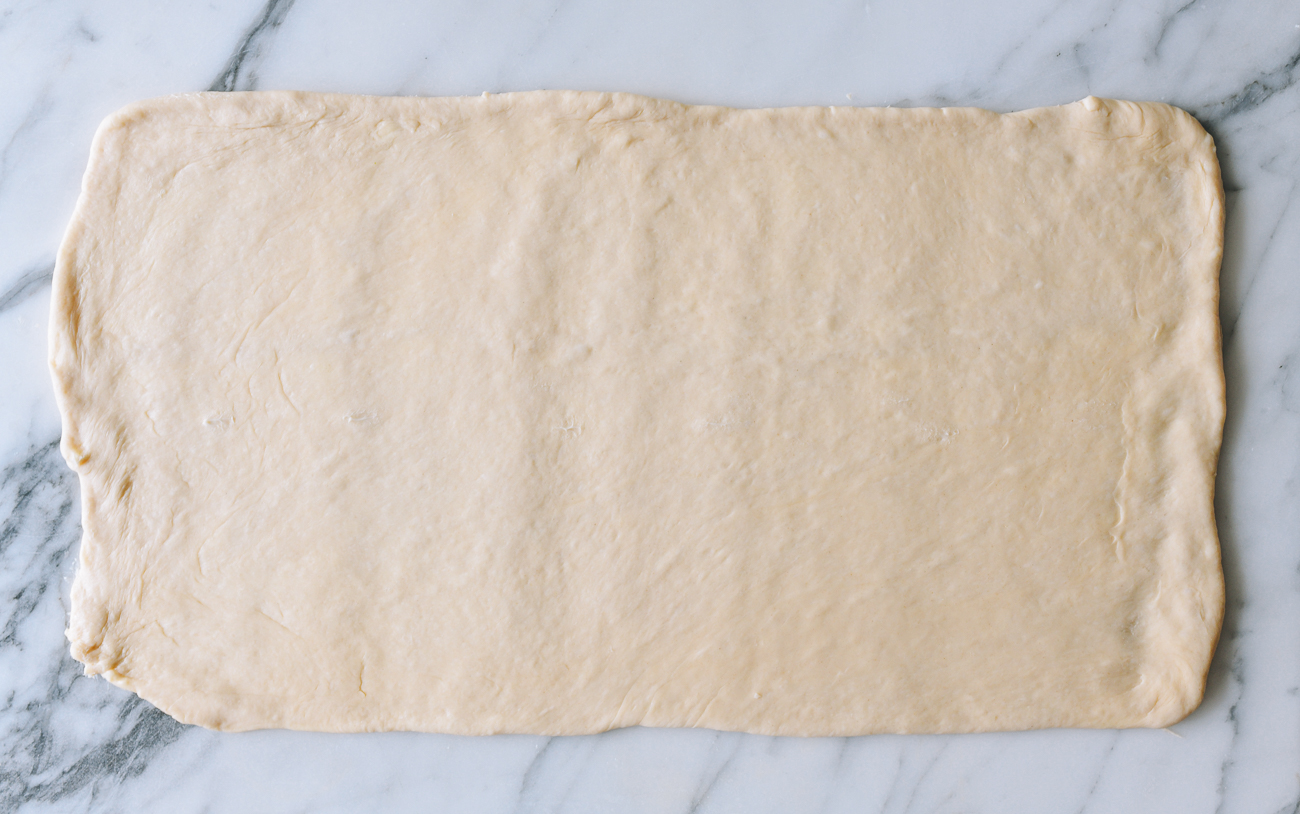
Roll the dough into a 18×9-inch (40x20cm) rectangle, flipping it several times while rolling it out to ensure uniform thickness of the dough and the butter.
In the picture below, you can see a technique from French bakers: to lightly press the dough with the rolling pin at every inch, which stretches the dough into a rectangular shape.
Use a dough scraper to straighten out the edges and keep the layers uniform. Dust with flour as needed while rolling and shaping.
Work as quickly as you can, so the butter doesn’t warm up and absorb into the dough! Distinct butter and dough layers will give you the lamination you’re looking for in a good croissant. With more practice, you’ll get the hang of rolling the dough out into a perfect rectangle.
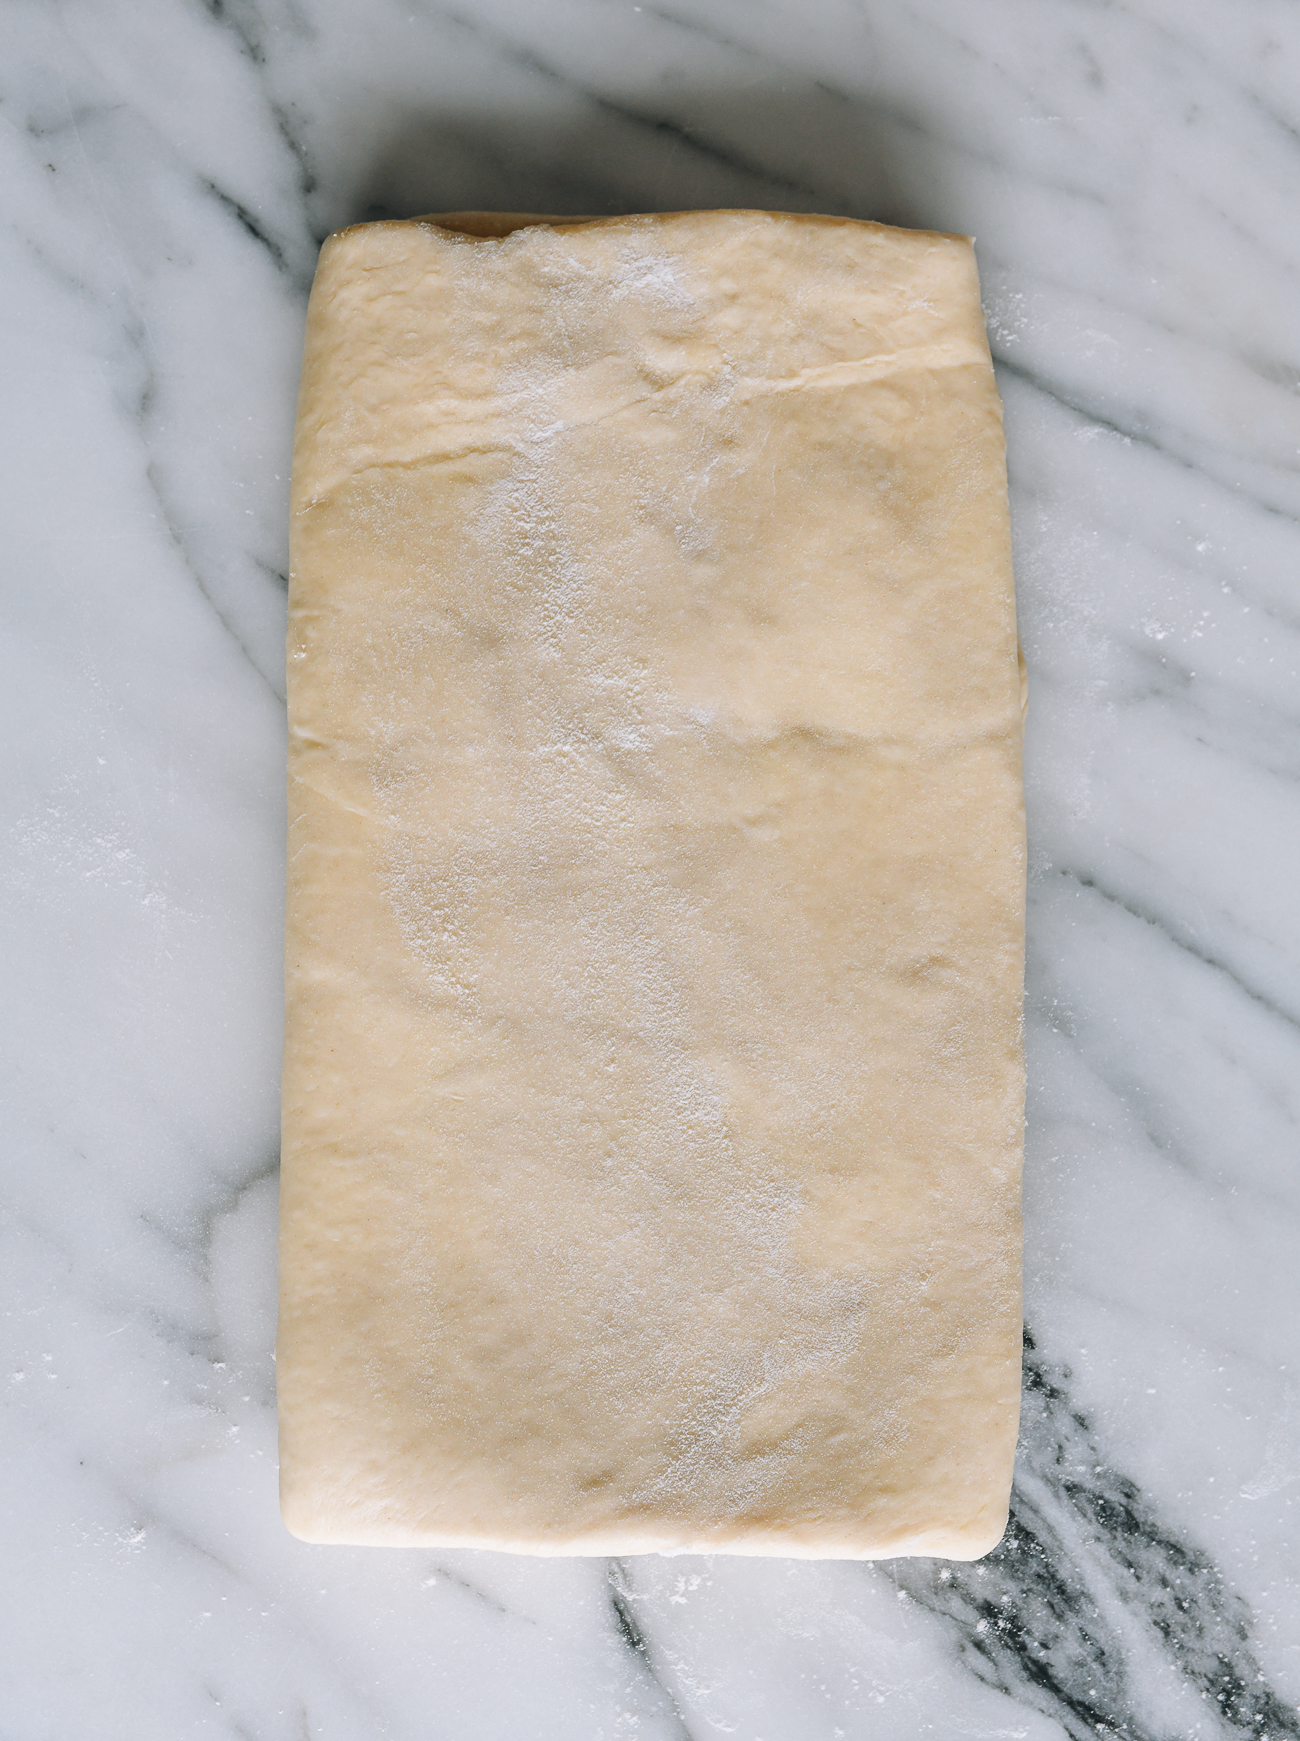
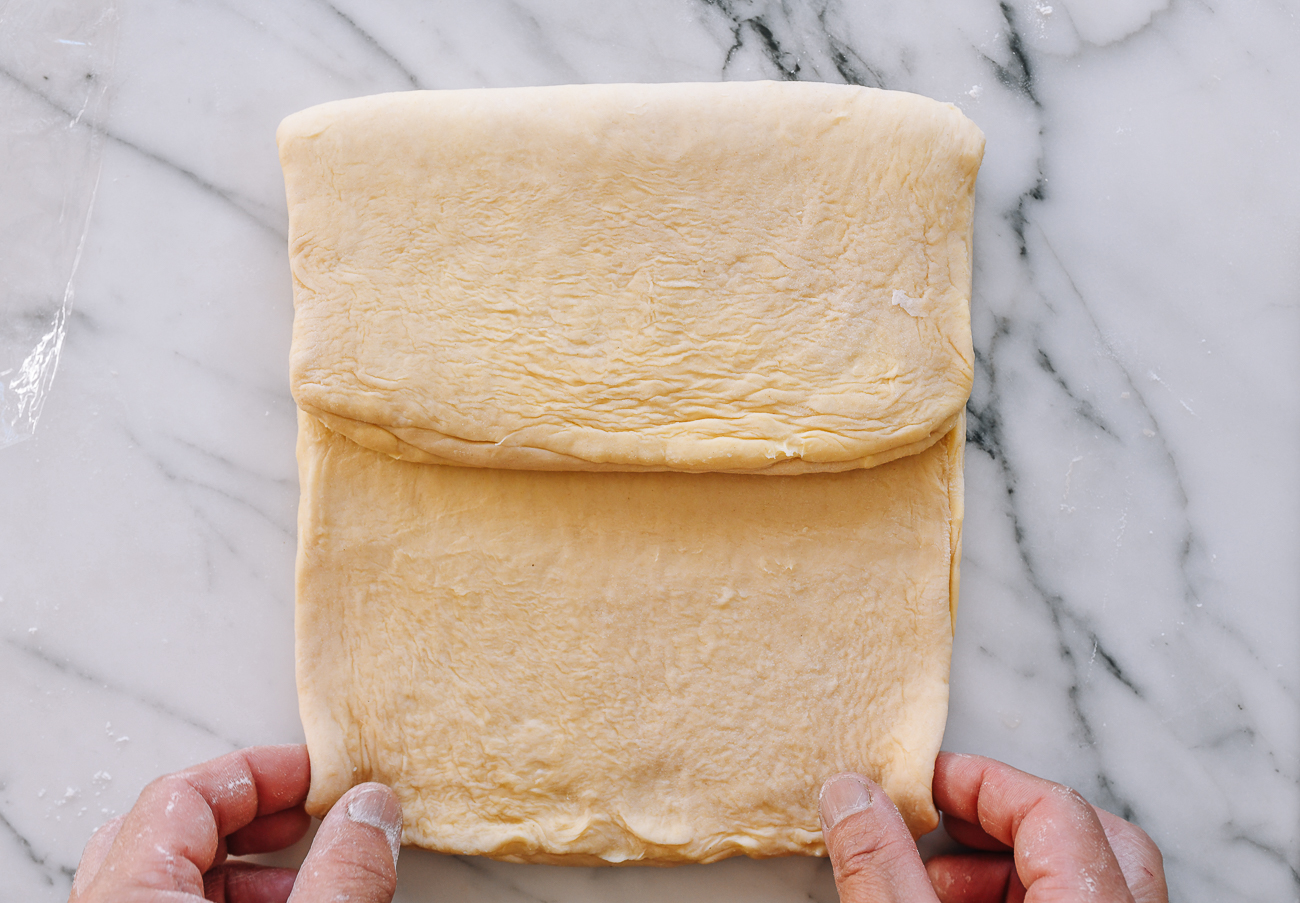
Brush off any excess flour, and fold it into thirds like a business letter.

(Fold 6-inches/13 cm of dough from one side towards the middle. Then fold the other 6-inches/13cm over the top of the two layers.)
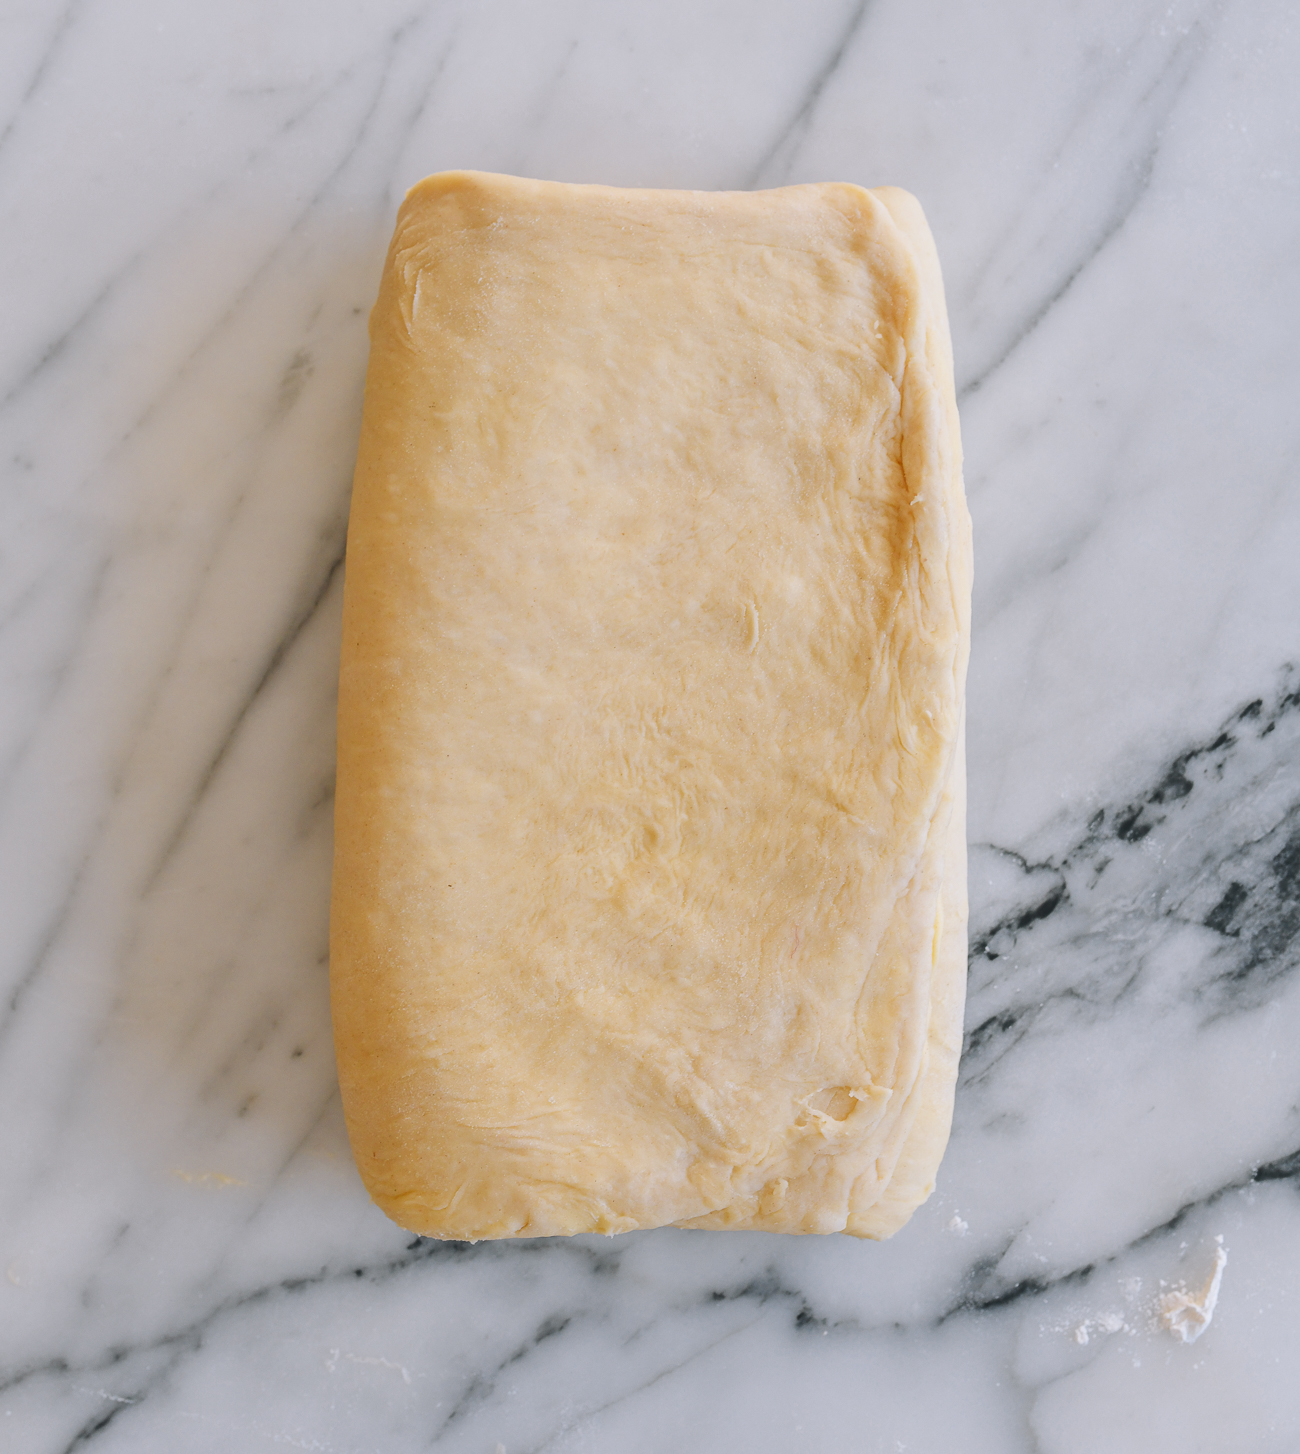
Make sure you have an even overlap of the three layers of dough. This is the “turn” of the dough. Lightly roll the dough with the rolling pin to flatten. Use the dough scraper to square off each side if needed.
Wrap the dough back in plastic wrap (note that we rarely use plastic wrap, but this is one scenario in which it is the best tool for the job. Just use the same piece for the entire process to minimize waste).
Return the dough to the refrigerator for 30 to 45 minutes. Chilling the dough a little longer is ok if you are multitasking—just remember to let the dough warm up slightly for 5 minutes if it is very cold (to make it easier to roll out).
Repeat these steps (starting with rolling the dough into a 18×9-inch/40x20cm rectangle) for another 3 turns. In total, you should complete 4 turns.
Croissant Rolling Tips!
- Work quickly! Work quickly so the ingredients stay cold. Warm dough and butter means you won’t get as much lamination. However, if the dough is very cold and difficult to work with when you take it out of the refrigerator, let it warm up for 5 minutes on the counter to make it easier to roll.
- A stone surface is ideal to keep the dough cool.
- Roll the dough in multiple directions to get a uniform rectangle and keep the corners sharp: roll up away from you, down towards you, and diagonally to each of the four corners. Practice makes perfect!
- Use a light dusting of flour. If the dough starts to stick, dust it with flour. Just remember to brush off the excess before the folding step.
- Flip the dough over often. Rolling on only one side may cause the layers to be misaligned on the ends, and the dough may stick to your work surface.
- If you experience air bubbles, pop them with a knife or toothpick.
- Reuse your plastic wrap during each turn. There’s no need for a new one. If you have a large reusable silicone bag, you can use that as well, but anything you use must have a good seal to it.
After the last turn, rest the dough for at least 1 hour or overnight in the refrigerator.
The duration largely depends on how much time you have, and when you want to bake your croissants.
1 hour is fine, but for optimal results, I chill the dough overnight, and then do the final shaping and baking the next morning for a late breakfast or brunch.
Can I freeze the dough? How to make croissants in advance
After the resting period, you can freeze the dough to make croissants at a later time. When you’re ready to bake them, simply defrost the dough in the refrigerator until it’s pliable enough to roll out in Step 4.
Step 4: How to Shape Croissants
When you’re ready to shape the croissants, take the dough out of the refrigerator.
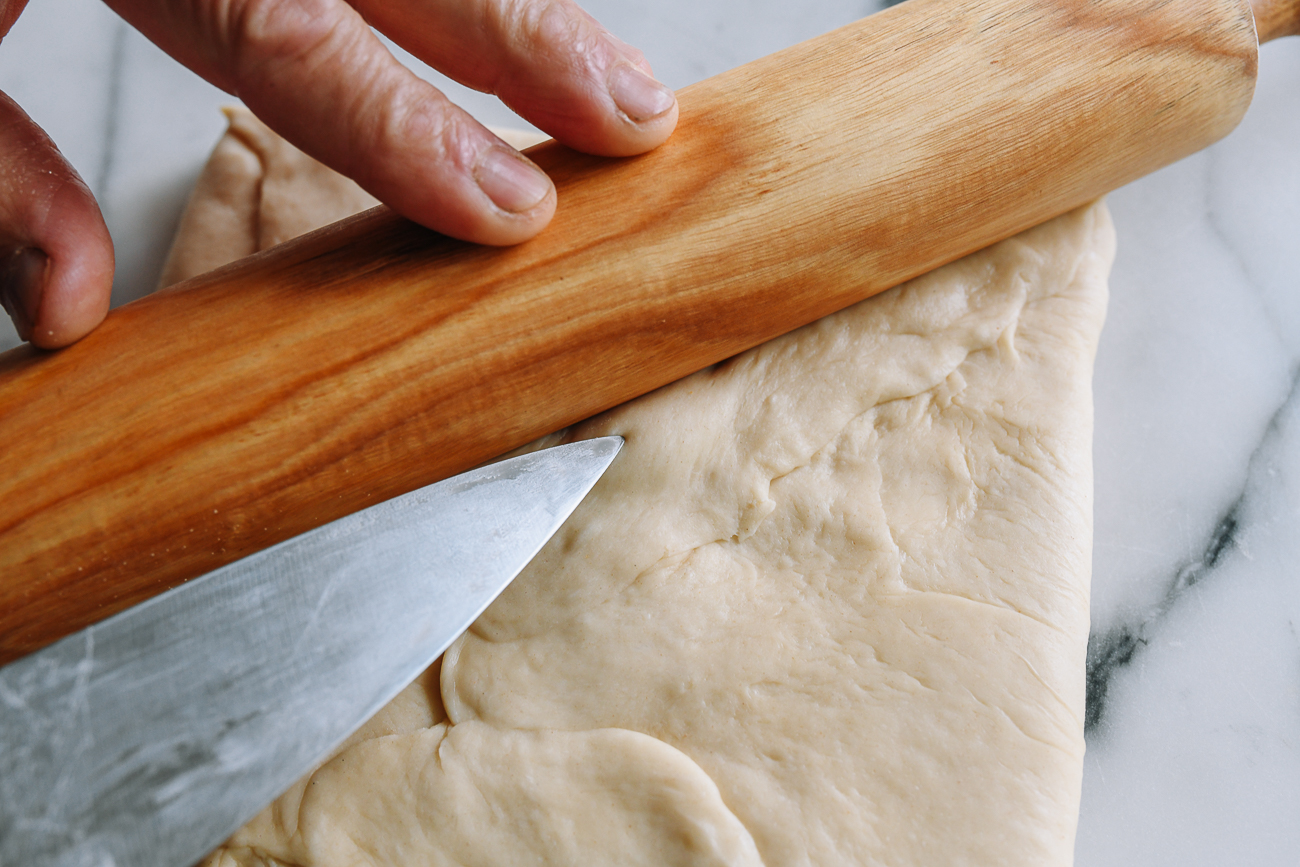
Roll the dough out into a 18×9-inch (40x20cm) rectangle.
Using a chef’s knife and straightedge (a ruler works great), trim the edges on all 4 sides of the rectangle. This exposes the lamination, enhancing the rise of the croissant.
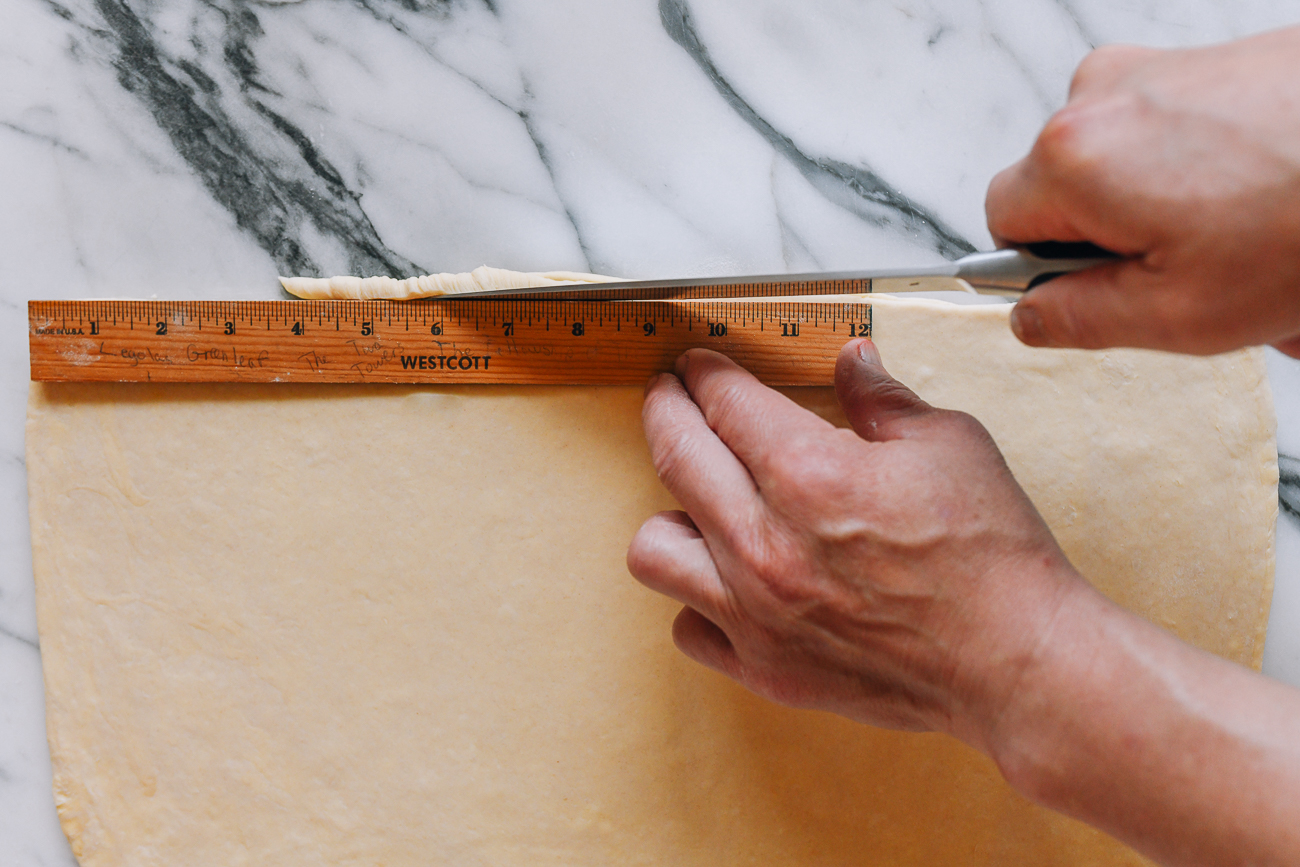
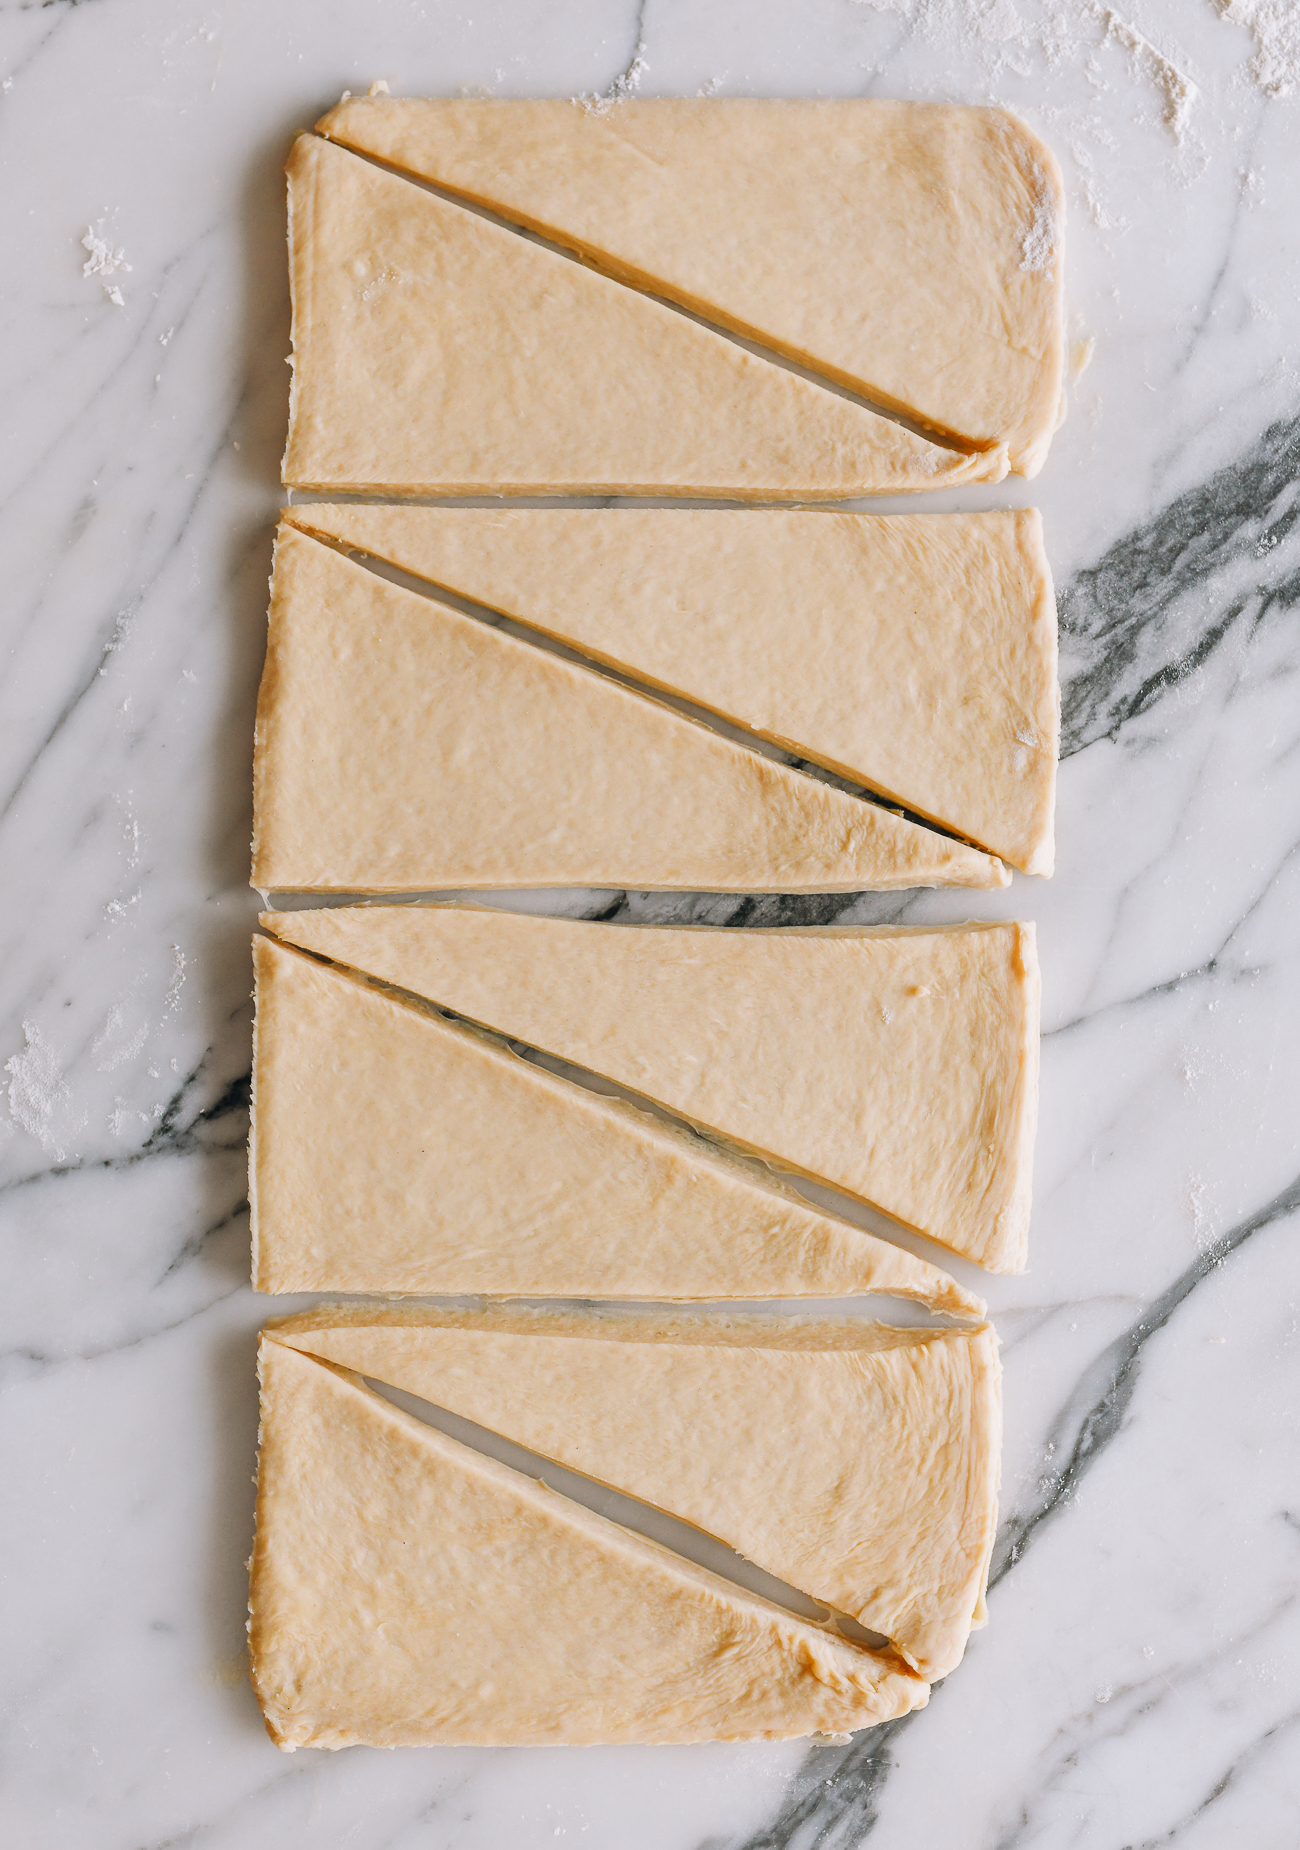
Using a ruler, cut the dough crosswise into 4 equal rectangles. Cut each rectangle across the diagonal into two right triangles. You should have 8 pieces.
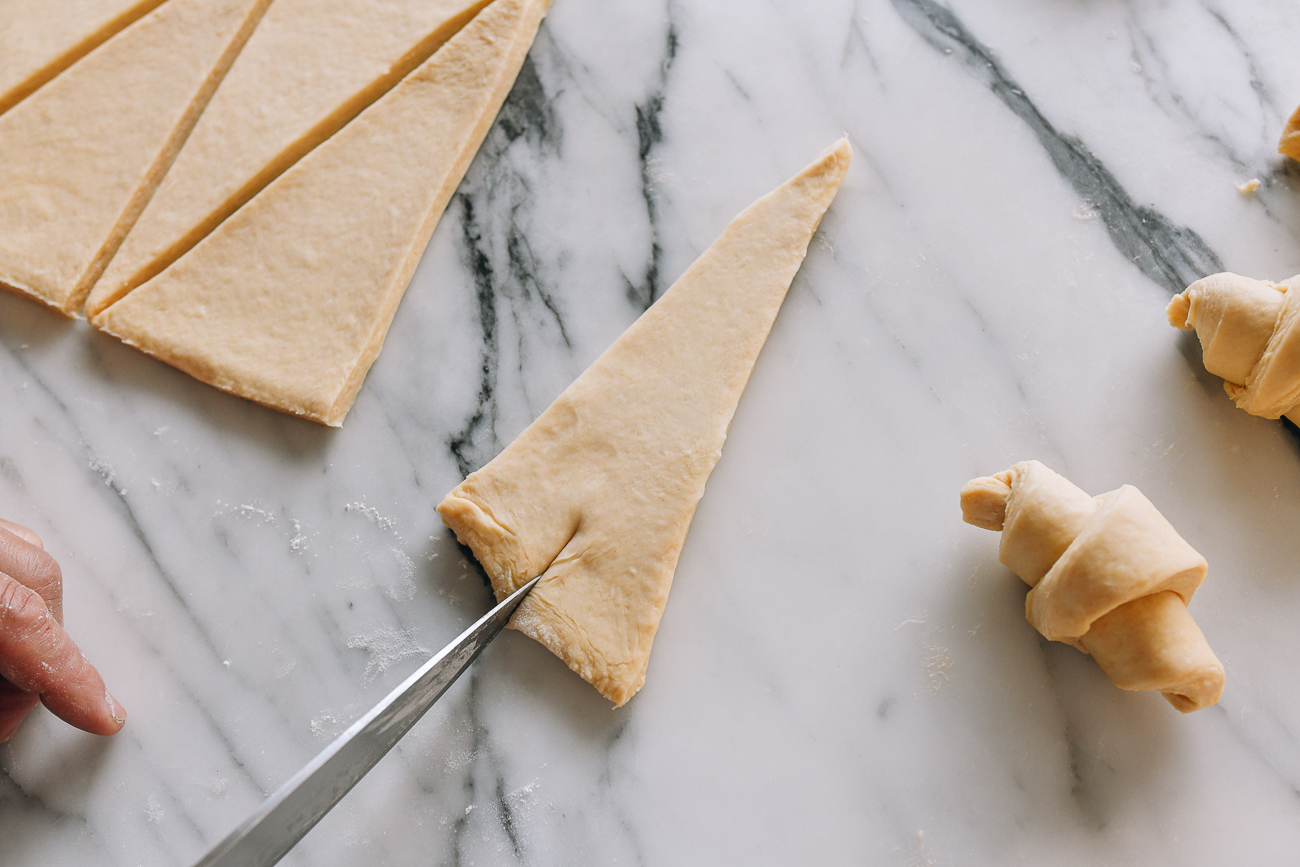
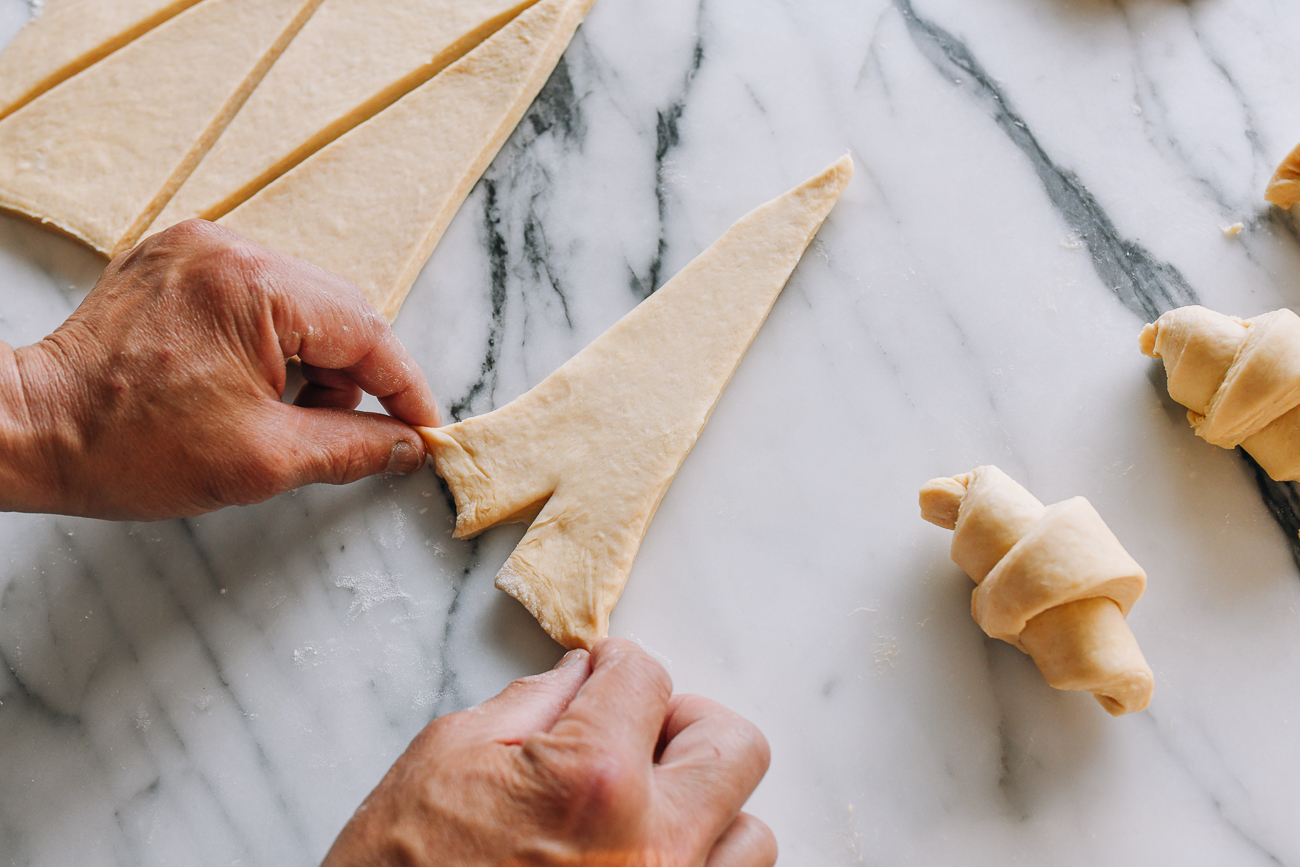
To form a croissant, place one triangle in front of you, with the pointy end of the triangle facing away from you. Cut a 1-inch/2.5cm slit in the center of the base of the triangle. Stretch the resulting ends outwards to make the base of the croissant wider. (Fittingly, it will look kind of like the base of the Eiffel Tower.)
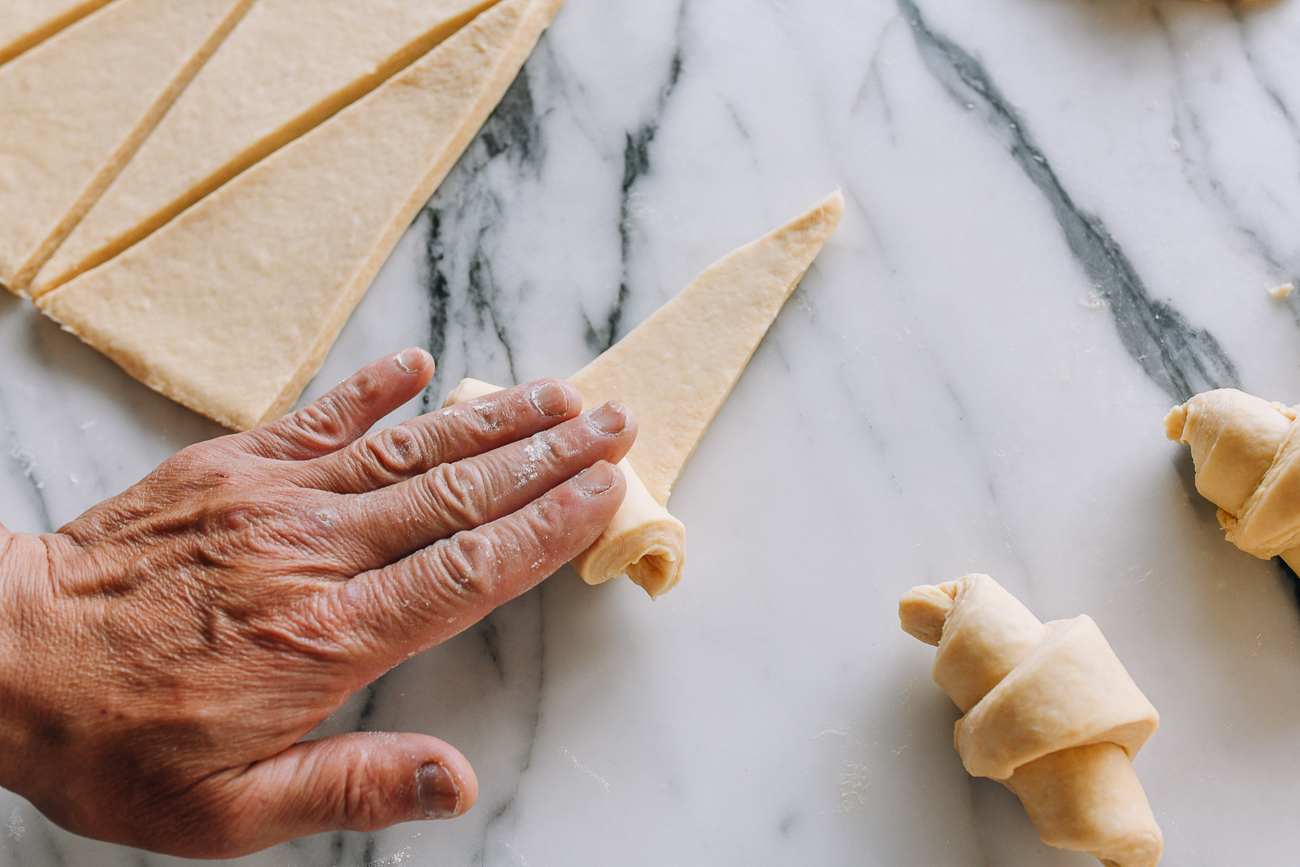
Use your hand to gently but tightly roll the dough away from you in one fluid motion. Place each finished croissant on a parchment-lined sheet pan, with the tip of the triangle tucked underneath the croissant.
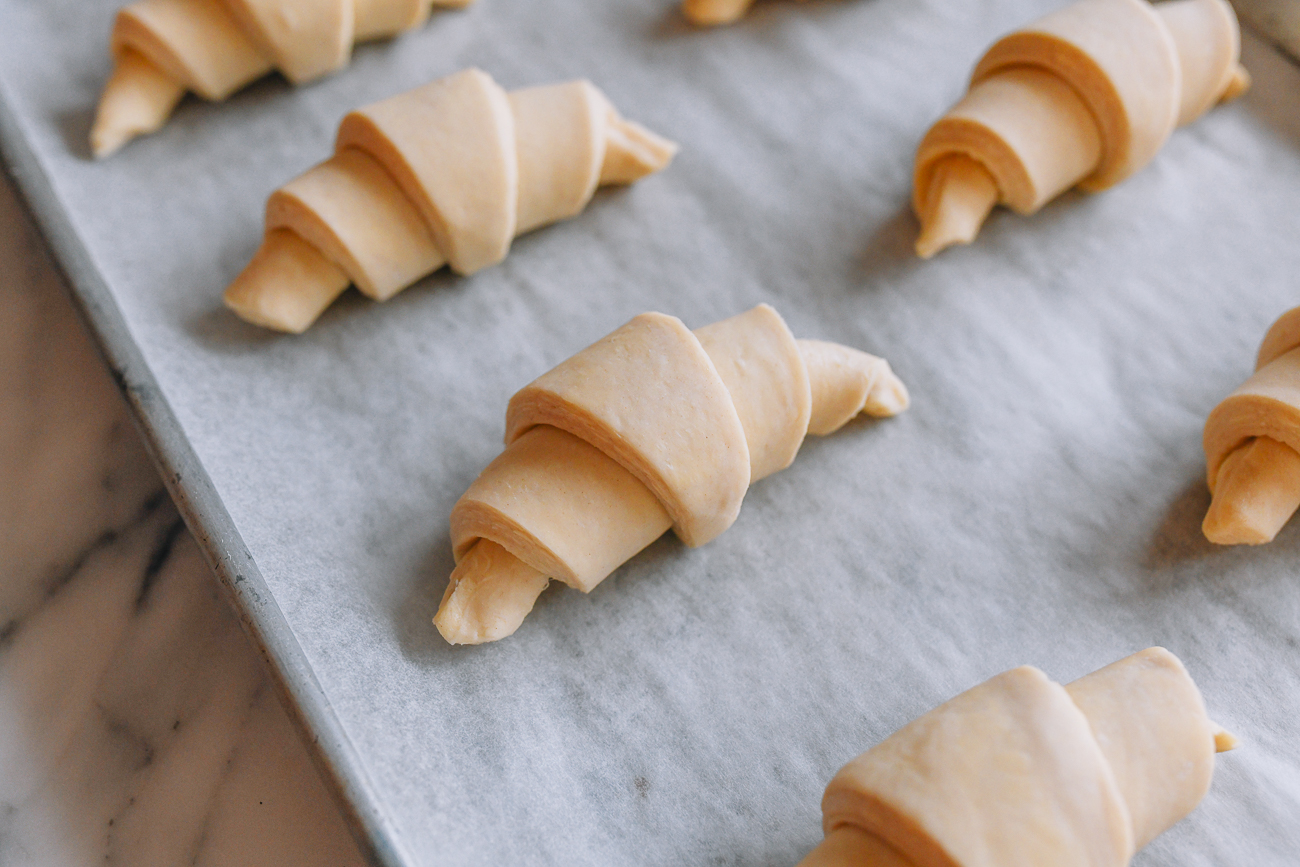
8 croissants should fit, evenly spaced, on a standard half sheet pan.
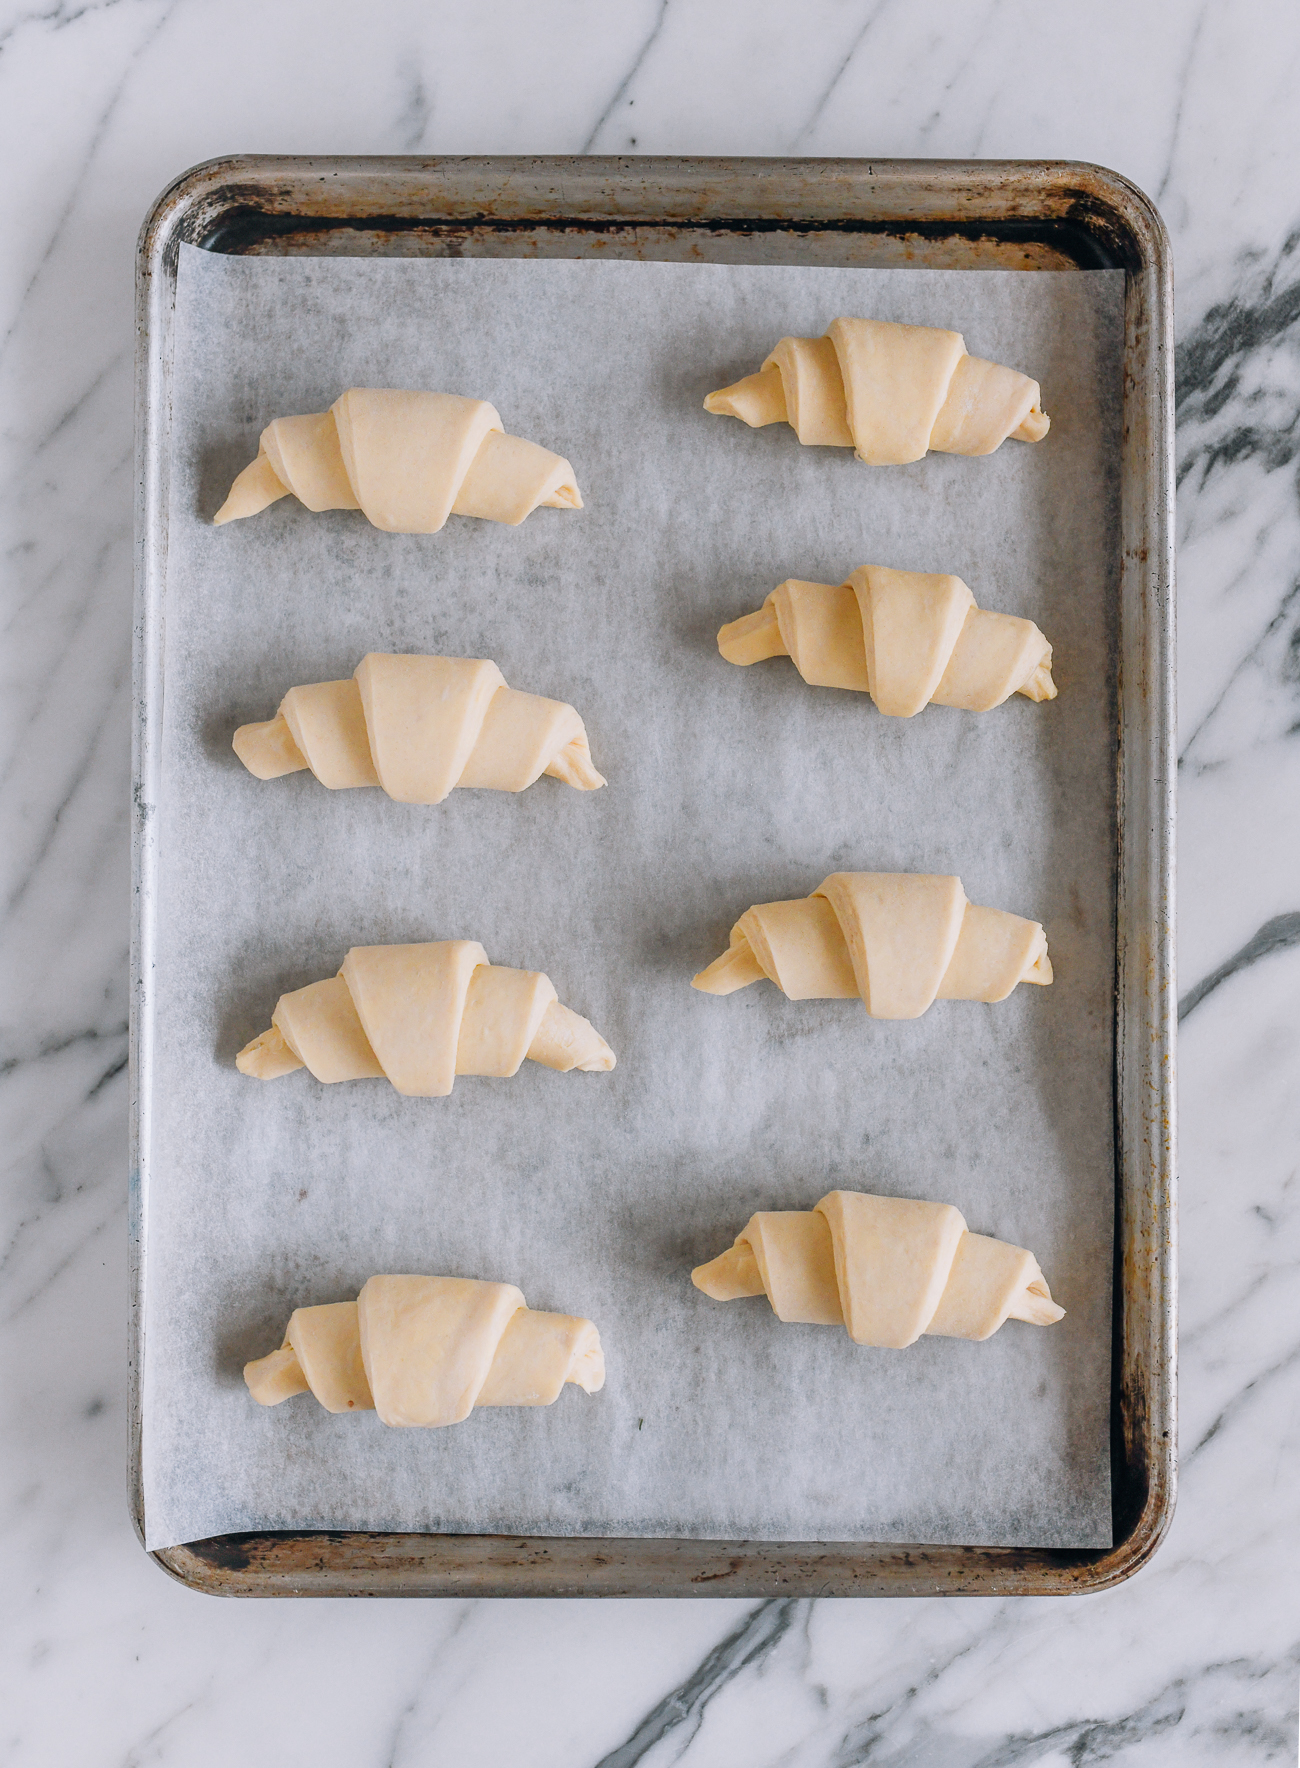
Repeat with the remaining dough, and cover the croissants with a clean, dry kitchen towel.
Refrigerate for 30 minutes so the croissants can rest after all that rolling and shaping.
Chilling also helps maintain the integrity of the lamination. See the layers in the photo below?
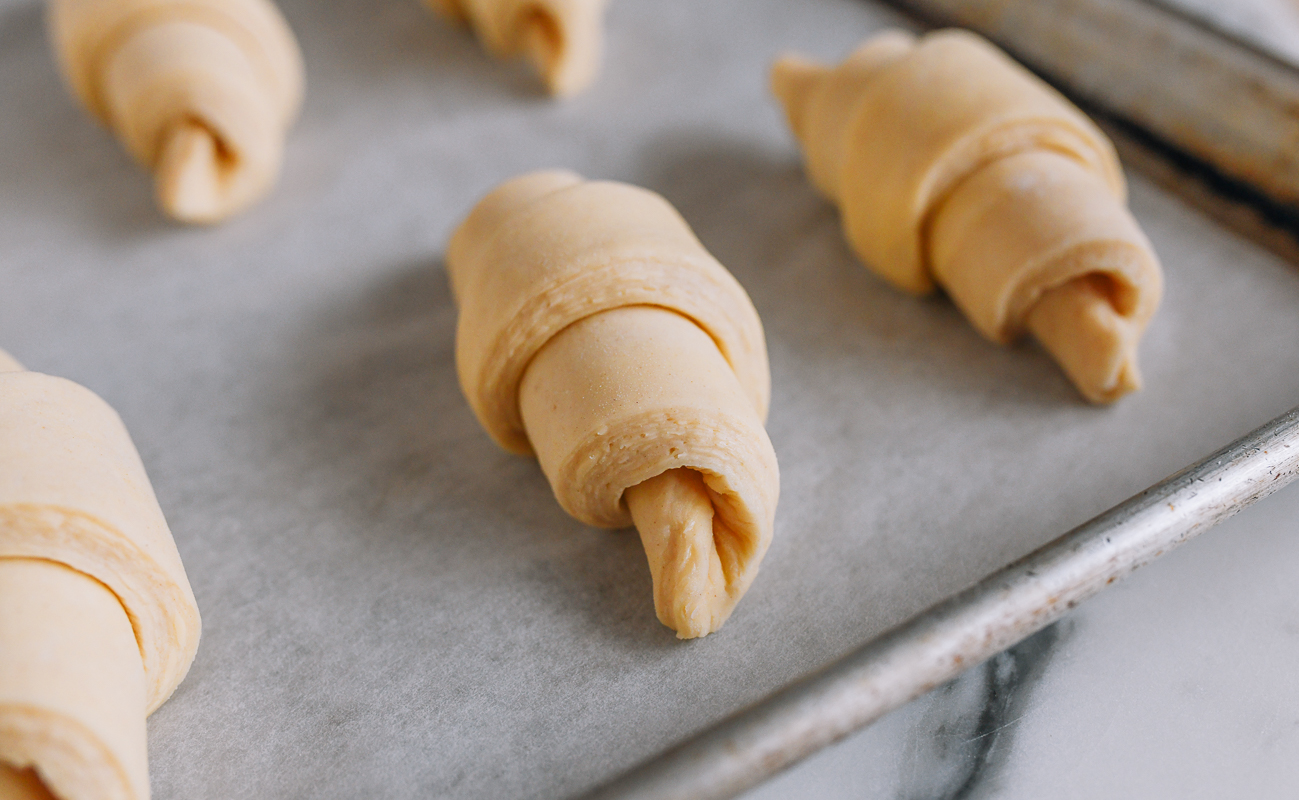
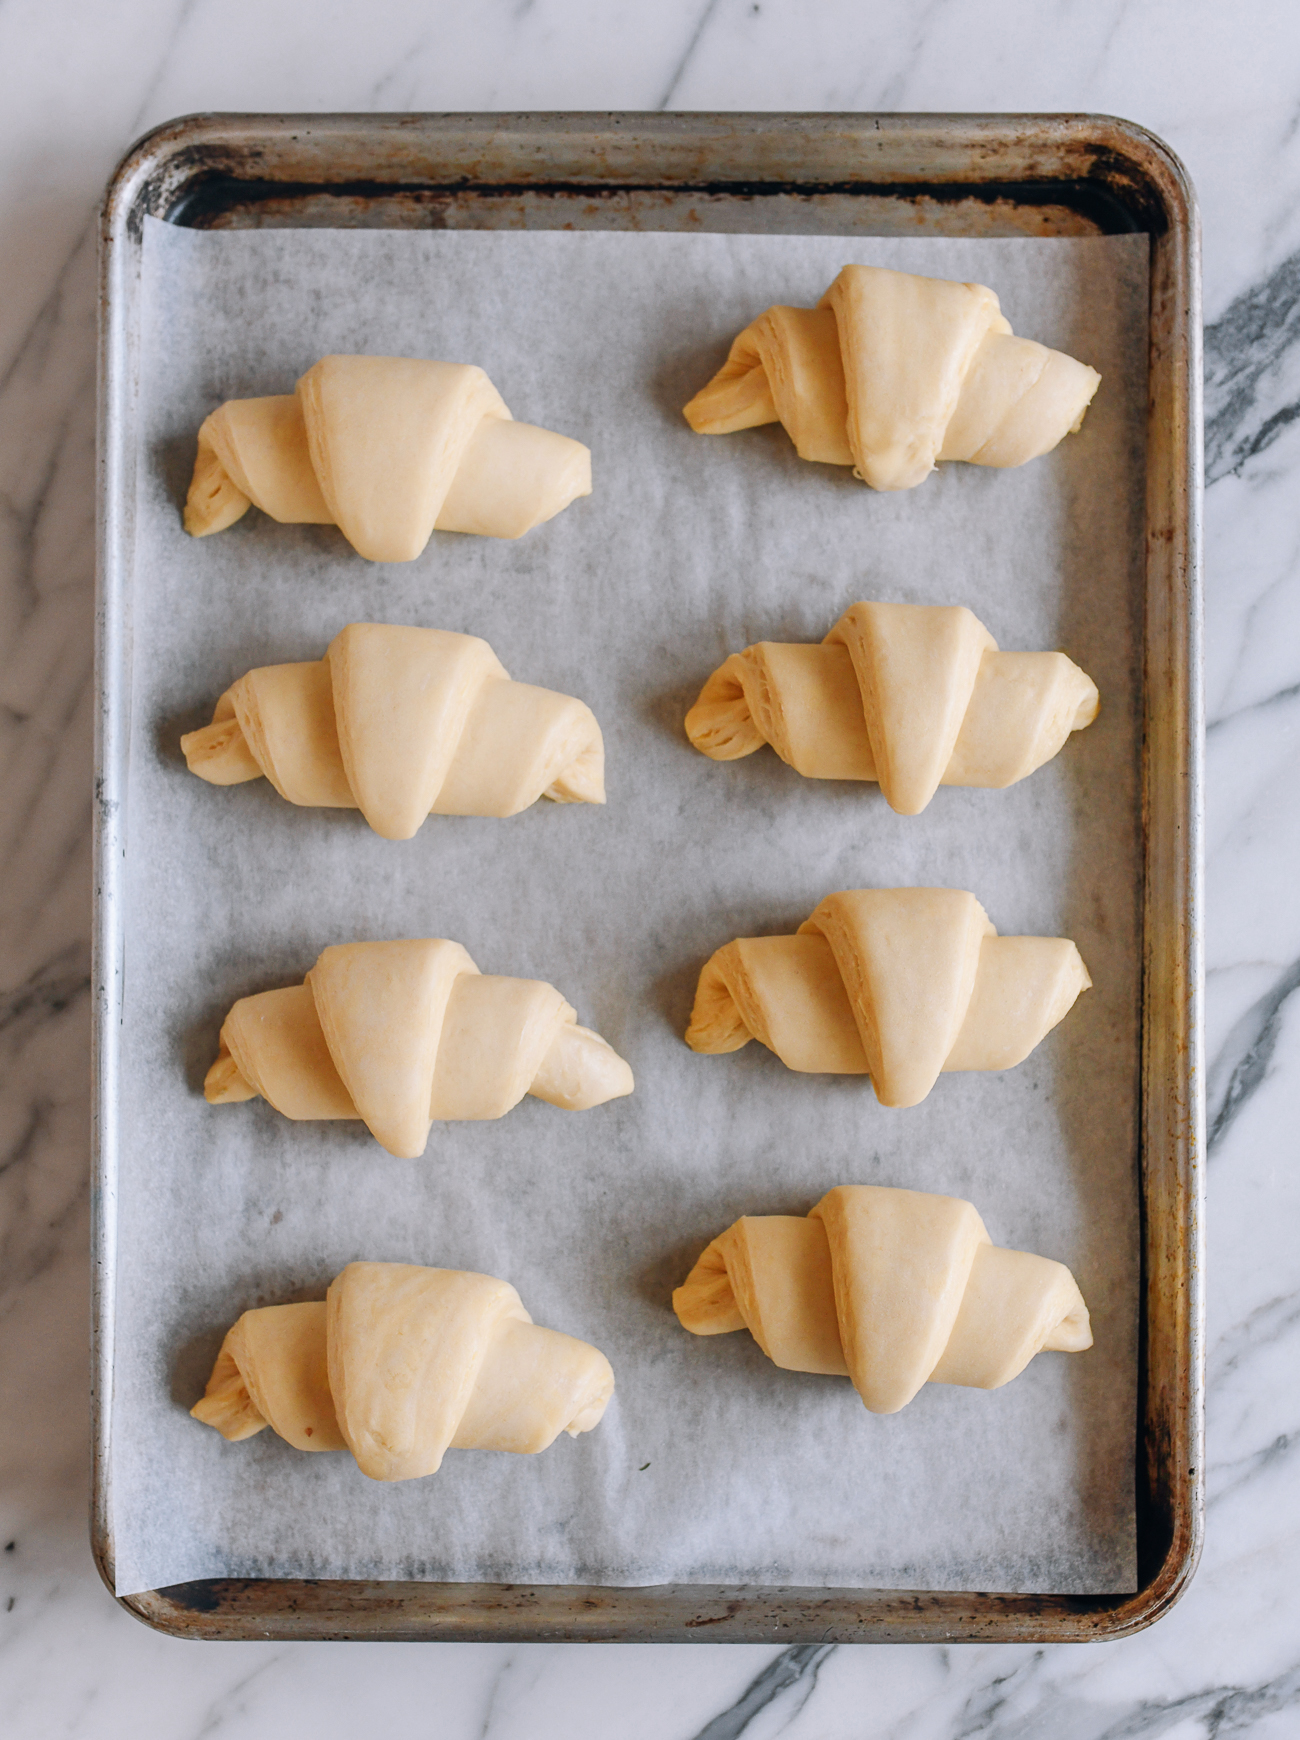
After 30 minutes, place the pan in the oven (turned off) or another warm spot to proof for about 90 minutes. (An ideal temperature is about 75°F/24°C.)
The croissants should look puffy and light, so if in doubt, let them proof for another 30 minutes.
Step 5: Bake the Croissants
Position a rack in the middle of your oven, and preheat it to 425°F/220°C. (If you proof the croissants in the oven, remember to remove them before preheating!)
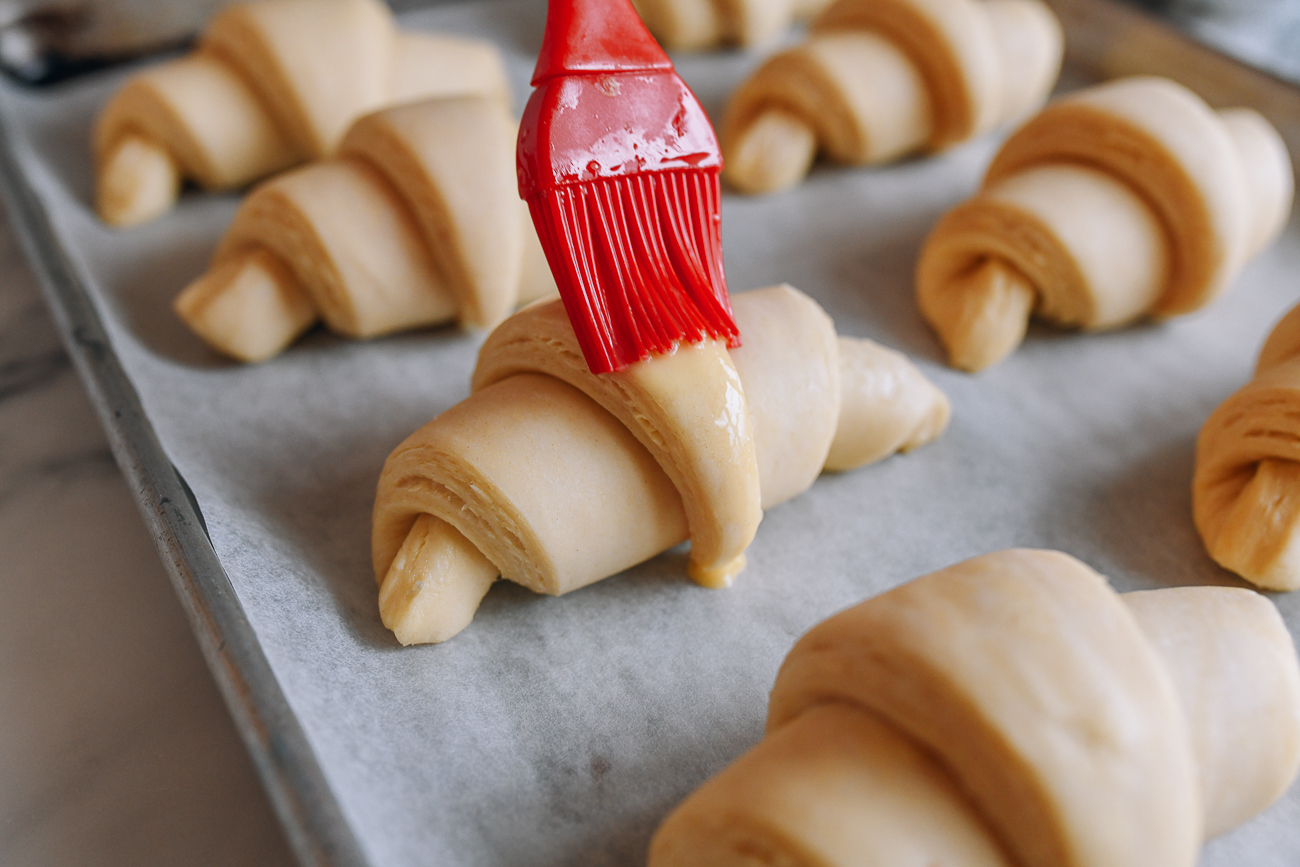
When the oven is ready, beat the remaining 1/2 of the egg you reserved earlier with 2 teaspoons of water to make an egg wash. Use a pastry brush to gently brush the croissants with the egg wash, avoiding the laminated edges.
Bake the croissants for 12 minutes, rotating the pan halfway through. After 12 minutes, reduce the oven temperature to 350°F/175°C. Bake for another 15-18 minutes—until the croissants turn a deep golden brown—for a total of 27-30 minutes of baking. Don’t take them out too soon, or they may be under-baked in the middle.
Remove from the oven, and cool for at least 15 minutes before enjoying.

Pat yourself on the back for making delicious homemade croissants, and enjoy them with extra butter, jam, and coffee!


Store the croissants in an airtight container at room temperature for up to 3 days. If they’re not fresh, lightly toast them in the toaster oven before enjoying them again!
Looking for more authentic recipes? Subscribe to our email list and be sure to follow us on Pinterest, Facebook, Instagram, and Youtube!
Recipe

Milk Bread Croissants
Equipment
- Parchment paper
- Rolling Pin
- ruler
- bench scraper/dough scraper
- stand mixer with dough hook attachment (optional, but ideal)
Ingredients
- 6 ounces unsalted European-style butter (at room temperature)
- 1/3 cup heavy cream (at room temperature)
- 1/2 cup whole milk (at room temperature)
- 1 large egg (at room temperature, divided—half for dough, half for egg wash)
- 2 1/2 tablespoons sugar
- 2 cups all purpose flour
- 1 1/2 teaspoons active dry yeast
- 3/4 teaspoon salt
- 2 teaspoons water
Instructions
Step 1: Make the Butter Square
- Cut a piece of parchment paper 11 inches (28 cm) long by 15 inches (38 cm) wide (this was the width of our parchment paper roll). Fold the parchment in half so you have a 7 ½” x 11” (19x28cm) rectangle.
- Cut the softened butter into ½-inch (1cm) squares, and arrange them on one side of the paper to form a rough 7×7 inch (18x18cm) square. Fold the other half of parchment over the slightly softened butter, and use a rolling pin and something with a flat edge (like a bench scraper/dough scraper or offset spatula) to form the butter into a uniform square, flipping the butter square over a couple times to flatten both sides.
- When you have a uniform thickness, place the butter square in the freezer for at least 30 minutes. You can do this step ahead of time, and keep the butter square frozen until you are ready to make your croissants.
Step 2: Make the Milk Bread Dough:
- In the bowl of a stand mixer with a dough hook attachment, add the ingredients in the following order: heavy cream, milk, ½ of the egg, sugar, flour, yeast, and salt. (Set aside the remaining ½ of the egg in a sealed container for the egg wash, which you’ll brush onto the croissants just before baking.)
- Turn on the mixer to the lowest setting, and once the ingredients have come together into a dough, knead on low speed for 15 minutes, occasionally stopping the mixer to push the dough together with a stiff rubber spatula. The dough should stick to the bottom of the mixing bowl, but not the sides. If the dough is sticking to the sides of the bowl, add flour 1 tablespoon at a time until it pulls away from the sides. If you don’t have a mixer and would like to knead by hand, start by mixing the dough with a stiff rubber spatula before kneading with floured hands, and extend the kneading time by 5-10 minutes.
- After kneading, cover the bowl with a damp towel, and place in a warm spot for 1 to 2 hours, until the dough has doubled in size (we place it in a closed microwave with a mug of just-boiled water next to it).
- When the dough has doubled in size, use the dough hook once again (or floured hands) to knead for 5 minutes, punching the air out of the dough.
- Roll the dough out into an 8-inch (20cm) square of uniform thickness. Use a rolling pin to press and flatten the dough. Use a straightedge to sharpen the sides and corners. Wrap the dough in plastic wrap, and refrigerate for 30 minutes. If your butter is frozen solid, you can take it out of the freezer to soften at this point. You want the butter to be cool, but still pliable (about as pliable as your dough), which should take about 30 minutes in a mild ambient temperature (68-70°F/20-21°C).
Step 3: Laminate the Dough with the Butter
- After the dough has been chilled for 30 minutes, unwrap it from the plastic wrap (set it aside—you’ll use it again several times). Use a rolling pin to roll the dough out to an 11-inch (28cm) square, using a dough scraper to form corners as sharp as you can manage.
- Place the butter square in the center of the dough at a 45° angle, so it looks like a diamond on top of a square. Fold the corners of the dough into the center of the butter diamond. There should be enough overlapping dough that you can easily pinch the seams together to seal the butter, making sure that you don’t have any air pockets that can break the seal and cause the butter to ooze out.
- Lightly roll over the seams with a rolling pin to flatten them and seal them further. This will minimize butter leakage when rolling out the dough during the lamination process.
- Flip the dough onto a lightly floured surface, so the seam side is facing down. Roll the dough into a 18×9-inch (40x20cm) rectangle, flipping it several times while rolling it out to ensure uniform thickness of the dough and the butter. Lightly press the dough with the rolling pin at every inch, which stretches the dough into a rectangular shape. Use a dough scraper to straighten out the edges and keep the layers uniform. Dust with flour as needed while rolling and shaping, but work as quickly as you can, so the butter doesn’t warm up and absorb into the dough!
- Brush off any excess flour, and fold it into thirds like a business letter, making sure you have an even overlap of the three layers of dough. This is the “turn” of the dough. Lightly roll the dough with the rolling pin to flatten, using the dough scraper to square off each side if needed. Wrap the dough back in plastic wrap (just use the same piece of plastic for the entire process to minimize waste). Return the dough to the refrigerator for 30 to 45 minutes. Chilling the dough a little longer is ok if you are multitasking—just remember to let the dough warm up slightly for 5 minutes if it is very cold (to make it easier to roll out).
- Repeat these steps (starting with rolling the dough into a 18×9-inch/40x20cm rectangle) for another 3 turns. In total, you should complete 4 turns.
- After the last turn, rest the dough for at least 1 hour or overnight in the refrigerator. The duration largely depends on how much time you have, and when you want to bake your croissants. 1 hour is fine, but chilling overnight is ideal.
Step 4: Shape the Croissants
- When you’re ready to shape the croissants, take the dough out of the refrigerator and roll the dough out into a 18×9-inch (40x20cm) rectangle. Using a chef’s knife and straightedge (a ruler works great), cut off the rounded edges on all 4 sides of the rectangle.
- Using a ruler, cut the dough crosswise into 4 equal rectangles. Cut each rectangle across the diagonal into two right triangles. You should have 8 pieces.
- To form a croissant, place one triangle in front of you, with the pointy end of the triangle facing away from you. Cut a 1-inch/2.5cm slit in the center of the base of the triangle. Stretch the resulting ends outwards (to look kind of like the base of the Eiffel Tower) to make the base of the croissant wider.
- Use your hand to gently but tightly roll the dough away from you in one fluid motion. Place each finished croissant on a parchment-lined sheet pan, with the tip of the triangle tucked underneath the croissant. Repeat until you have 8 croissants, evenly spaced on a half sheet pan. Cover the croissants with a clean, dry kitchen towel. Refrigerate for 30 minutes.
- After 30 minutes, place the pan in an oven (turned off) or on the counter to proof for about 90 minutes—an ideal temperature is about 75°F/24°C. The croissants should look puffy and light, so if in doubt, let them proof for another 30 minutes.
Step 5: Bake the Croissants
- Position a rack in the middle of your oven, and preheat it to 425°F/220°C. (If you proof the croissants in the oven, remember to remove them before preheating!)
- When the oven is ready, beat the egg with 1 tablespoon of water to make an egg wash. Use a pastry brush to gently brush the croissants with the egg wash, avoiding the laminated edges.
- Bake the croissants for 12 minutes, rotating the pan halfway through. After 12 minutes, reduce the oven temperature to 350°F/175°C, and bake for another 15-18 minutes (for a total of 27-30 minutes of baking), until the croissants turn a deep golden brown. Don’t take them out too soon, or they may be under-baked in the middle. Remove from the oven, and cool for at least 15 minutes before enjoying.


