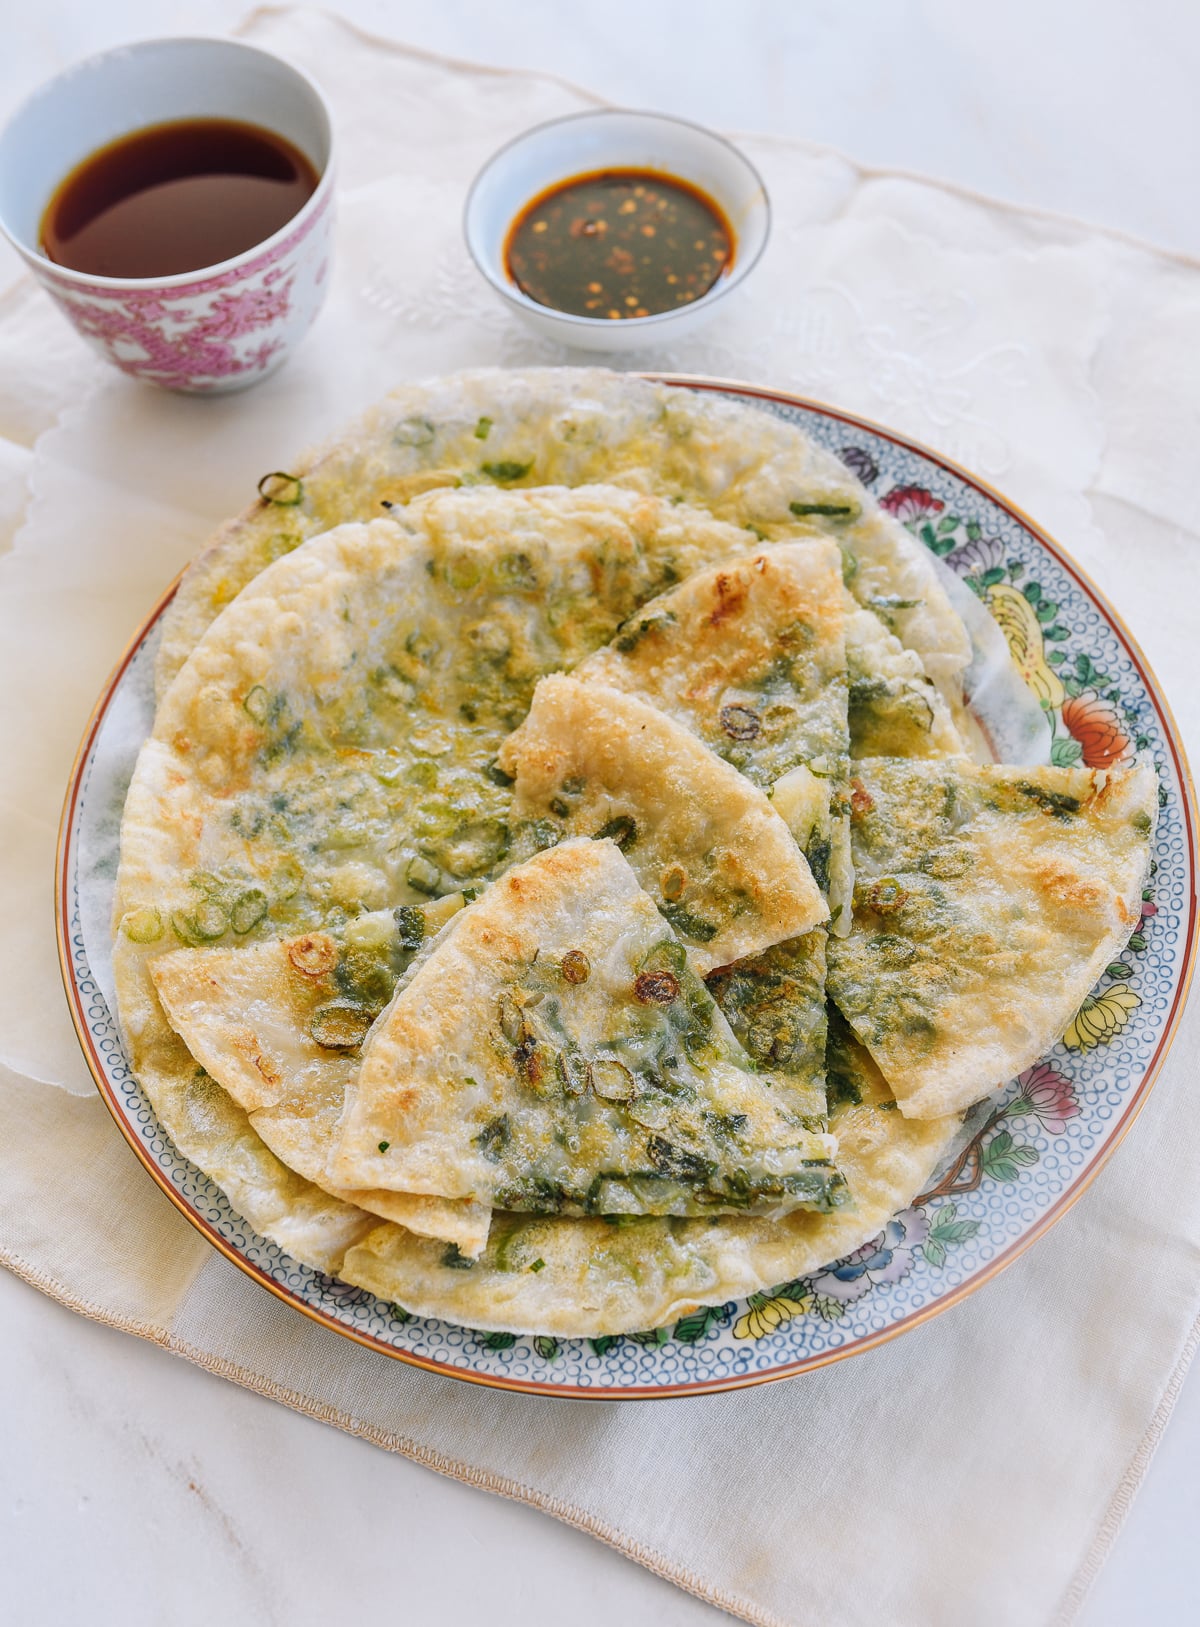
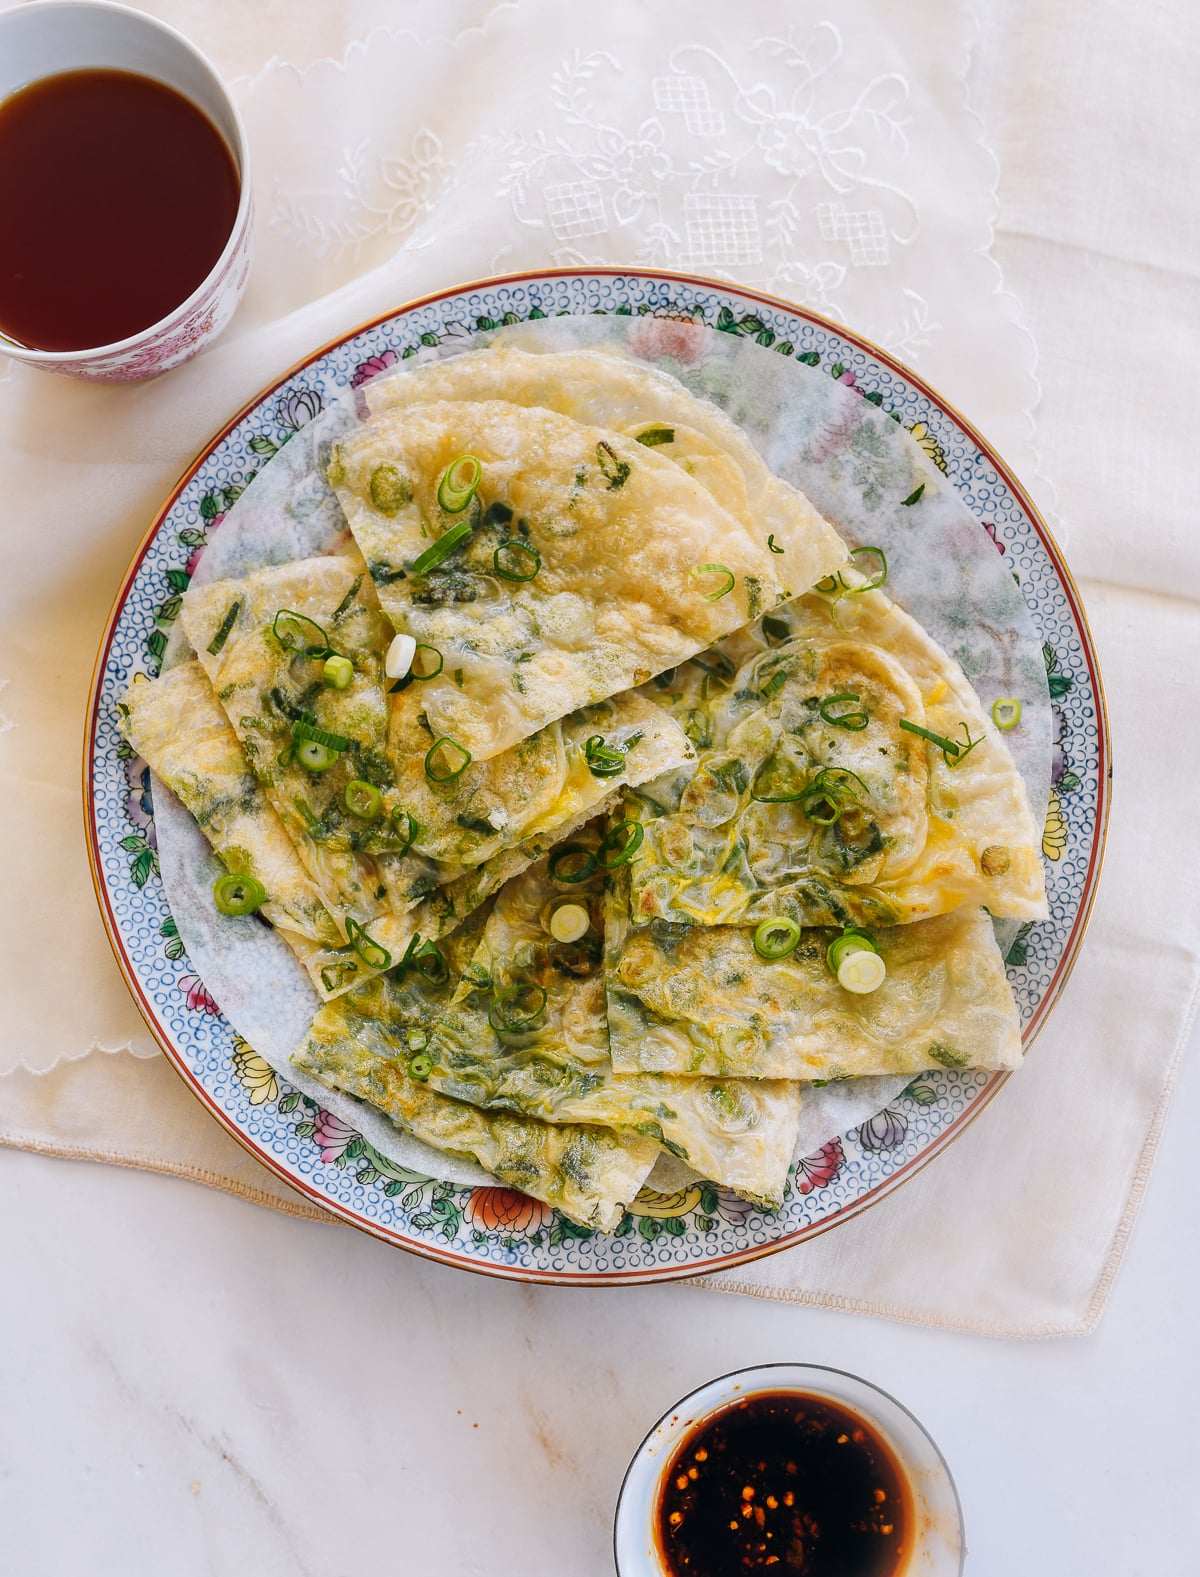
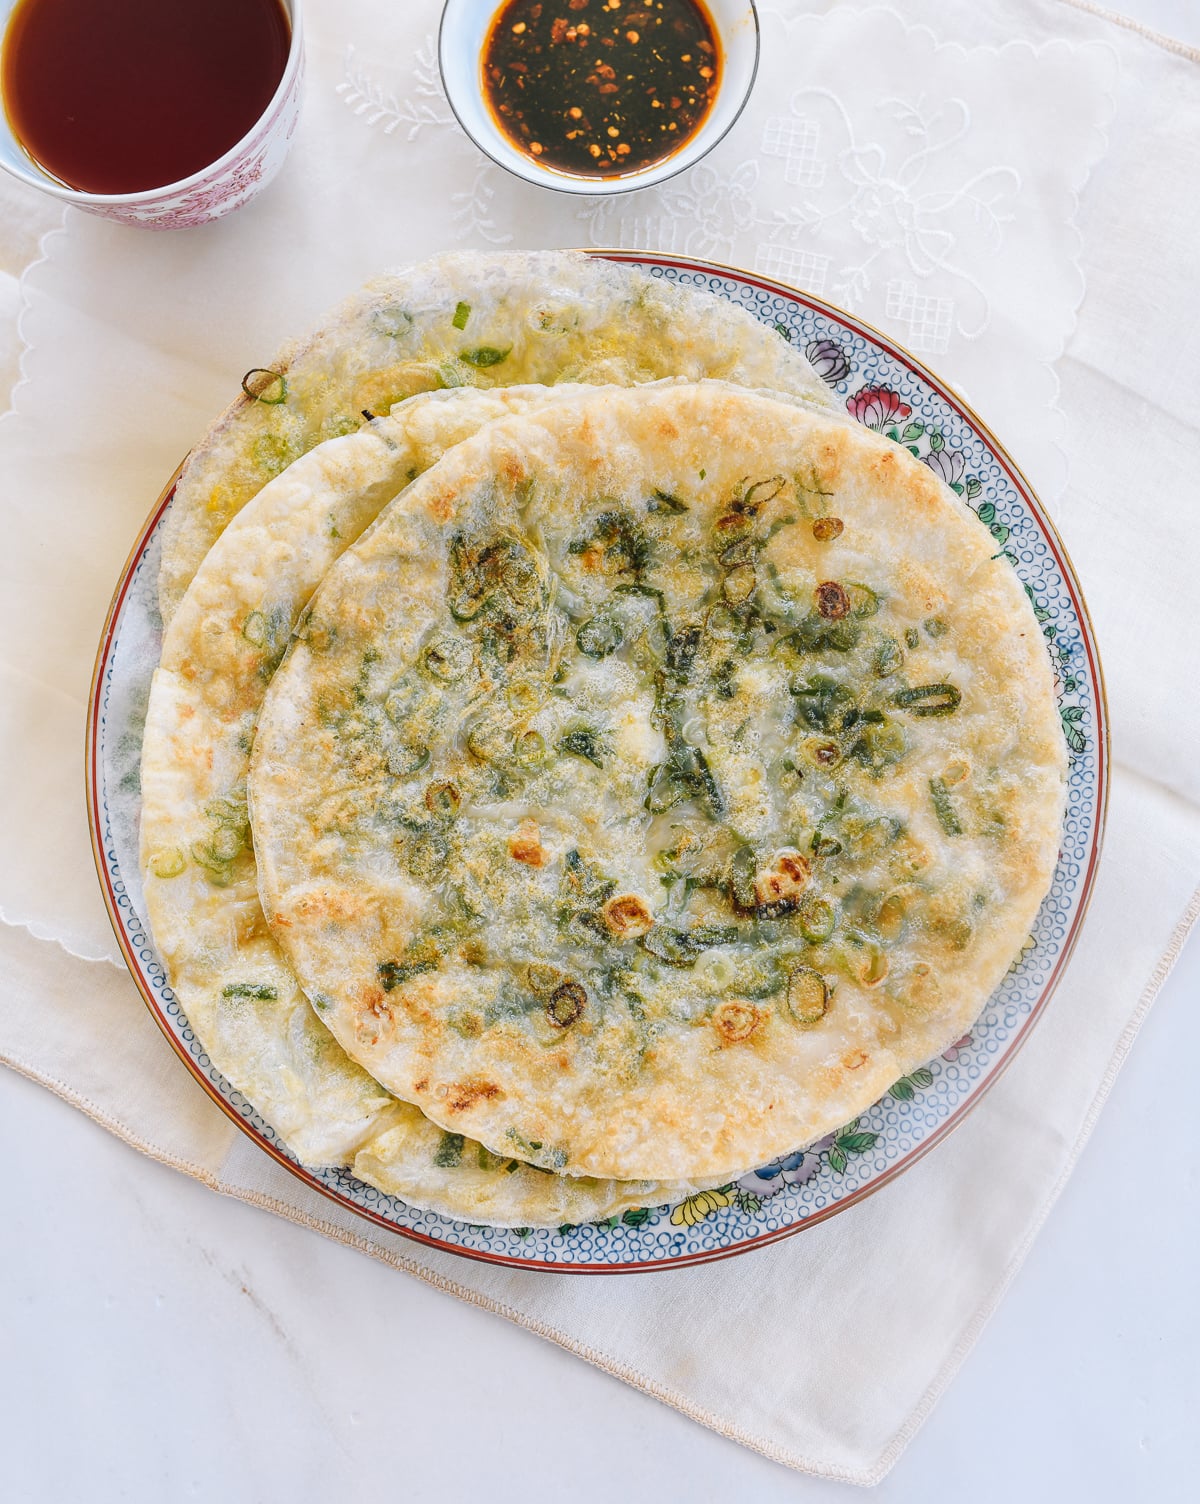
These Gluten Free Scallion Pancakes are a marvel: chewy, crispy, scallion-packed and absurdly fast to whip up. Instead of using gluten-free flour, which produces a dense, dry pancake, we make them with layers of Vietnamese rice paper—to gloriously chewy and crispy effect!
The Best solution for a chewy, flaky, gluten-free scallion pancake
Making Chinese food gluten-free can be easy in some cases, tricky in others. While there are plenty of rice-based dishes, rice noodles, tapioca starch, and cornstarch—all gluten-free, there are also wheat-laced soy sauces, soybean sauces, and flour-based pancakes, bao, dumplings, and breads.
I was wracking my brain for a way to make a scallion pancake with all its signature characteristics—flaky, chewy, salty and oniony—sans gluten. I tried making a dough with a gluten-free flour mix, which yielded a hard unleavened cracker-ish texture and flavor. Not good.
Like most things in life, I arrived at the answer with a nudge from my mother. She told me to try Vietnamese rice paper sheets, or bánh tráng. They’re made with rice flour, water, tapioca starch, and salt. They worked beautifully! Even for those who do eat gluten, these are a real treat!
The rice paper sheets get a quick dip in water to rehydrate them. Then you layer them with scallions and just a smidgen of salt. We brush the outside very lightly with egg, which does the dual purpose of helping them get golden and soft and preventing them from burning. When rice paper burns, it becomes astoundingly bitter and basically inedible!
I’m by no means the first person to think of a rice paper hack, but I think they work excellently for a simple scallion pancake. I’ve seen people using them for Korean-style vegetable and kimchi pancakes too.

Scallion Pancakes Galore!
There are a lot of variations on scallion pancakes and we’ve covered many of them:
- 9-Layer Scallion Pancakes
- Classic Scallion Pancakes in our cookbook
- Shanghai Scallion Pancakes
- Easy Shortcut Scallion Pancakes
Recipe Tips
- These are best made fresh rather than ahead of time. These scallion pancakes are best served straight away. As they cool, the rice paper texture begins to return to baseline and they can get a little bit hard.
- The rice paper needs only the quickest dip in water. Once you start assembling the pancake, work quickly. The longer the rice paper sits, the softer and harder to work with it will be.
- Each pancake requires 5 rice paper rolls. You can portion them out so you don’t lose count, as it’s easy to do so once you start layering them.
- If you like, when you sprinkle the salt on, you can also sprinkle toasted sesame seeds and a light dusting of five spice powder for extra crunch and flavor.
- You may be tempted to layer on more rice paper sheets. I tried as few as three and as many as eight. Five rice papers was the sweet spot in our humble opinions!
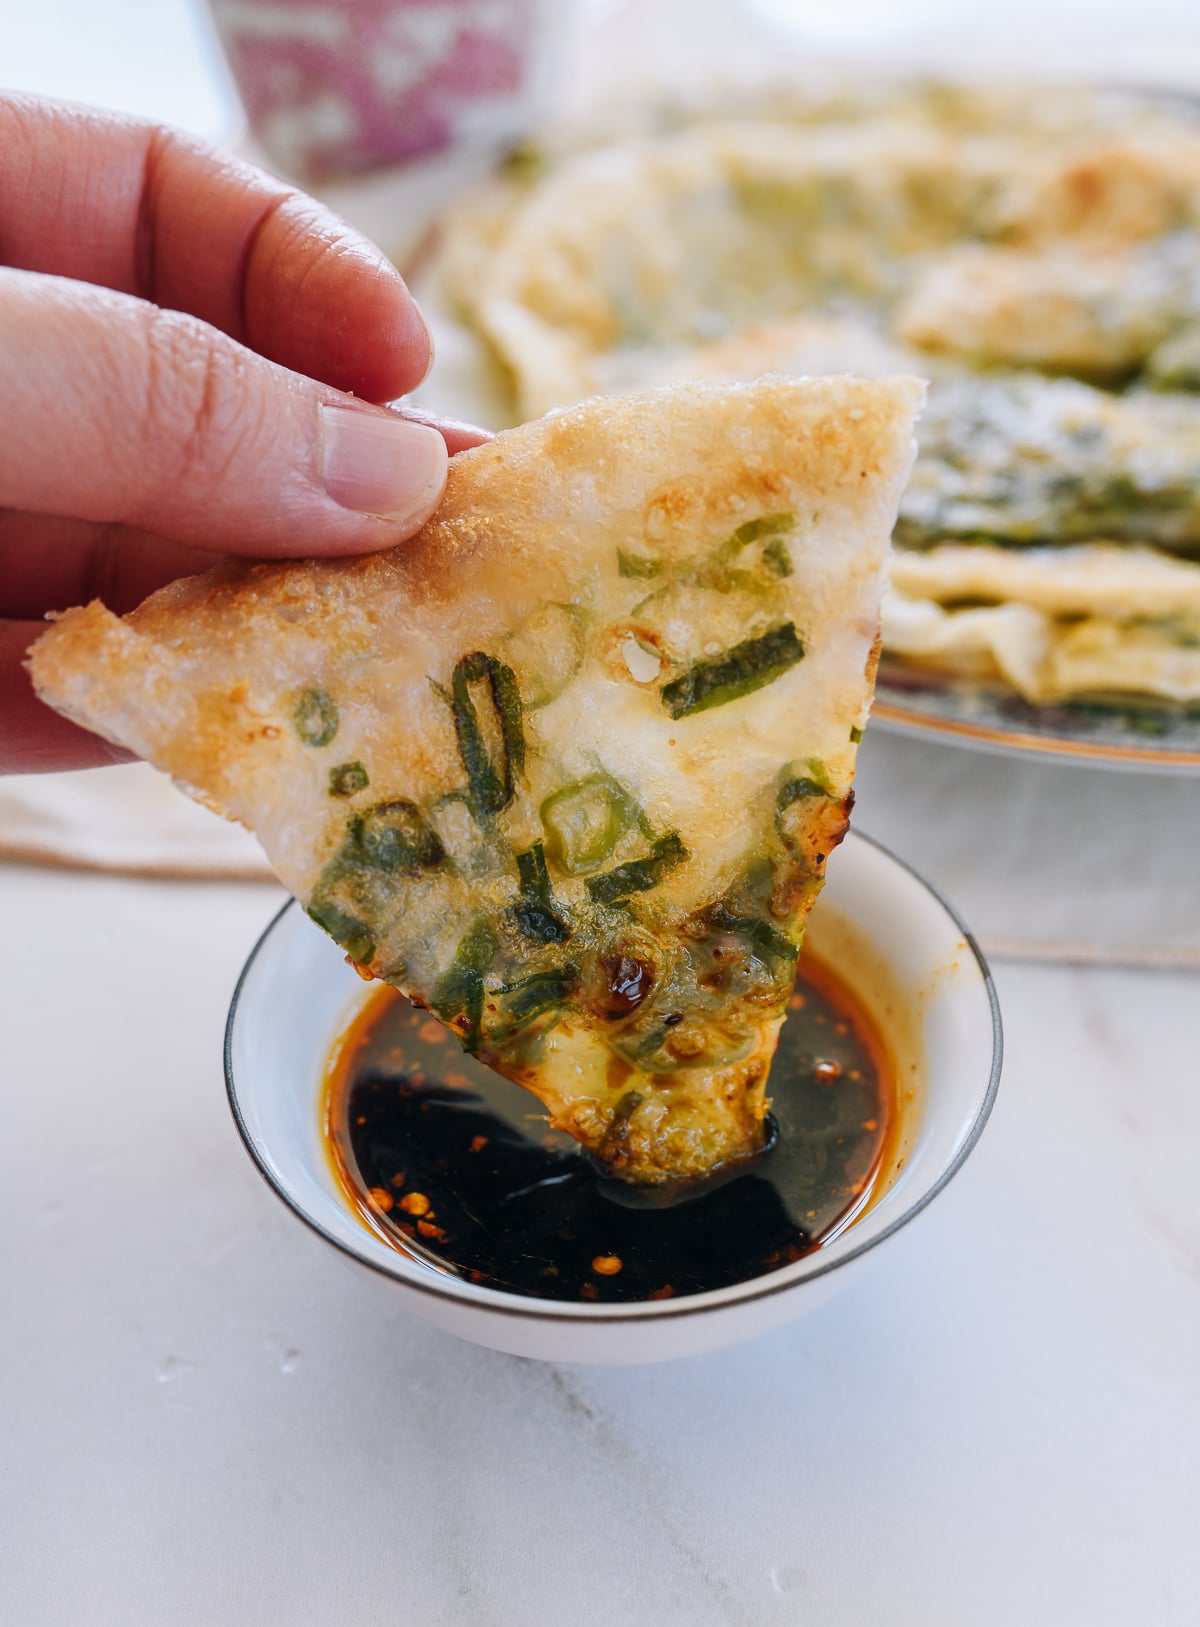
- Looking for a dipping sauce? Use your favorite gluten-free soy sauce and gluten-free oyster sauce (look for Lee Kum Kee’s green panda bottle) my mom’s scallion pancake dipping sauce! If you’d like to serve these with dipping sauce, you may want to make that first so you have it ready to go and can enjoy the pancakes hot right away.
So let’s make these Gluten-free Scallion Pancakes!
Gluten-free Scallion Pancakes Recipe Instructions
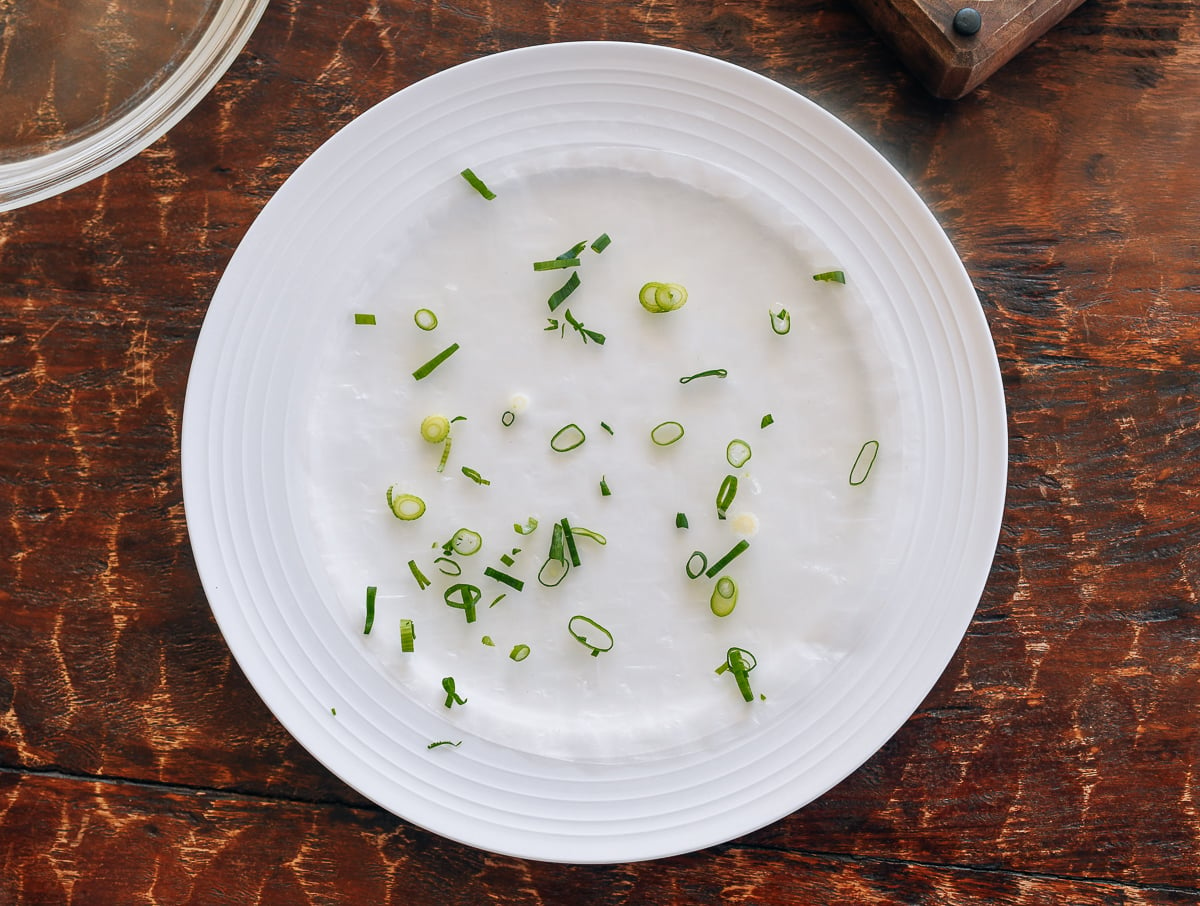
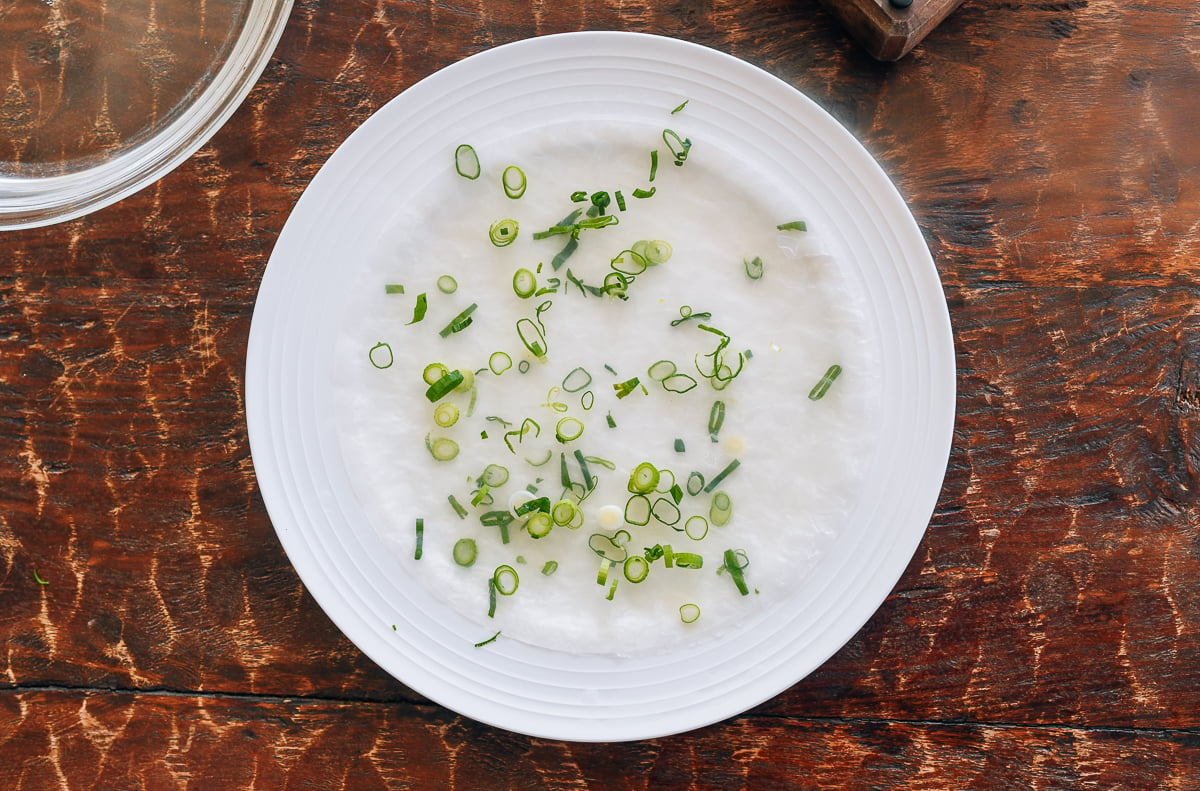
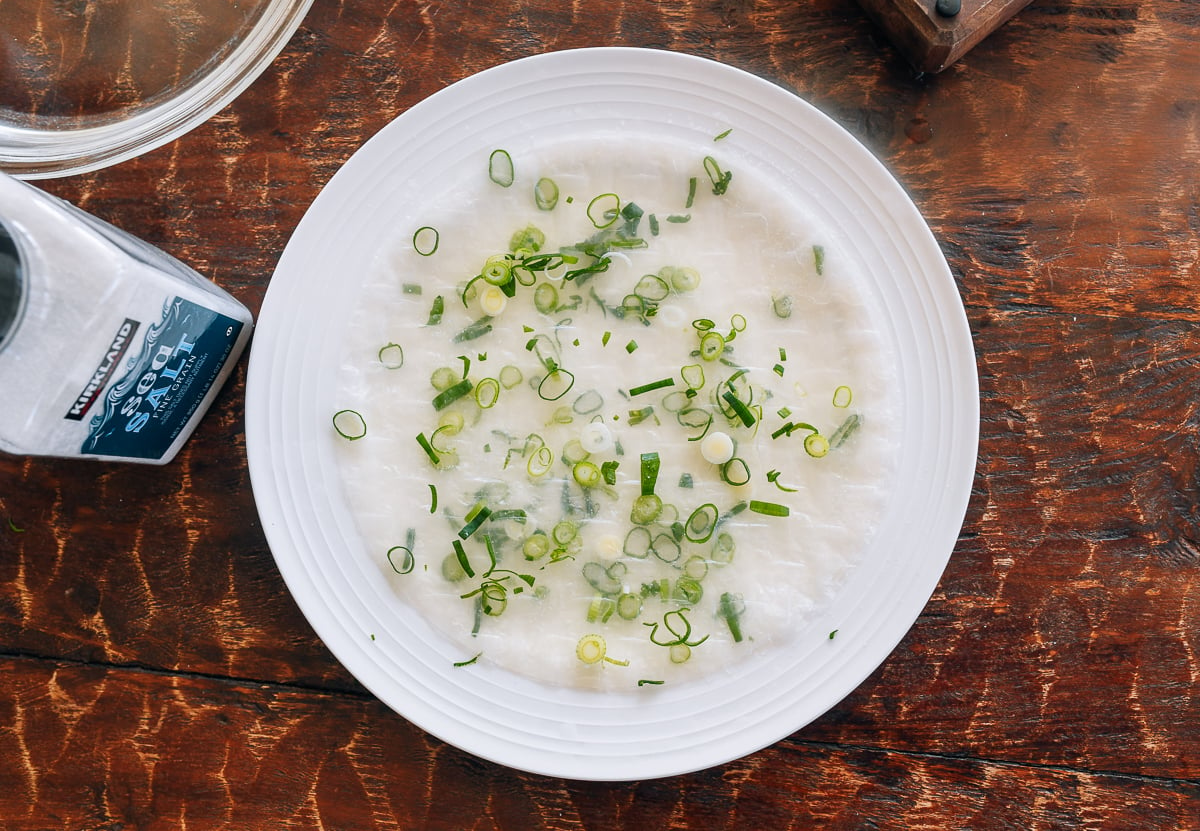
Fill a 9-inch pie plate (or other shallow dish that will fit a rice paper wrap) with cold water. Dip one of the rice papers in the water, shaking off the excess. Lay it on a large plate. Sprinkle a tablespoon of scallions over the top, with an equal mix of both white and green parts. Then dip another rice paper sheet in water and lay it over the scallions. Sprinkle the scallions over once more. Dip a third rice paper roll in the water and lay it over the top. Add another sprinkling of scallions. This time, sprinkle a very small pinch of salt evenly over the scallions. Add a fourth rice paper, more scallions, and top with the fifth and final rice paper.
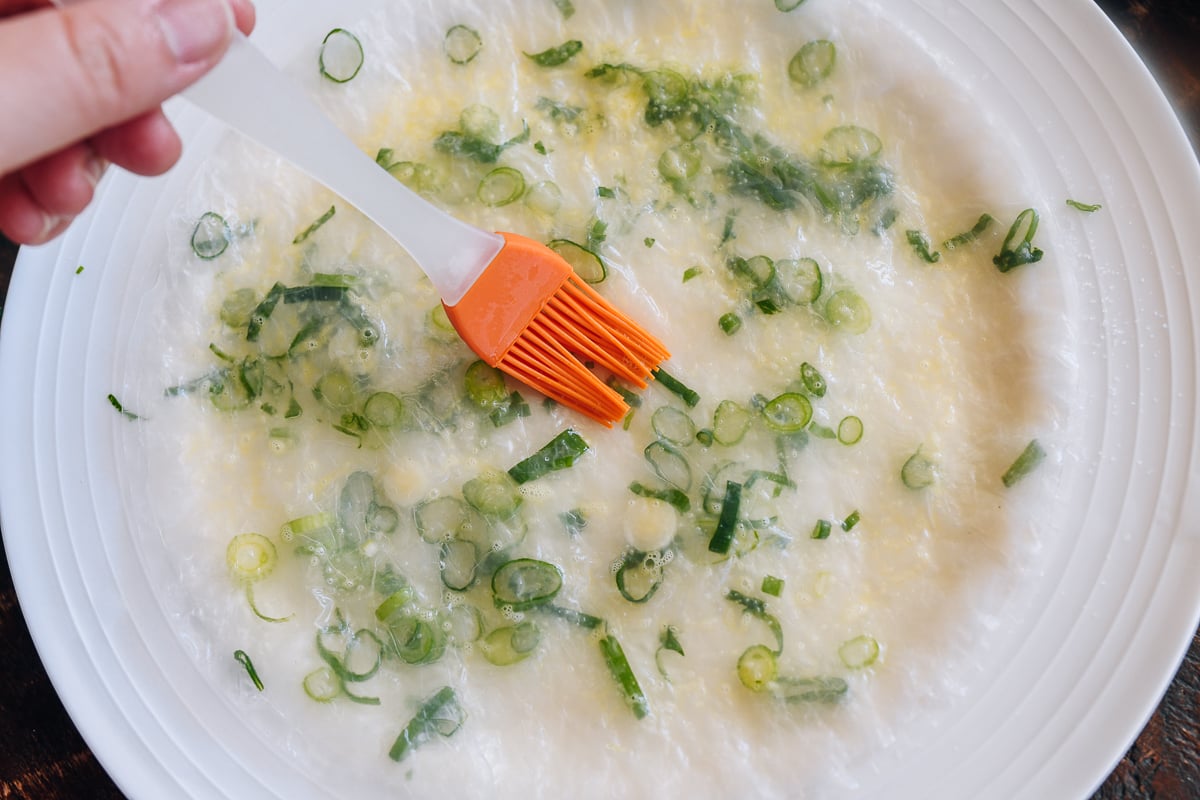
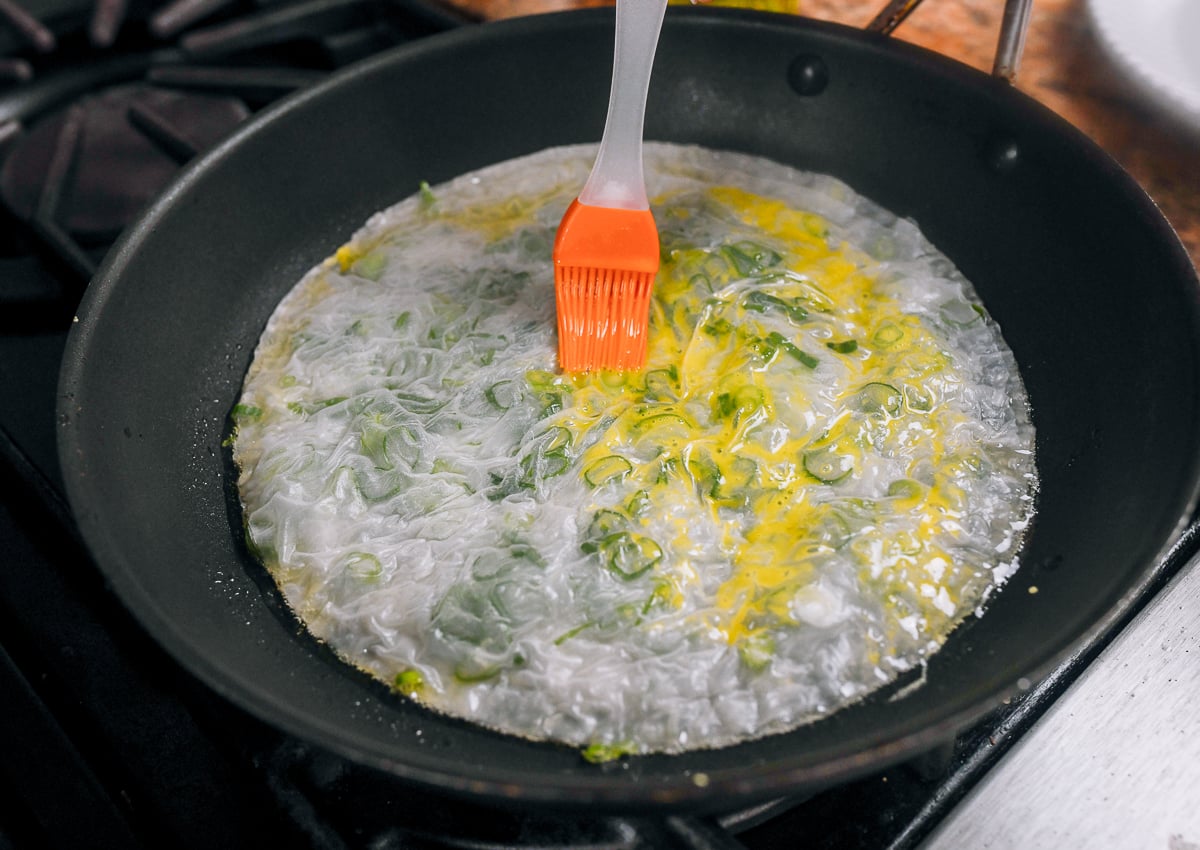
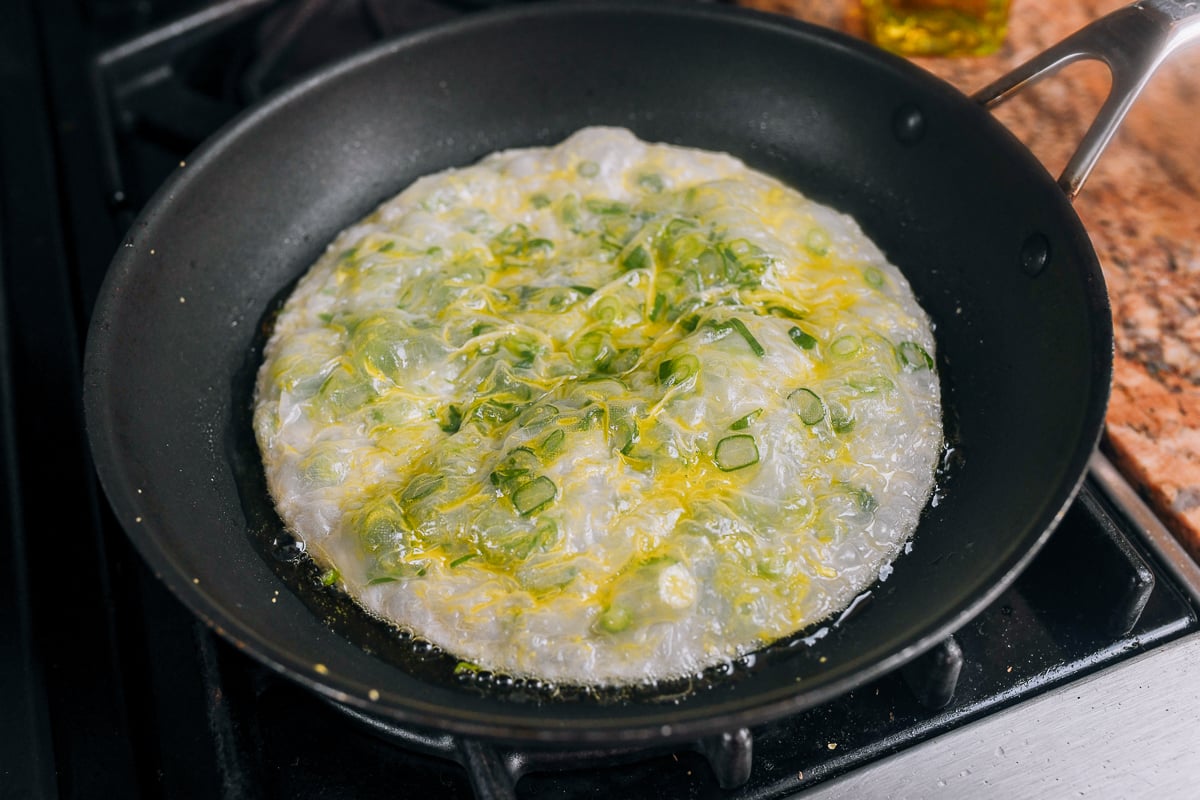
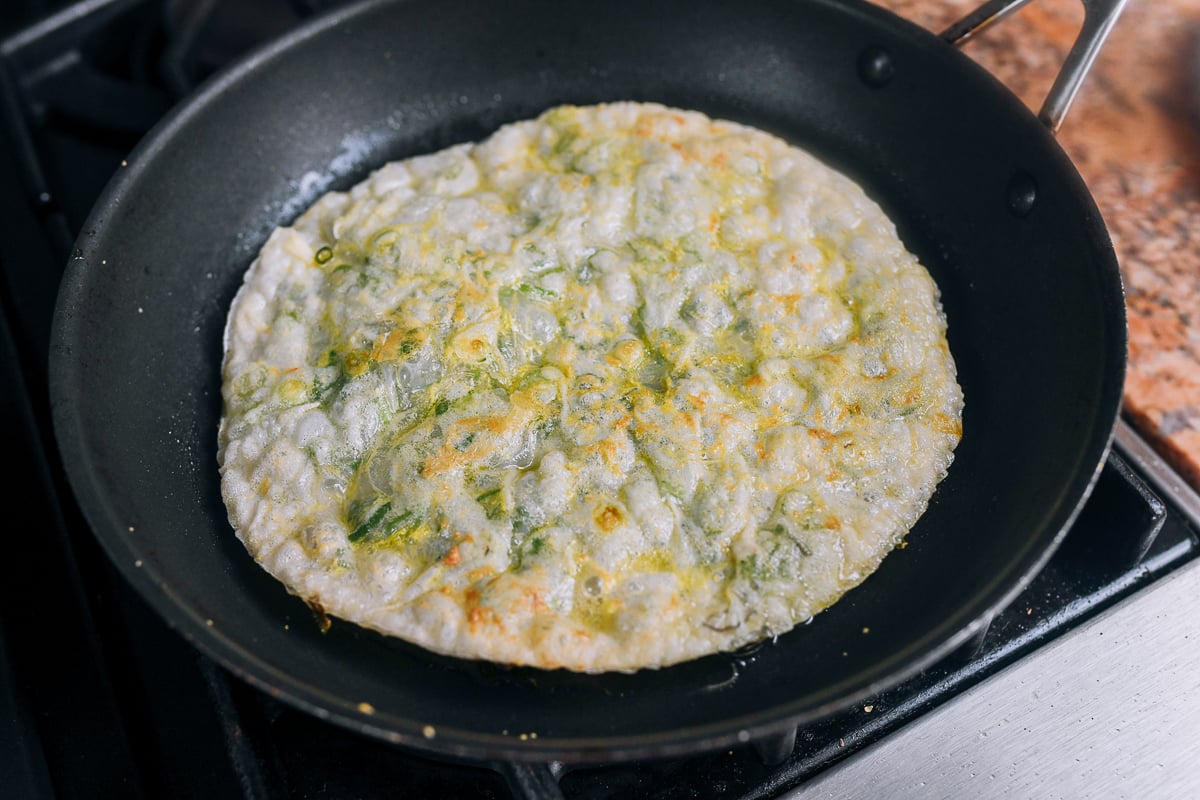
Using a pastry brush, brush a very thin layer of beaten egg over the top of the pancake. Heat a nonstick skillet over medium-high heat. Add 1 tablespoon of oil. When the oil is heated and coats the surface of the pan easily, carefully peel the pancake off the plate and place in the preheated pan egg side down. Brush the other side of the pancake with a thin layer of egg. Fry for 2-3 minutes on each side until golden brown, flipping once. Enjoy immediately!
Repeat with the remaining two pancakes, keeping the pan on the lowest heat setting while you assemble, and then increasing the heat to medium-high when you’re ready to cook again.

Looking for more authentic recipes? Subscribe to our email list and be sure to follow us on Pinterest, Facebook, Instagram, and Youtube!
Recipe

Gluten-free Scallion Pancakes
Ingredients
- 15 rice paper wrappers (that you'd use for Vietnamese spring rolls/summer rolls)
- 5 scallions very thinly sliced
- A few small pinches salt
- 1 small egg beaten
- 3 tablespoons neutral oil such as canola, vegetable, or avocado oil
Instructions
- Fill a 9-inch pie plate (or other shallow dish that will fit a rice paper wrap) with cold water. Dip one of the rice papers in the water, shaking off the excess. Lay it on a large plate. Sprinkle a tablespoon of scallions over the top, with an equal mix of both white and green parts. Then dip another rice paper sheet in water and lay it over the scallions. Sprinkle the scallions over once more. Dip a third rice paper roll in the water and lay it over the top. Add another sprinkling of scallions. This time, sprinkle a very small pinch of salt evenly over the scallions. Add a fourth rice paper, more scallions, and top with the fifth and final rice paper.
- Using a pastry brush, brush a very thin layer of beaten egg over the top of the pancake. Heat a nonstick skillet over medium-high heat. Add 1 tablespoon of oil. When the oil is heated and coats the surface of the pan easily, carefully peel the pancake off the plate and place in the preheated pan egg side down. Brush the other side of the pancake with a thin layer of egg. Fry for 2-3 minutes on each side until golden brown, flipping once. Enjoy immediately!
- Repeat with the remaining two pancakes, keeping the pan on the lowest heat setting while you assemble, and then increasing the heat to medium-high when you’re ready to cook again.


