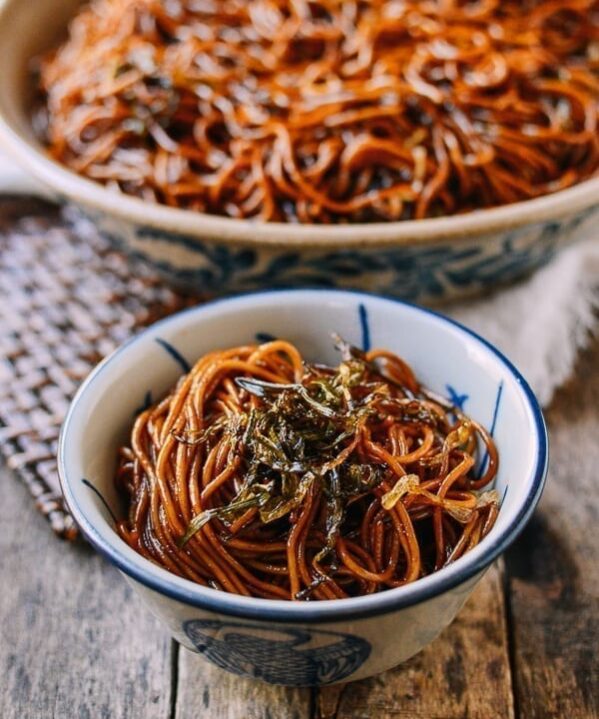
If you have read my write-up on Shanghainese-style breakfasts, you know the breakfast choices in Shanghai range far and wide. This Shanghai Scallion Flatbread (Shànghǎi qiāng bǐng, 上海羌饼) is one of my favorites.
What Is Shanghai Scallion Flatbread?
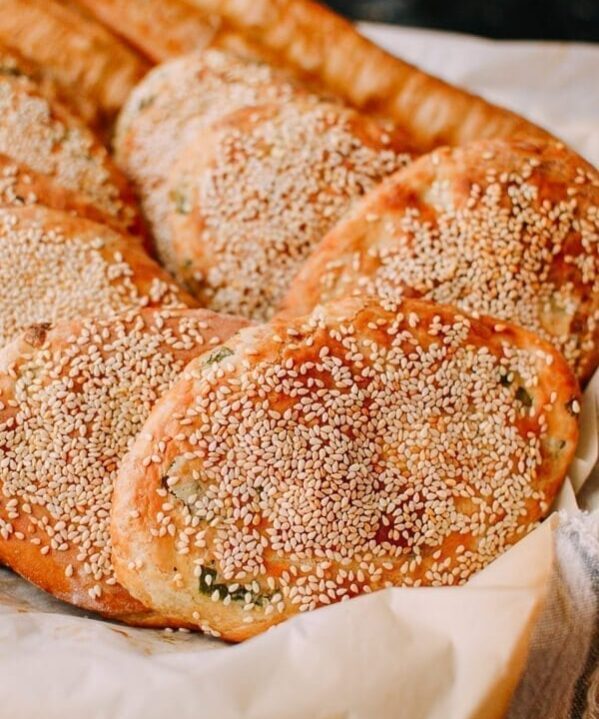
While I’m calling this a Shanghai Scallion Flatbread because it’s what I grew up with in the Shanghai area, there are different variations of it across China. Basically, it is a leavened, thick pancake, cooked on a griddle rather than baked.
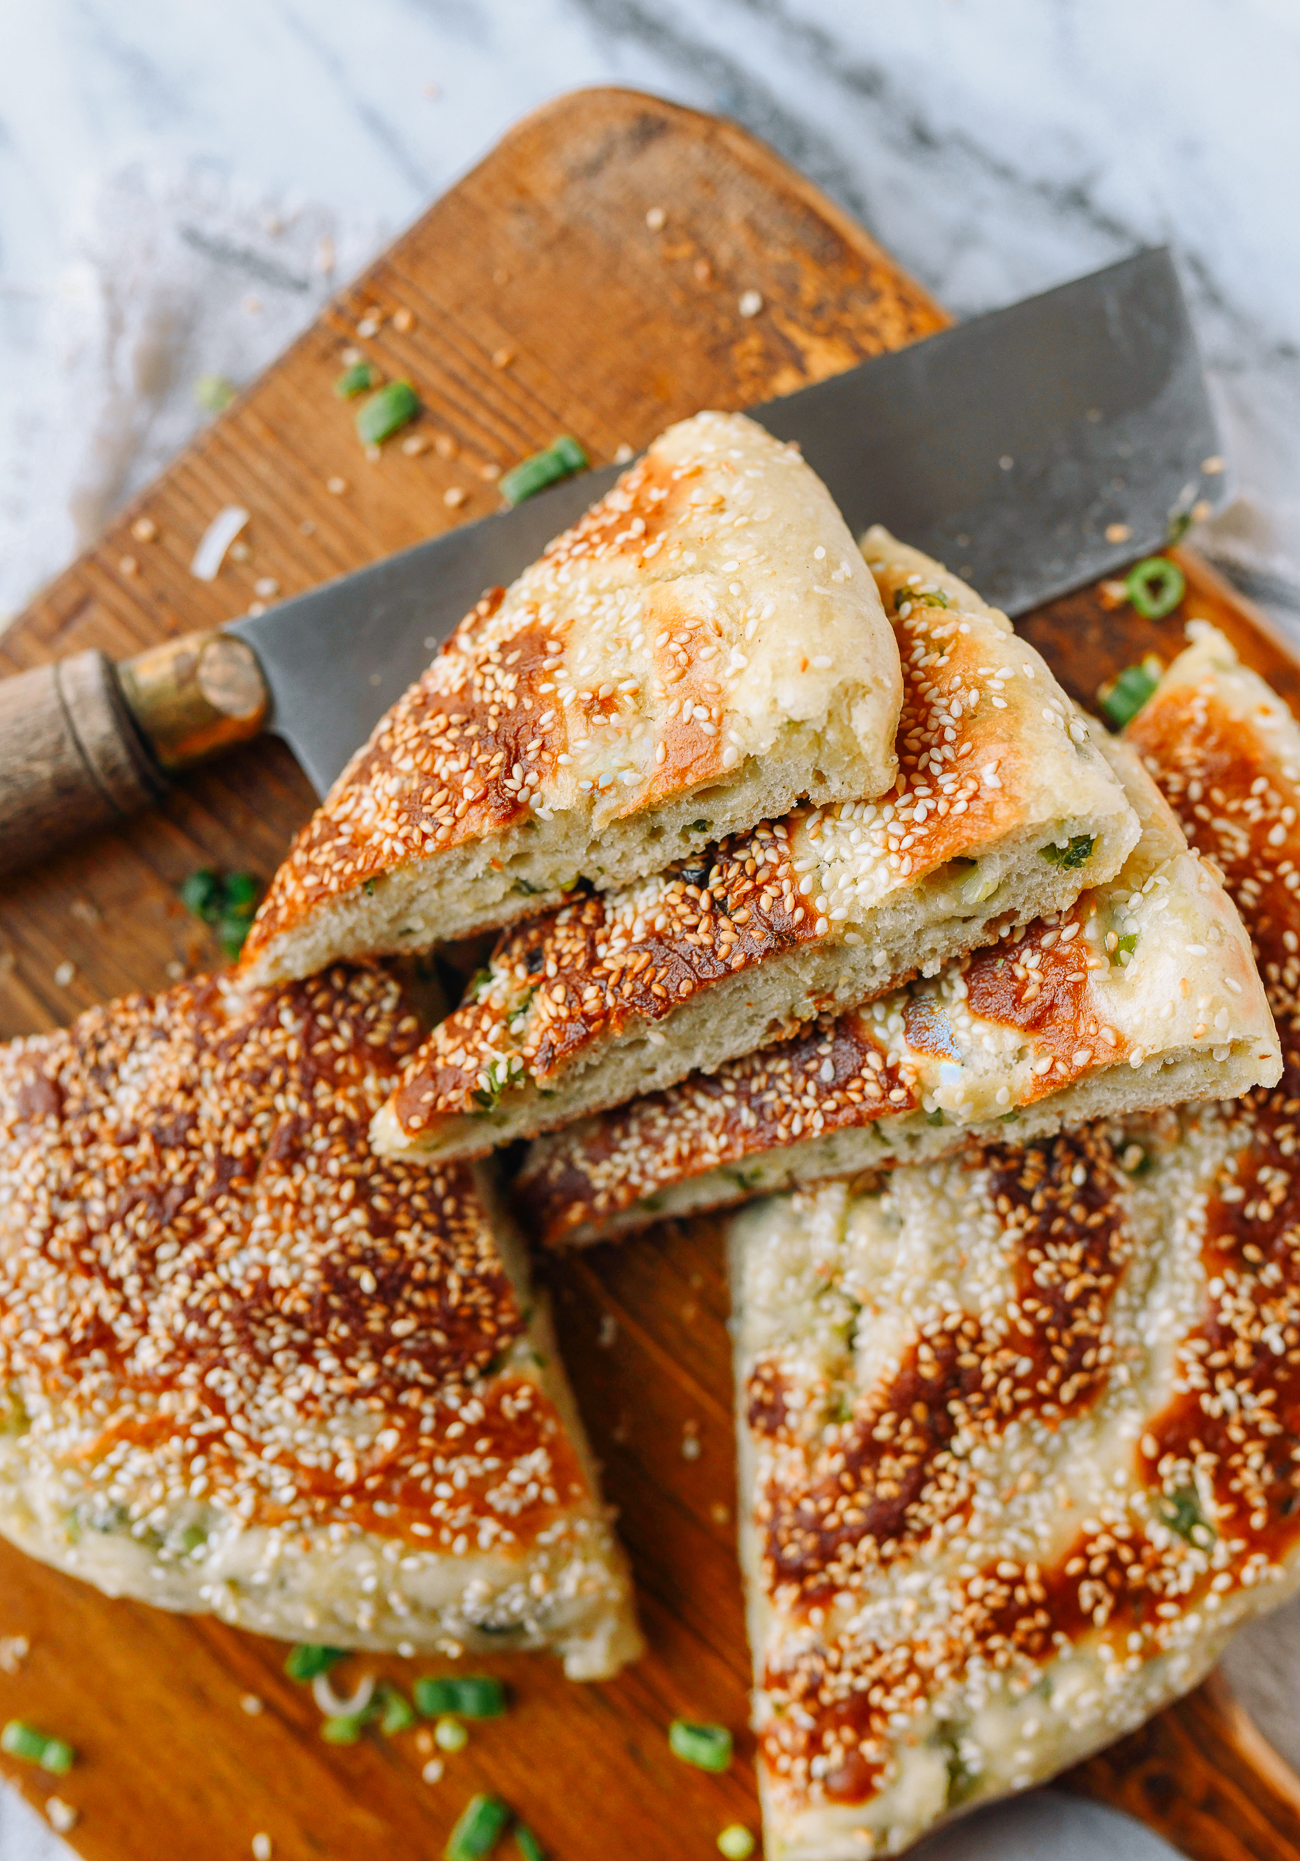
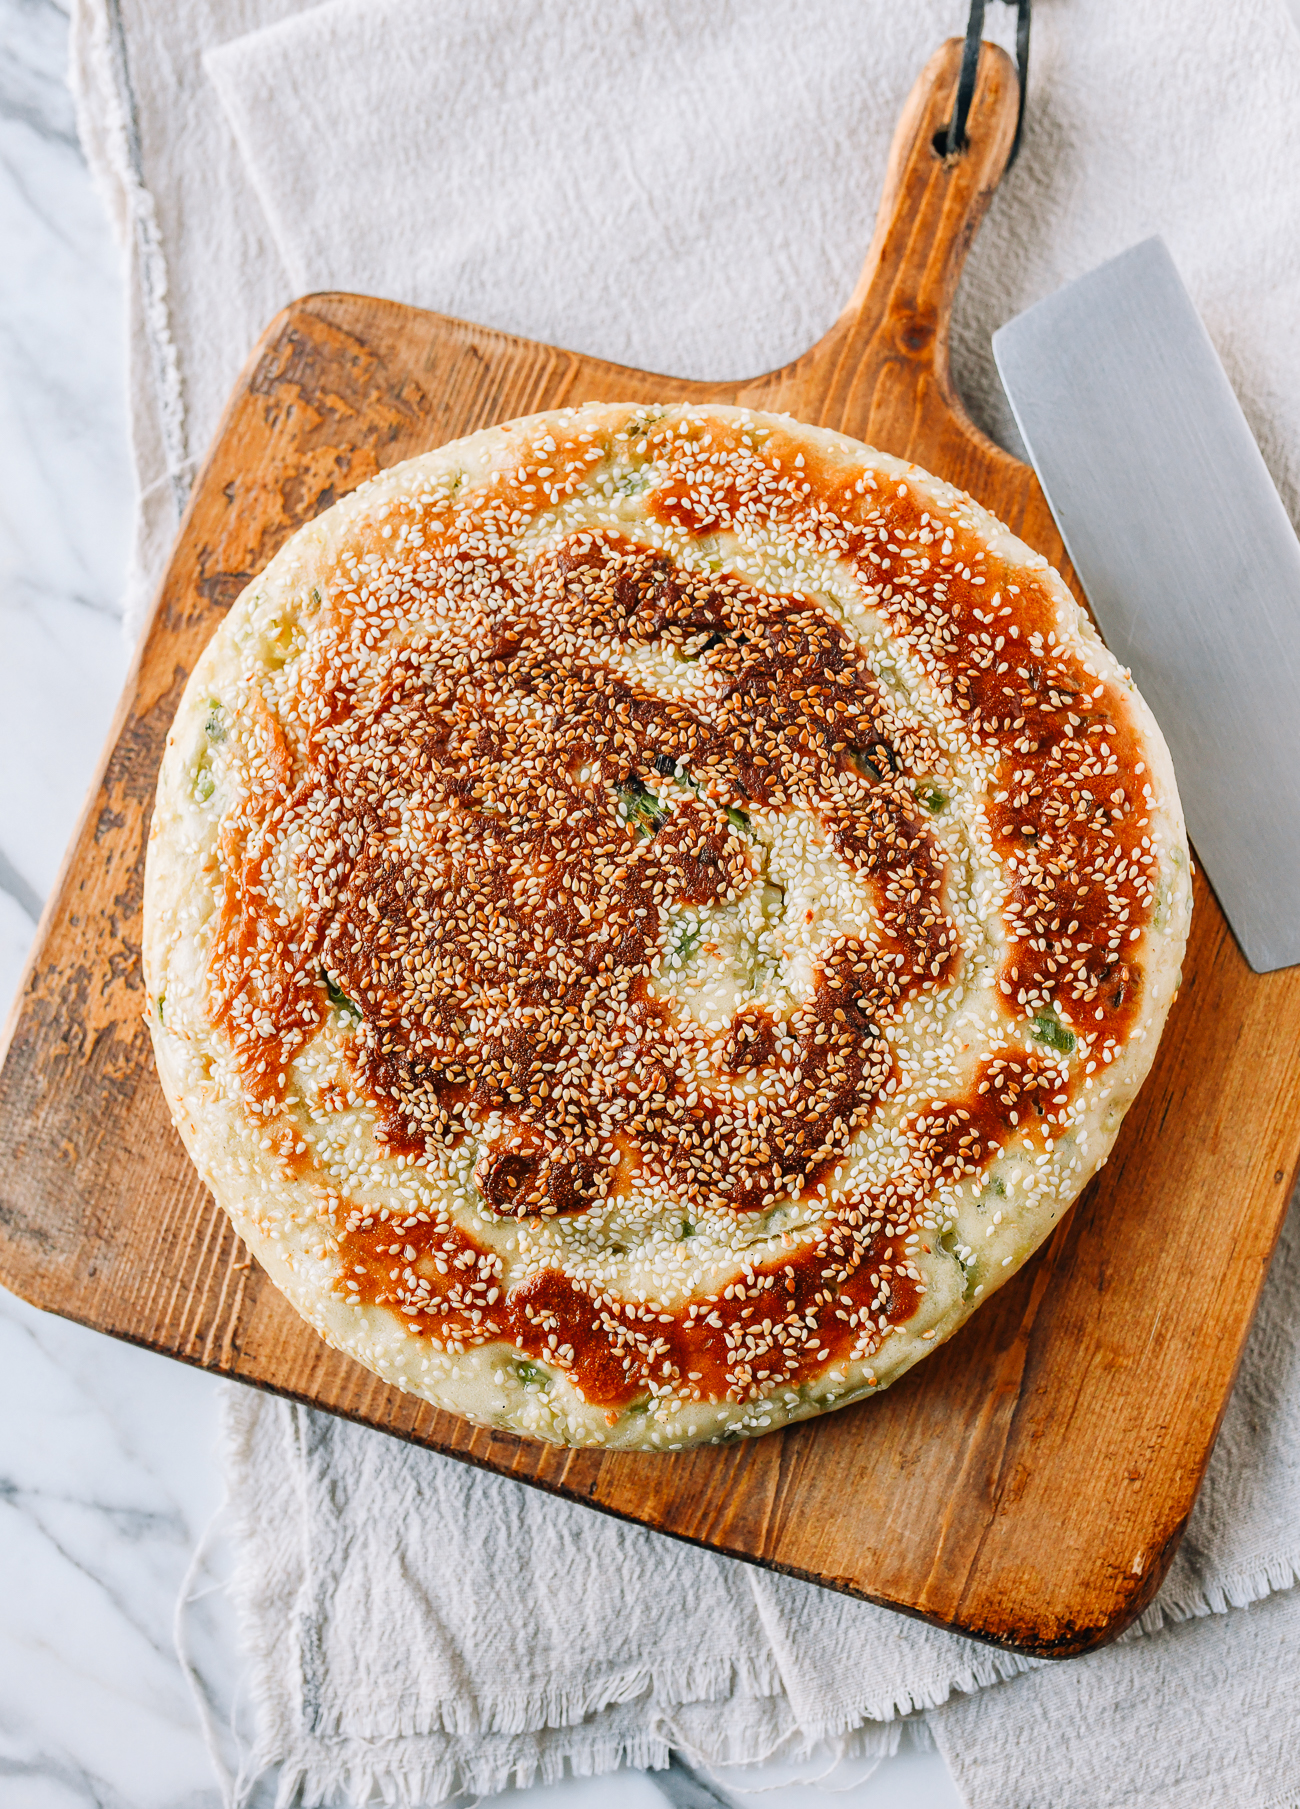
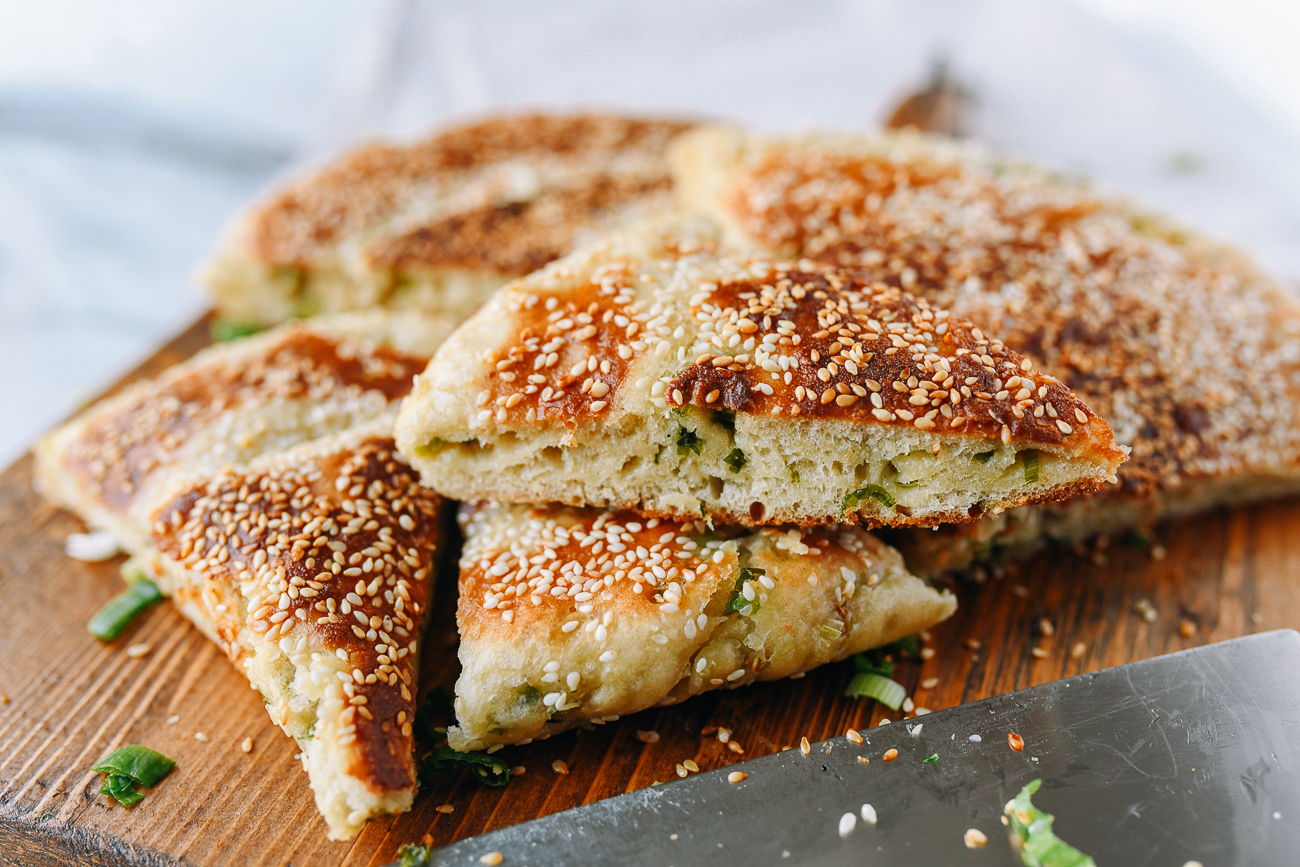
This version has a coating of nutty sesame seeds, with a crisp outer crust that contrasts with its soft and fluffy middle. It has an aroma similar to that of its cousin, the regular scallion pancake we all know and love.
Another Vivid Childhood Food Memory
The ones I remember were much bigger than this homemade version. It was bigger than a large pizza. You would purchase it by weight, because no one could finish even a slice of that giant pancake!
I remember impatiently waiting in line for a piece, mesmerized by the wisps of steam and the soft sizzle of condensation dropping onto the hot metal pan.
I have to admit, the crunchy sesame seed crust was always worth whatever wait was required.
After I made it for the girls the first time, they quickly compared it to Italian focaccia. This flatbread is indeed quite similar to focaccia in terms of thickness, and it has a similar oil-crisped crust.
However, the Shanghai version is much softer and has a hint of sweetness that makes it stand out in my mind.
After thinking about qiāng bǐng for so many years, I’ve finally gotten around to experimenting with my own recipe and documenting it.
It’s very special to me, so do give it a try. I hope you like it as much as I do. (And as much as the rest of the family does, now that they’ve experienced it too!)
Shanghai Scallion Flatbread: Recipe Instructions
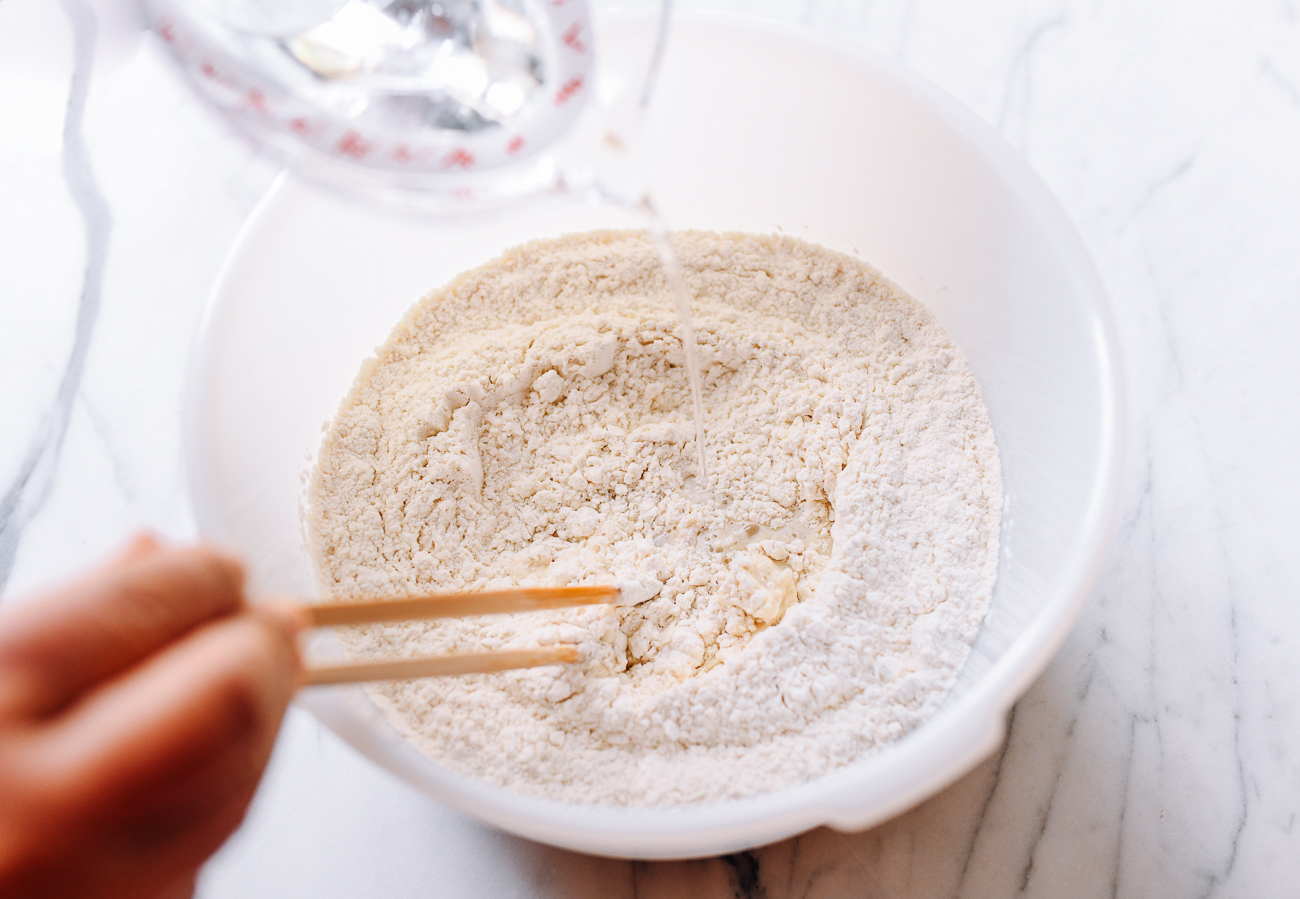
In a large mixing bowl, combine the flour, yeast, and sugar.
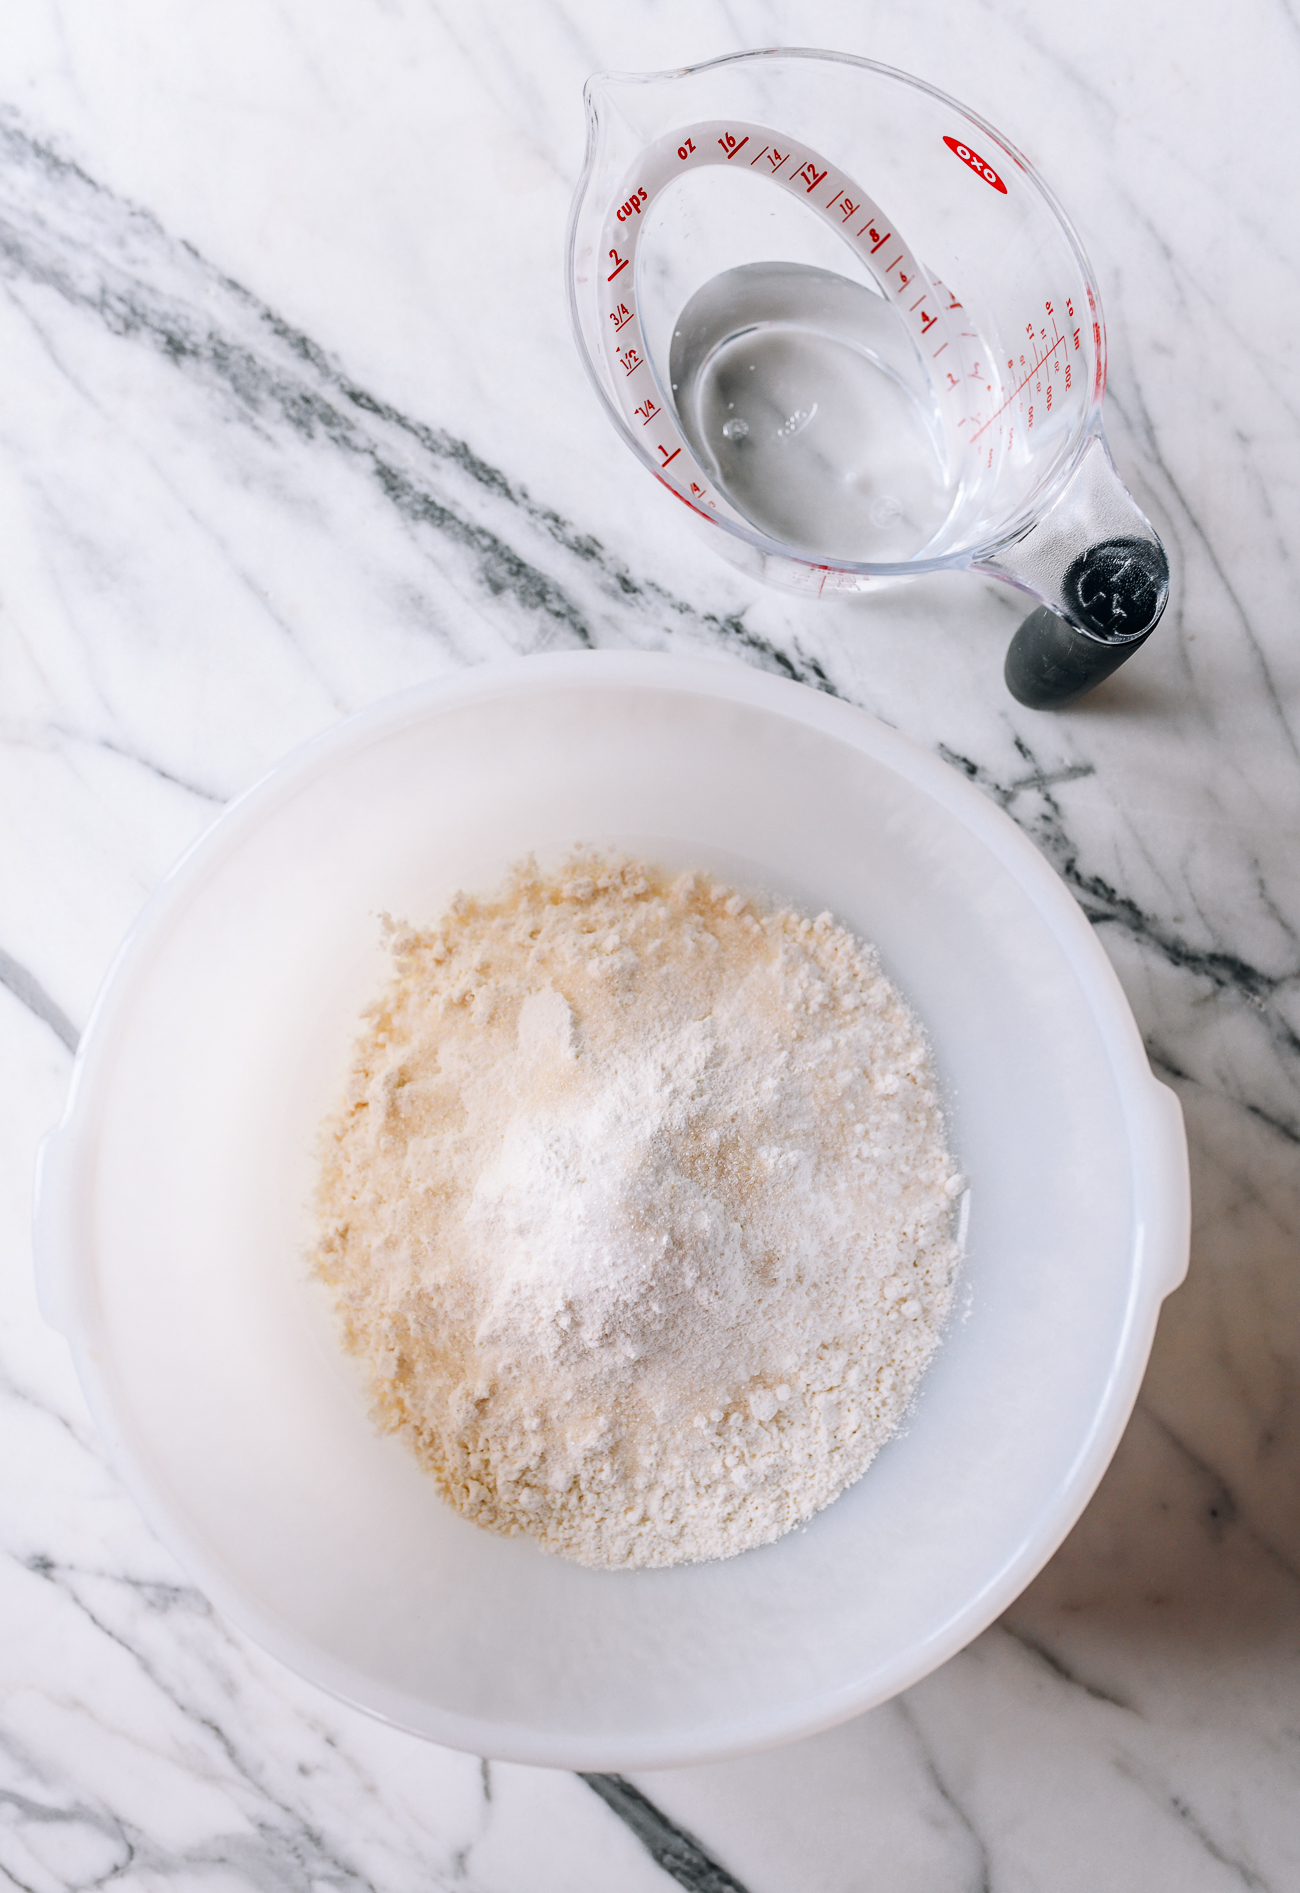
Pour in the tepid water and work it into the flour gradually with chopsticks or a rubber spatula.
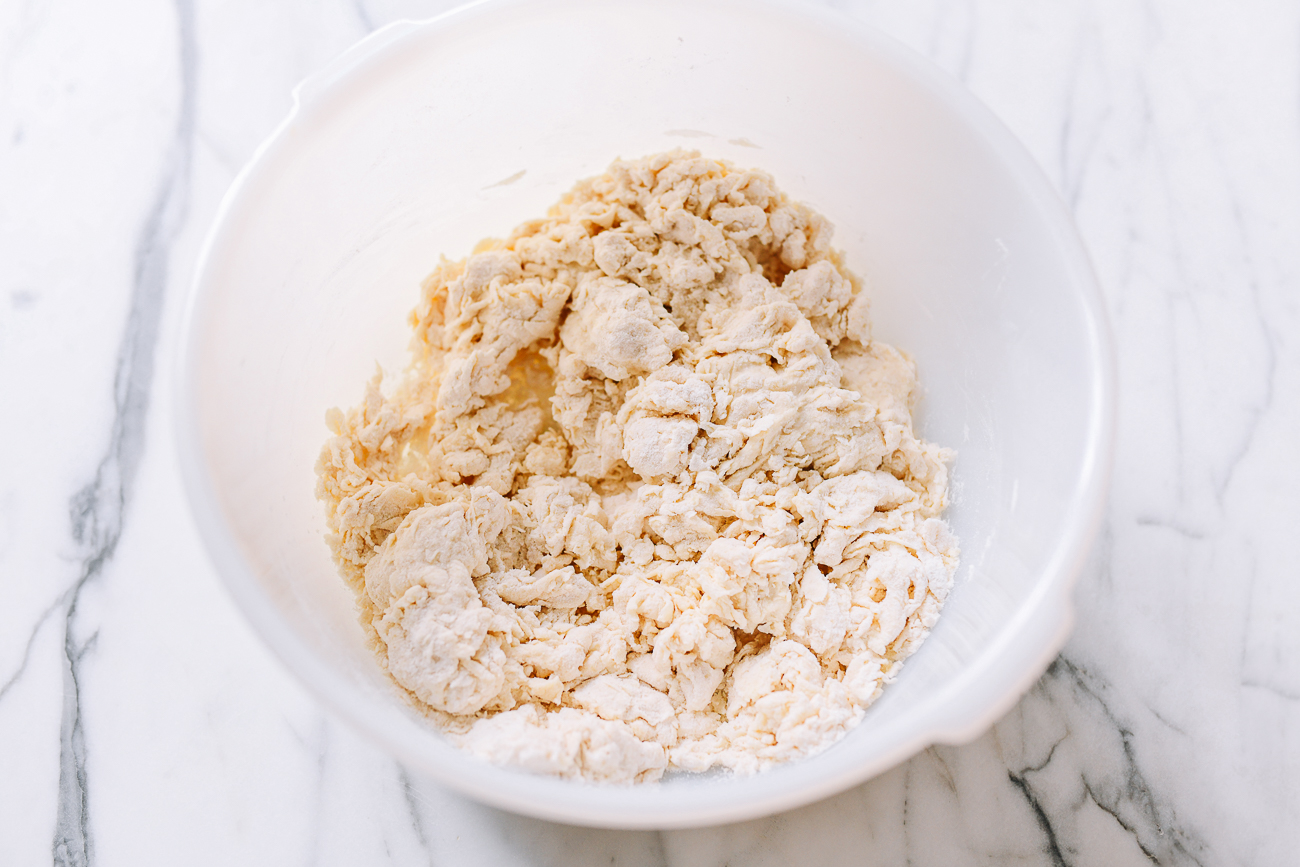
The dough will be sticky and slightly wet, but still workable. Do your best not to add more flour to the dough from this point on!
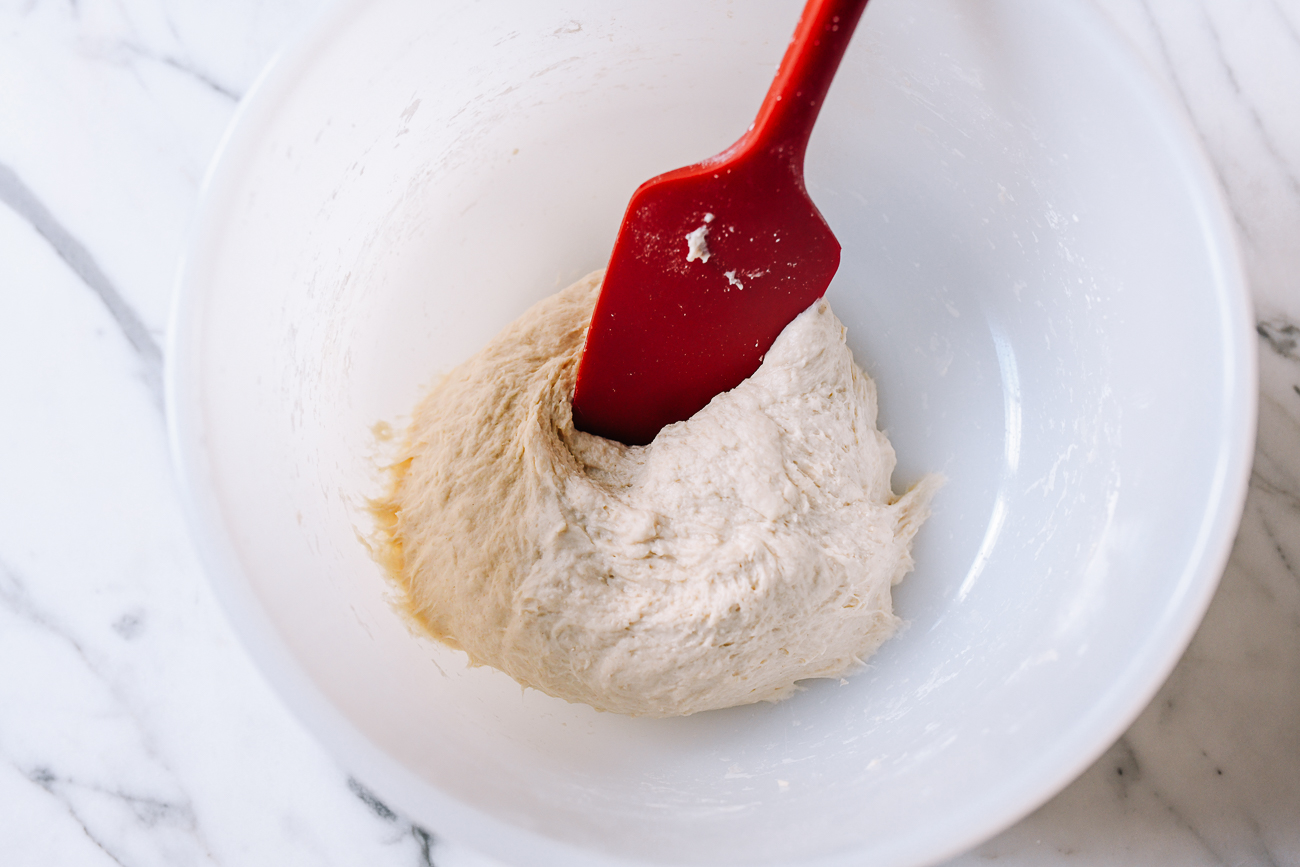
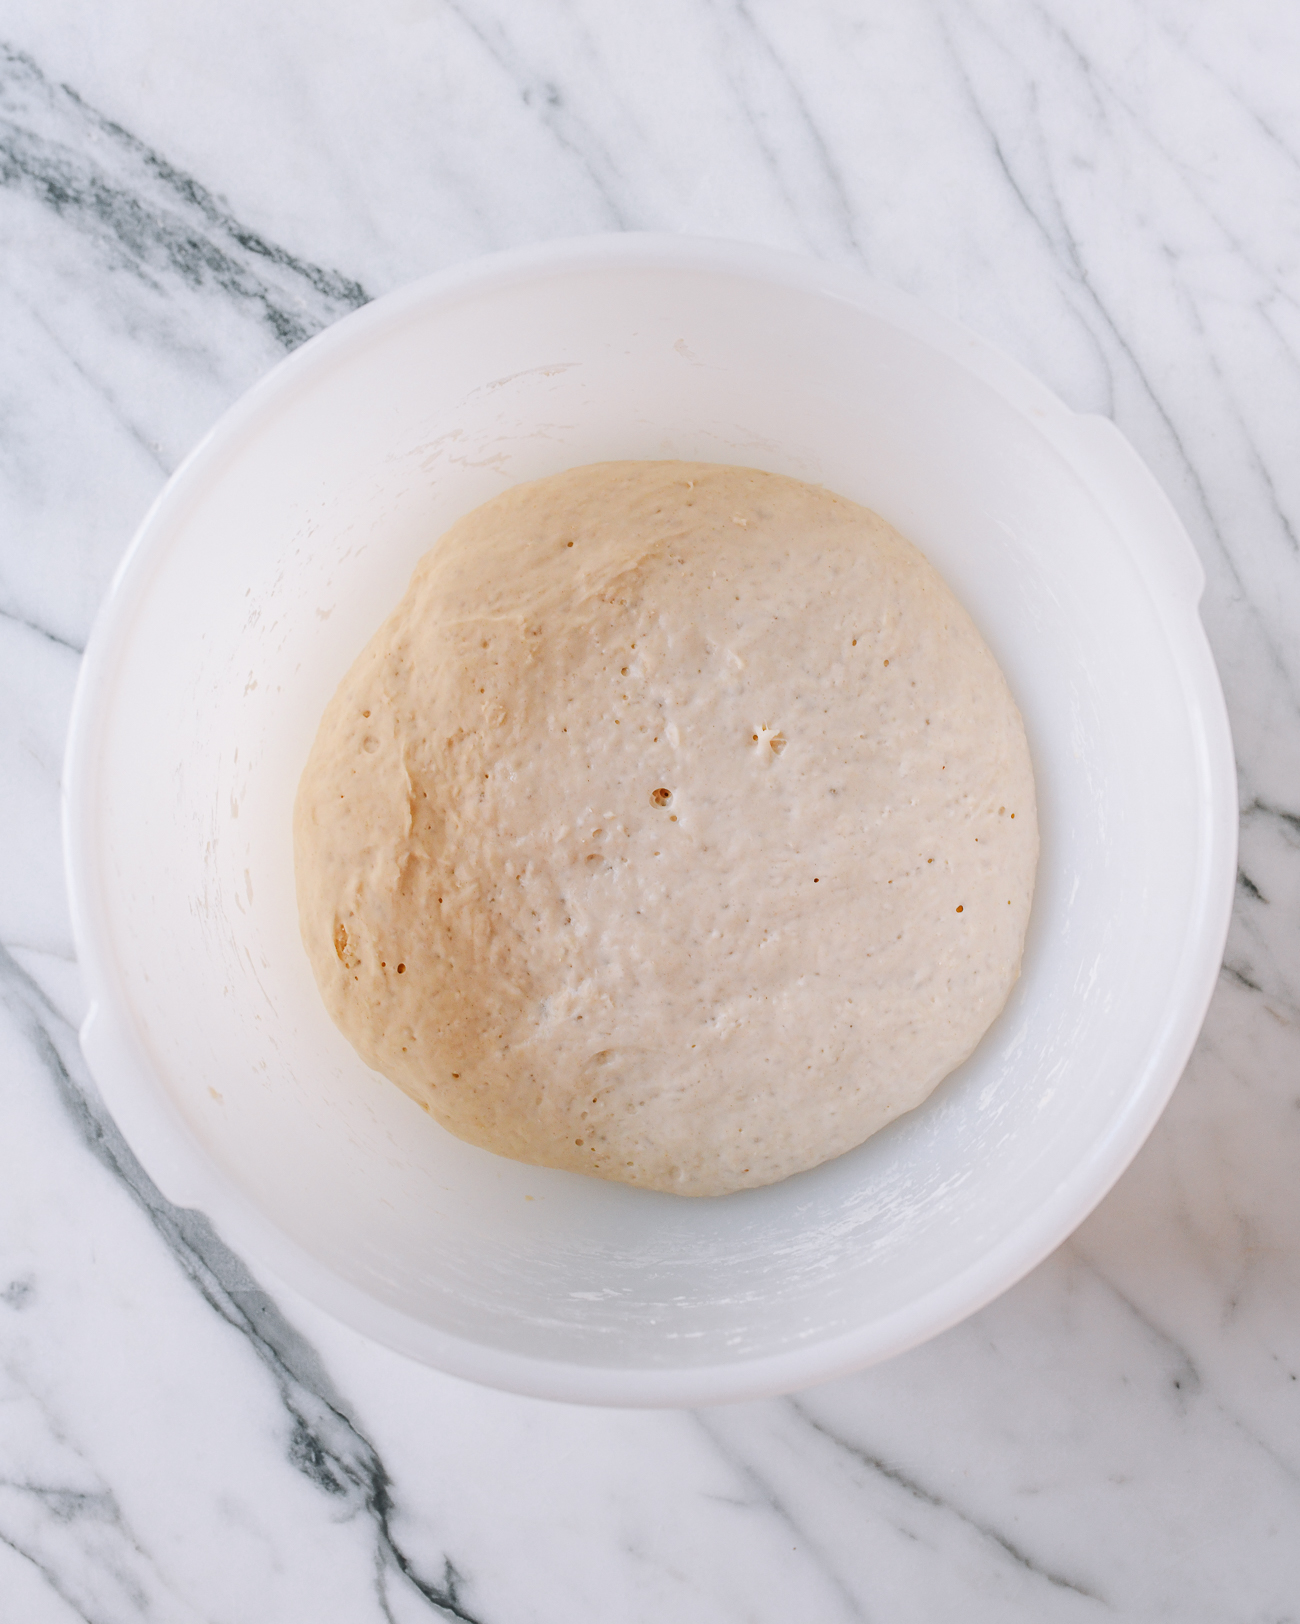
Knead the dough until it forms a soft ball.
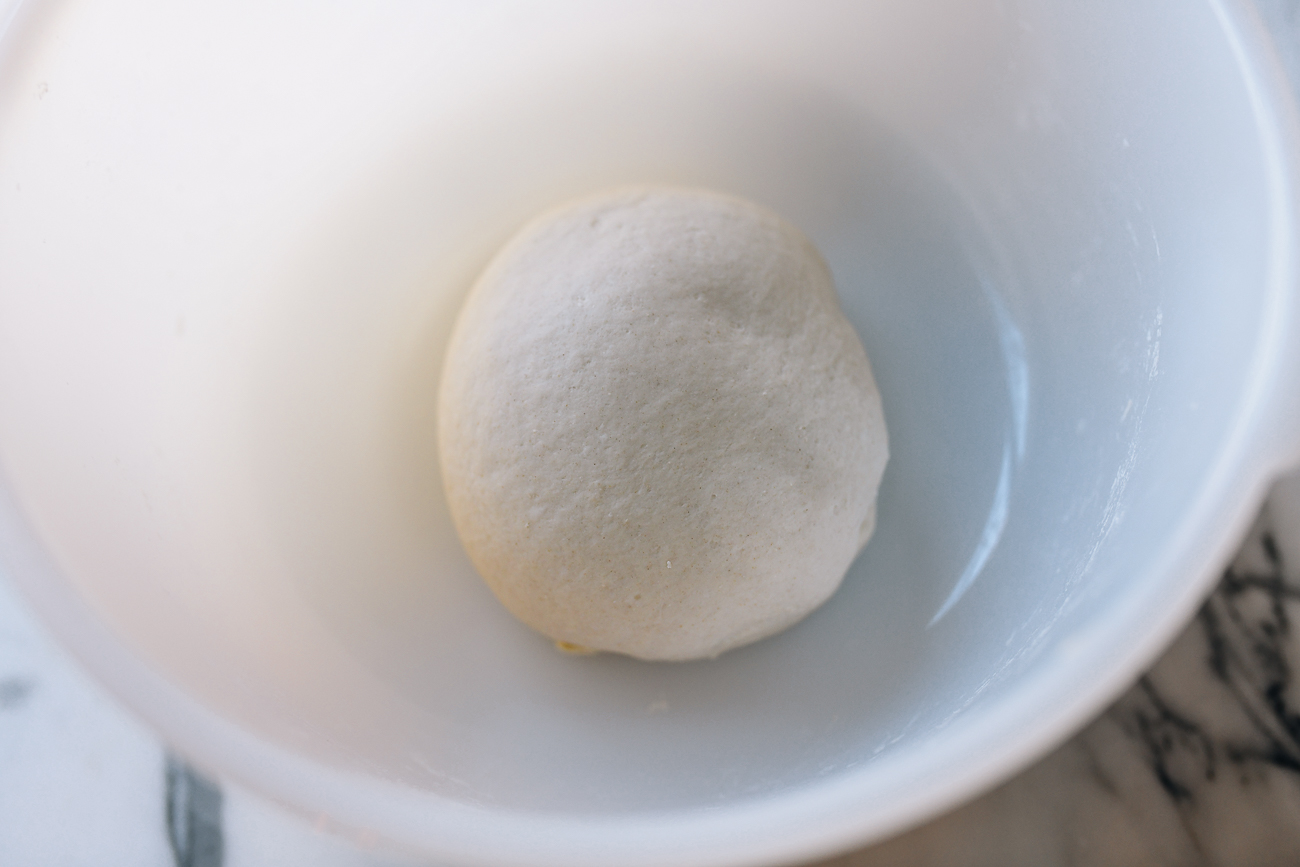
Cover the mixing bowl with a damp kitchen towel and proof in a warm spot until the dough triples in size, 60-90 minutes. I proof my dough inside my microwave, with a large mug of just-boiled water next to it and the microwave door closed.
After proofing, add the sea salt, white pepper, and ground Sichuan peppercorns (or five spice powder).
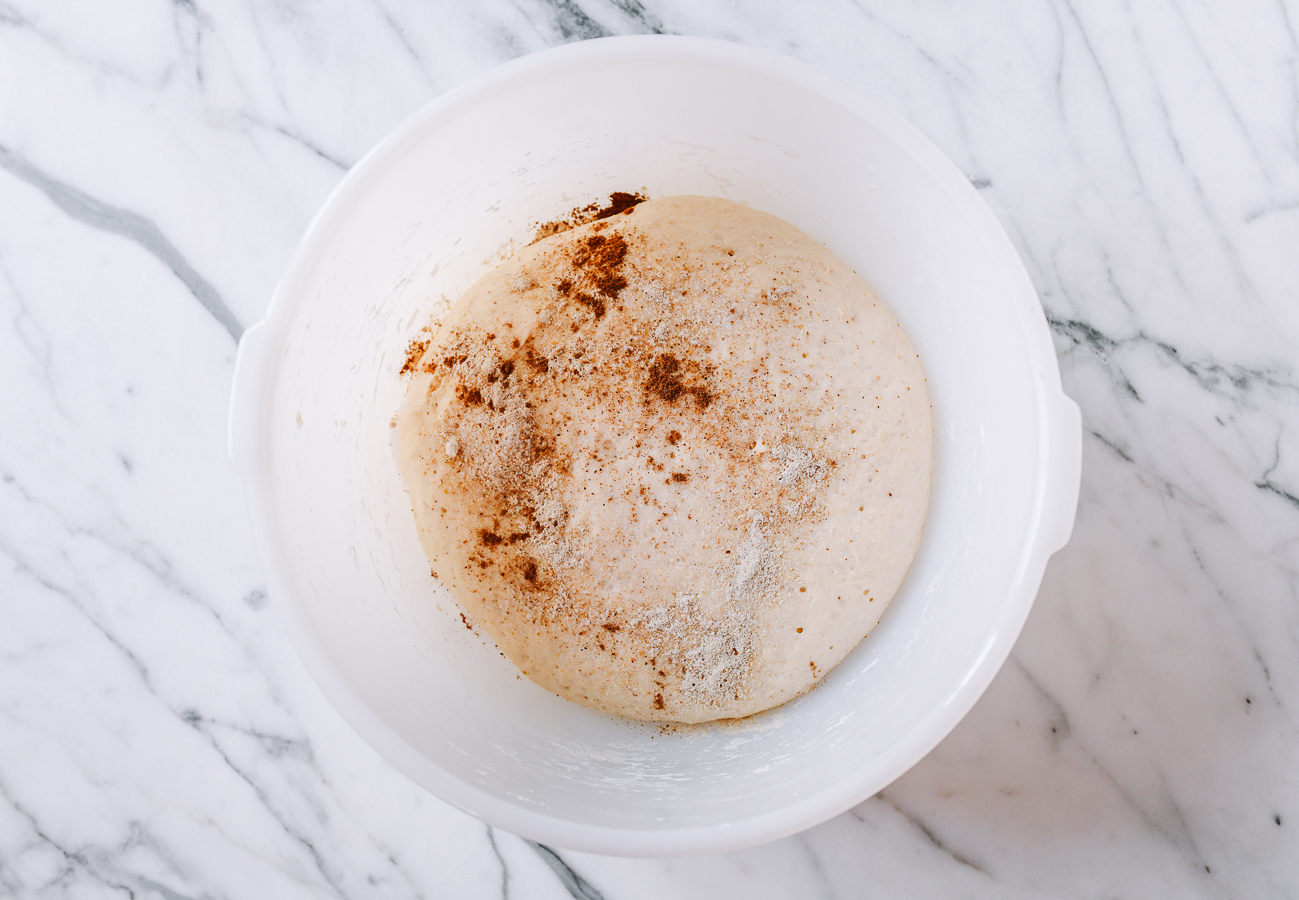
Knead for another 5 minutes to combine. If the stickiness of the dough makes it difficult to work with, oil your hands rather than using additional flour.
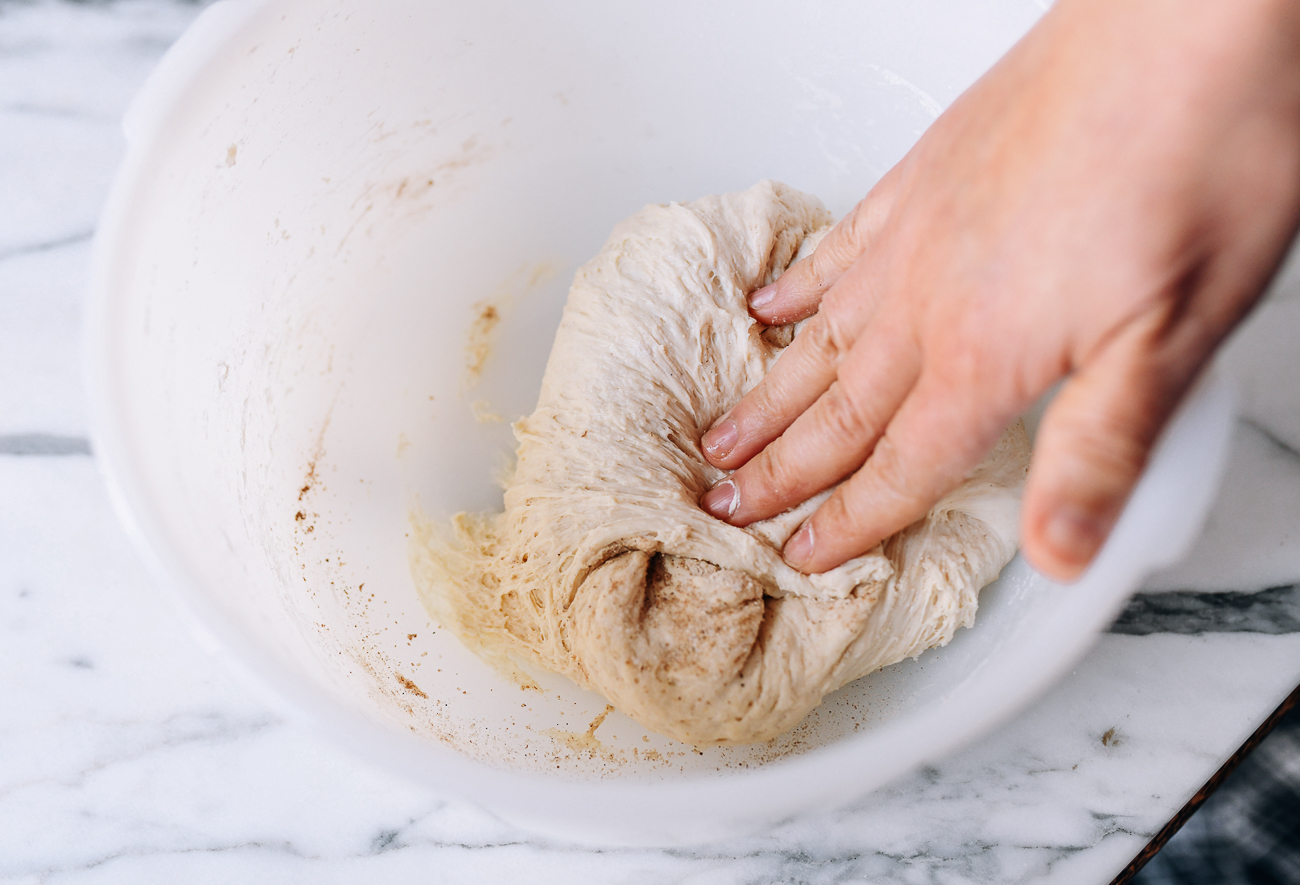
Cover the dough with the towel again, and let it rest on the counter for another 15 minutes. At this point, you can very finely chop the scallions (they must be small to distribute evenly throughout the pancake and release more flavor).

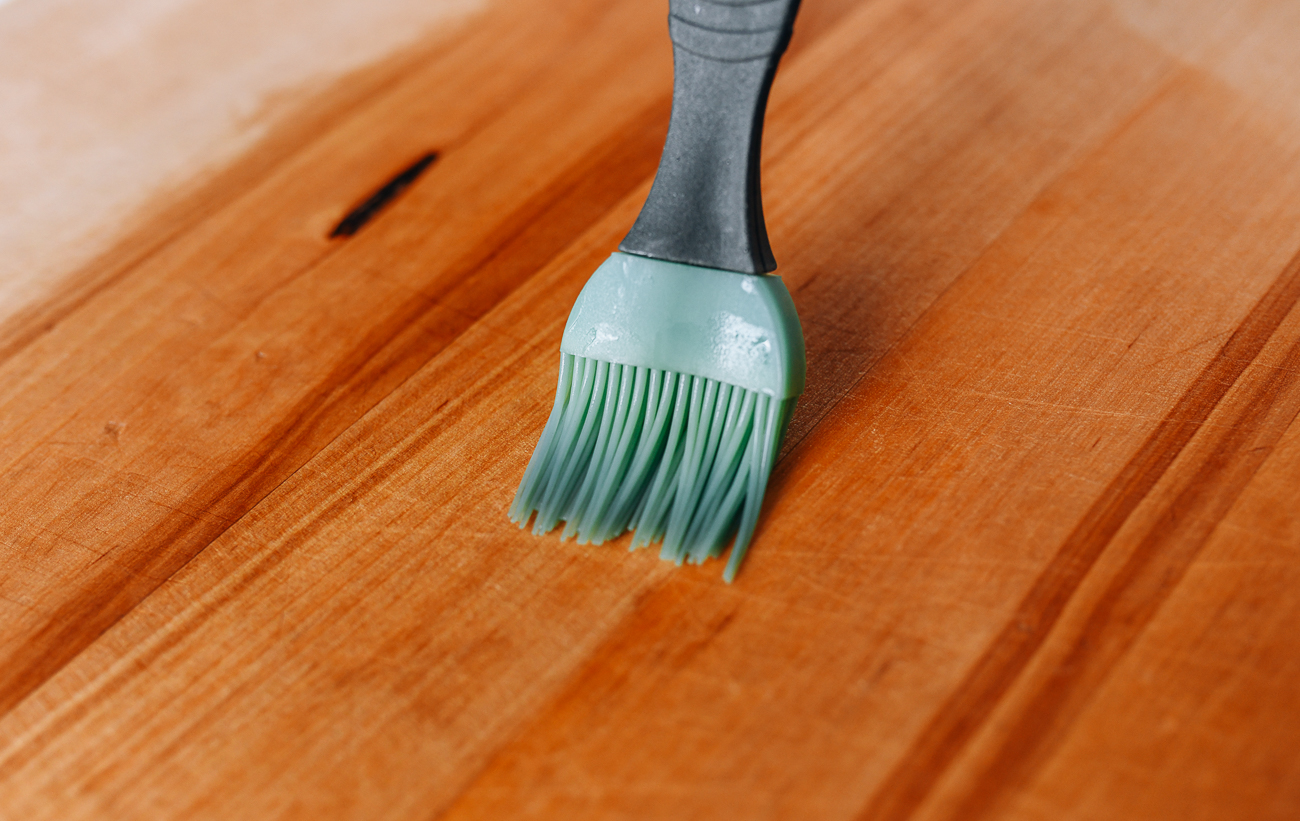
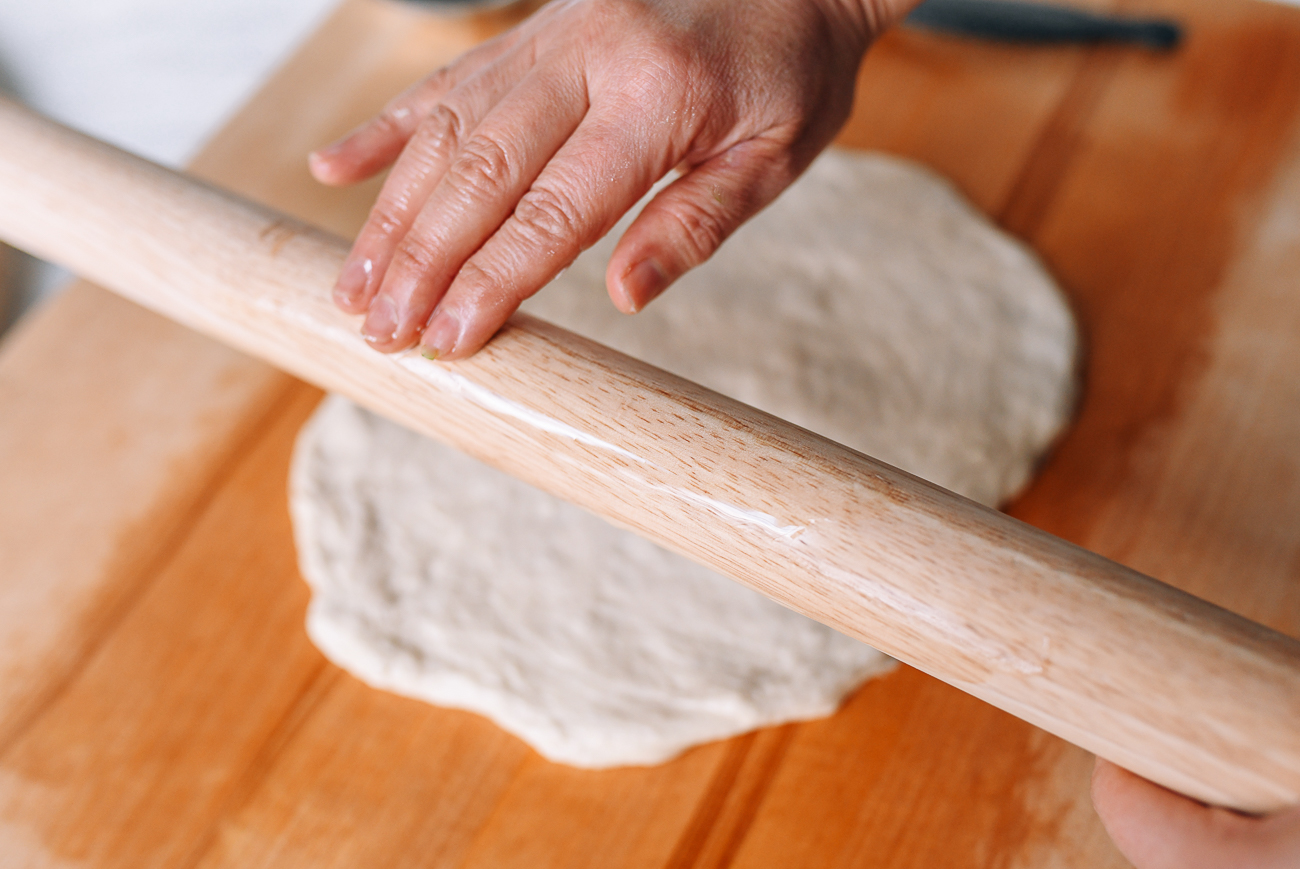
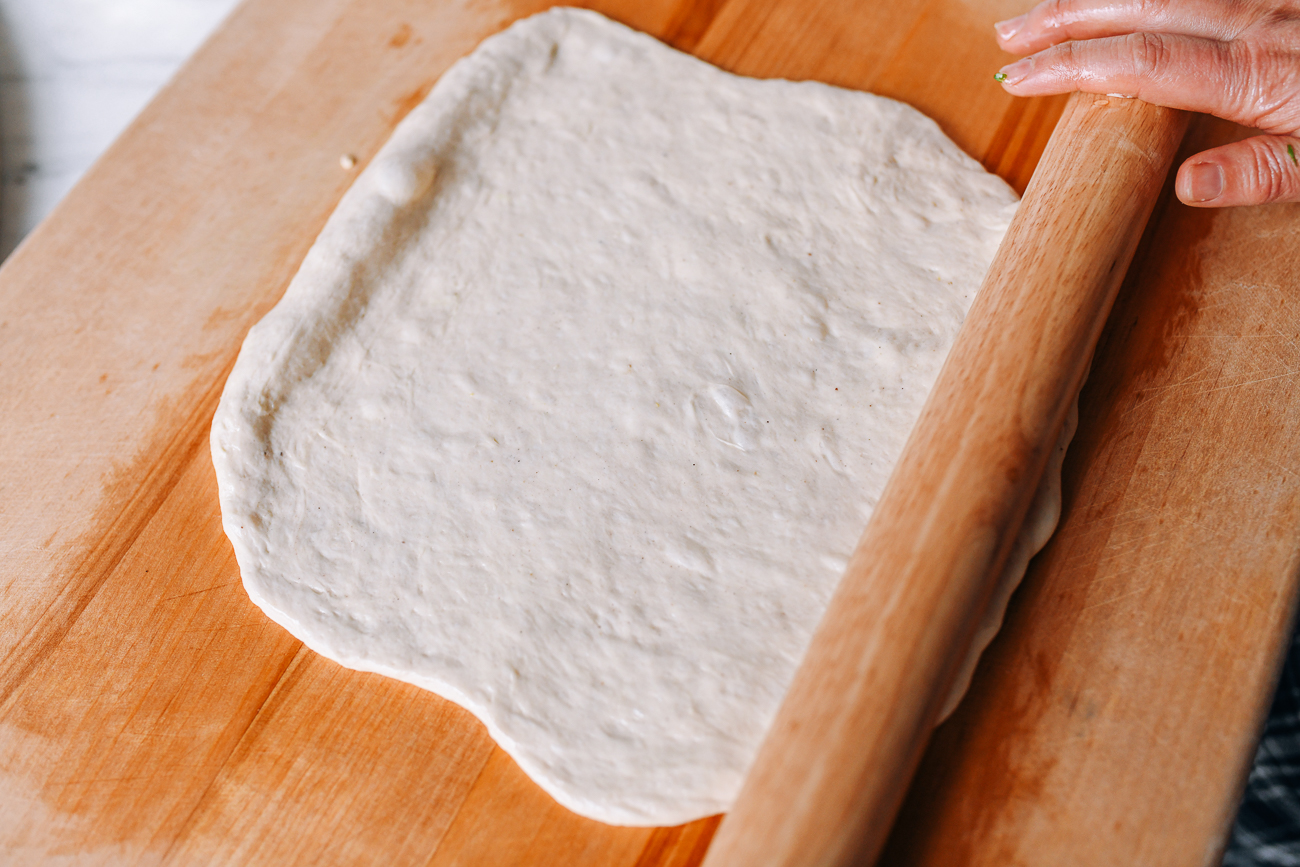
Knead the dough one more time for 2 minutes to get rid of any air bubbles. Brush a clean, flat work surface (such as a clean counter or cutting board) lightly with oil.
Using an oiled rolling pin, roll the dough into a thin rectangle a little less than ¼-inch (0.6 cm) thick.
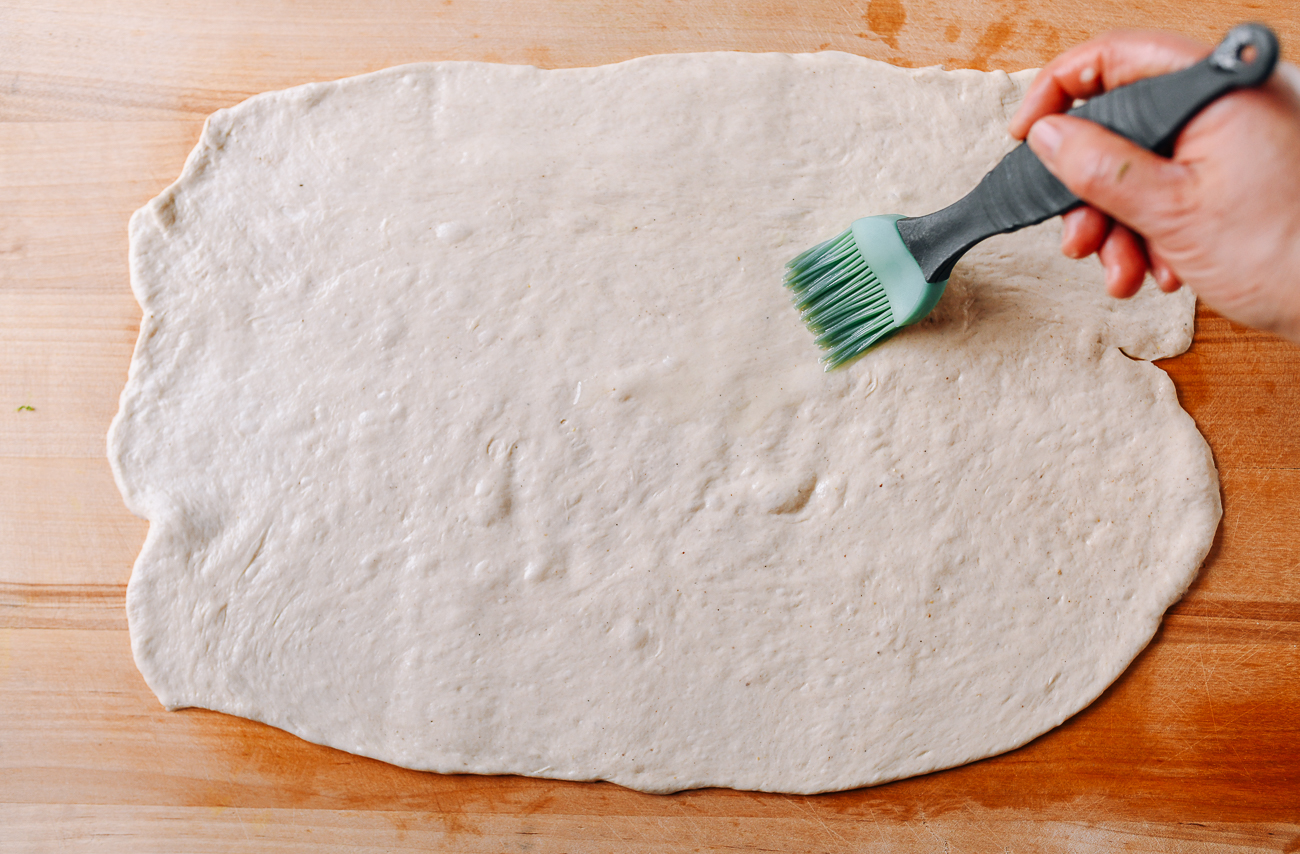
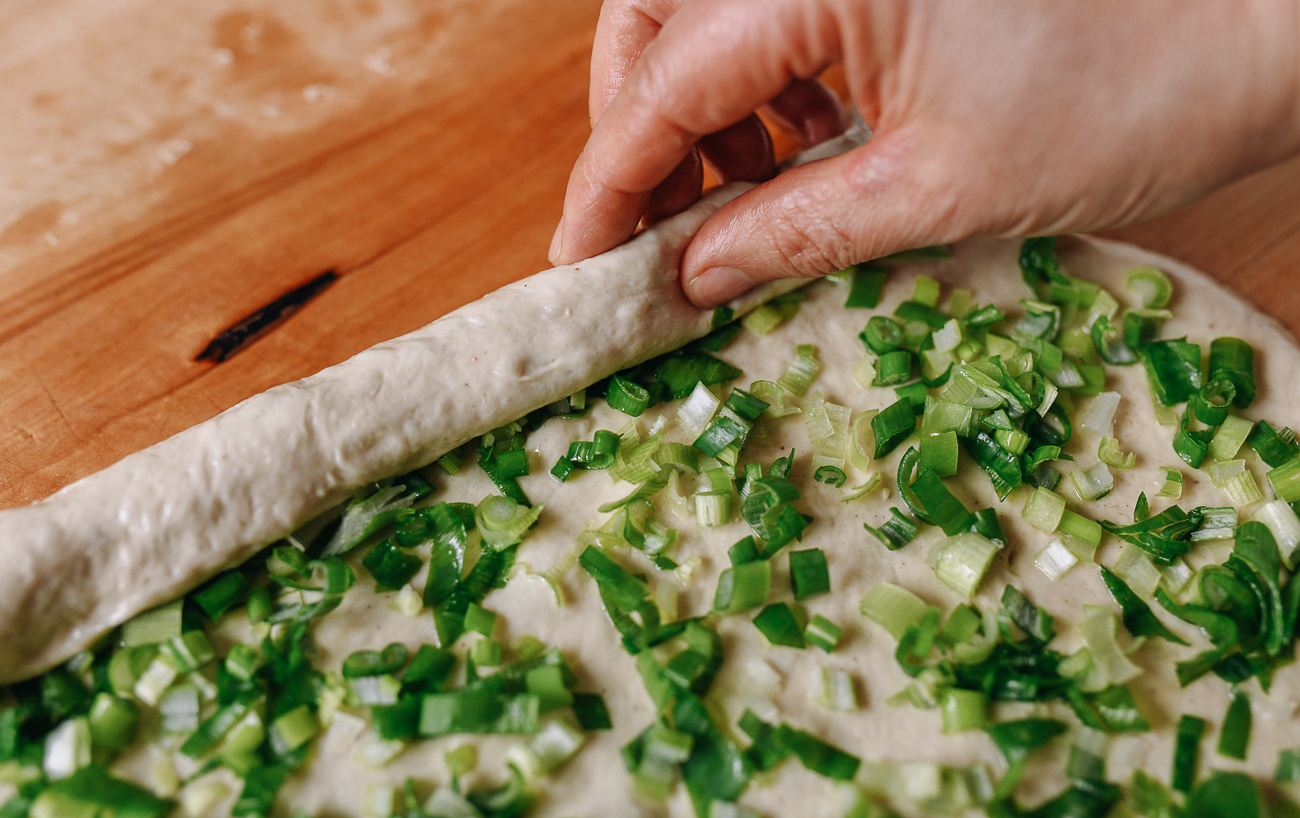
Brush the rolled dough with a thin layer of oil.
Evenly cover it with the scallions.
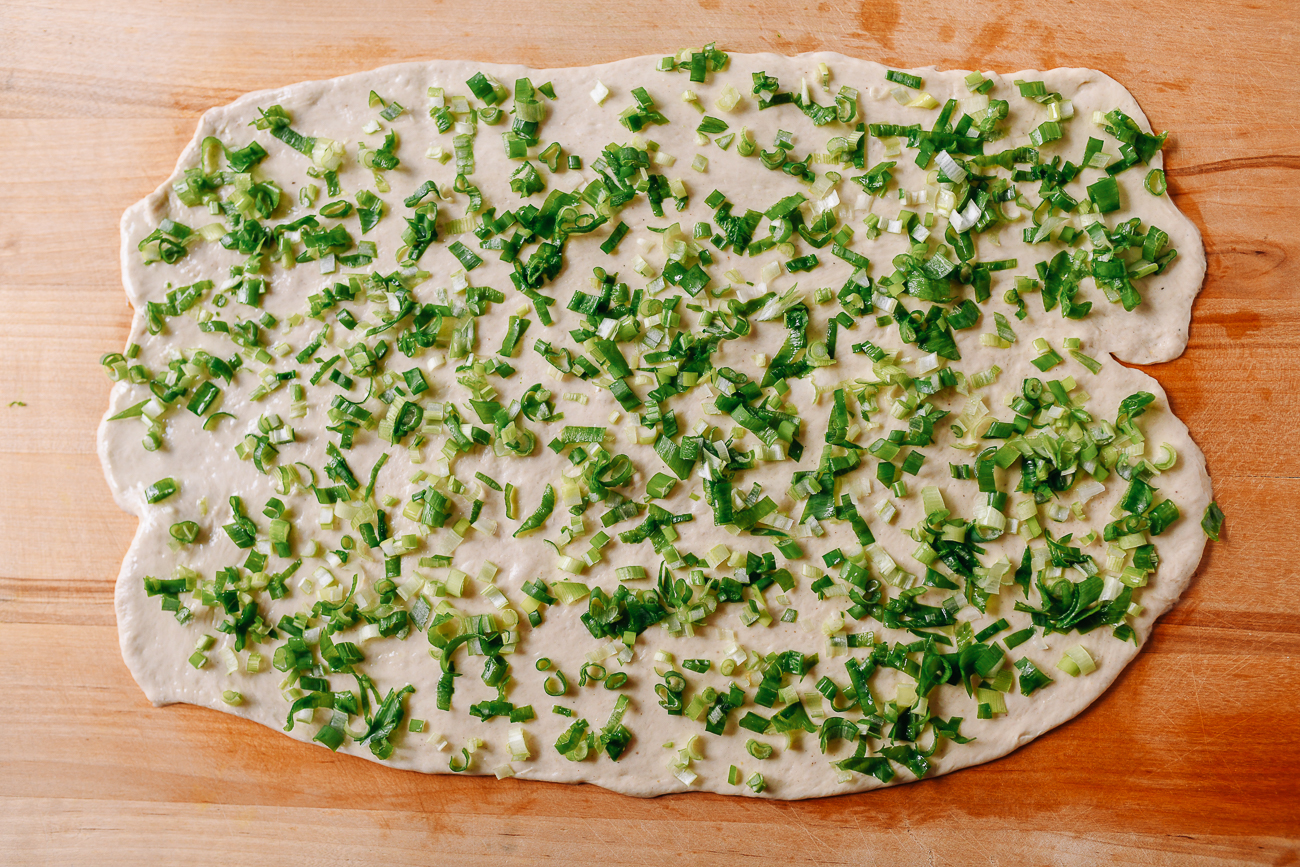
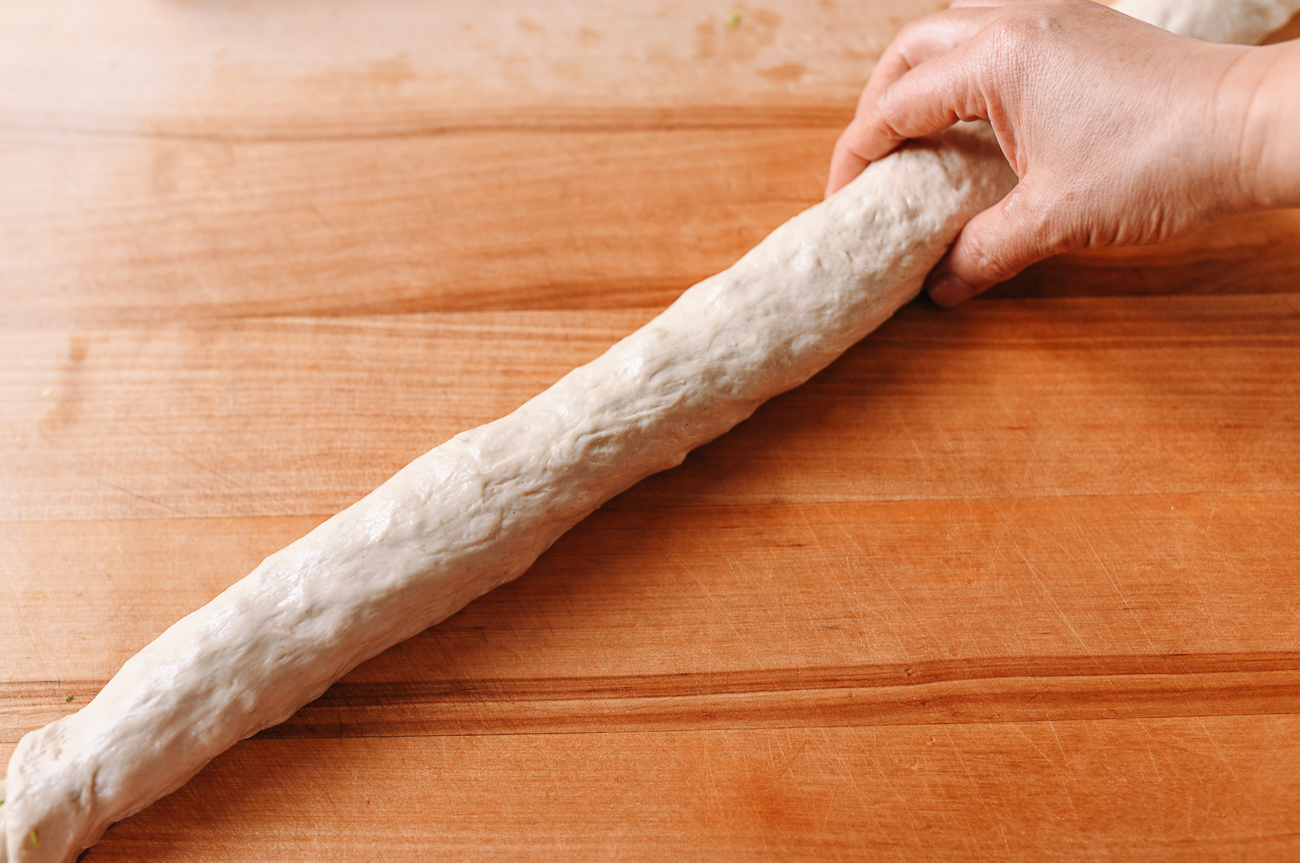
Roll it up lengthwise into a tight log.
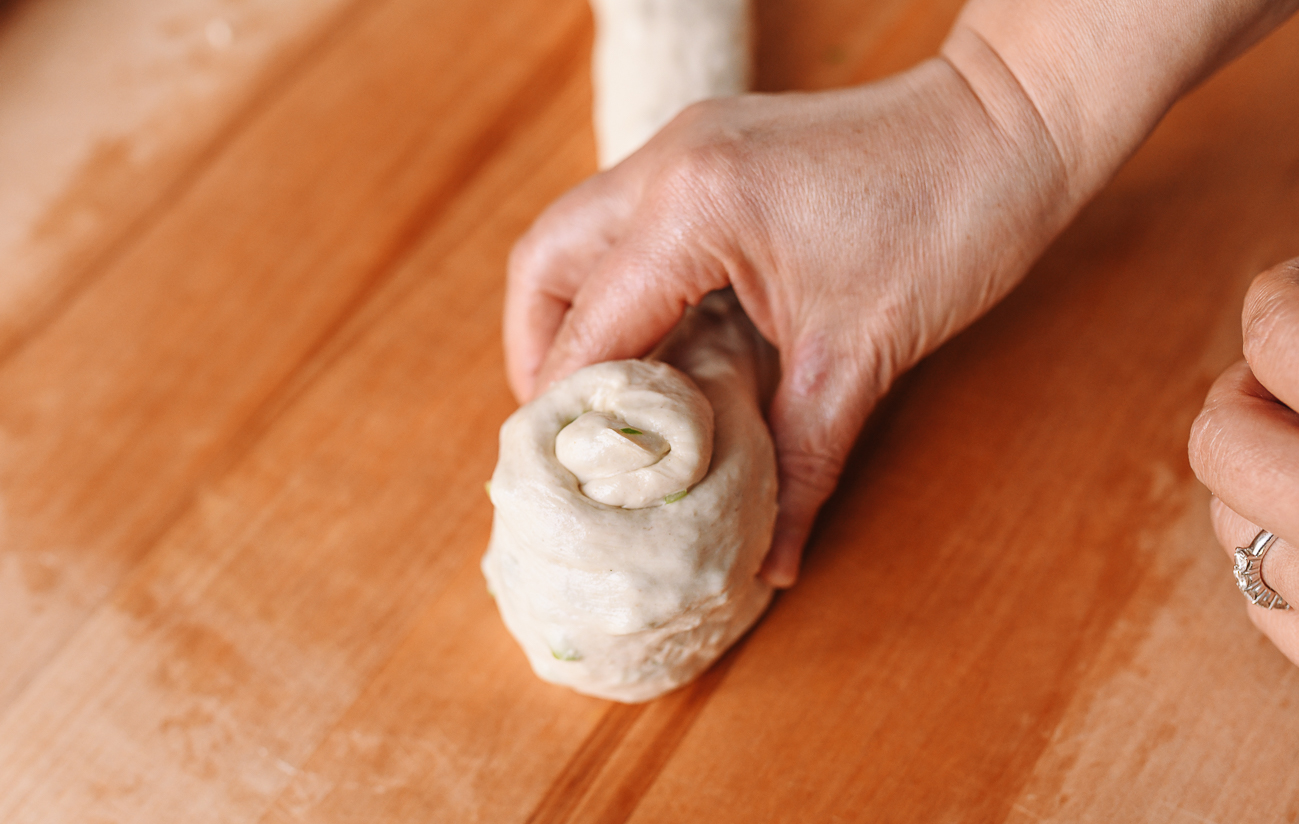
Roll the log into a thinner tube (this also helps reduce air pockets).
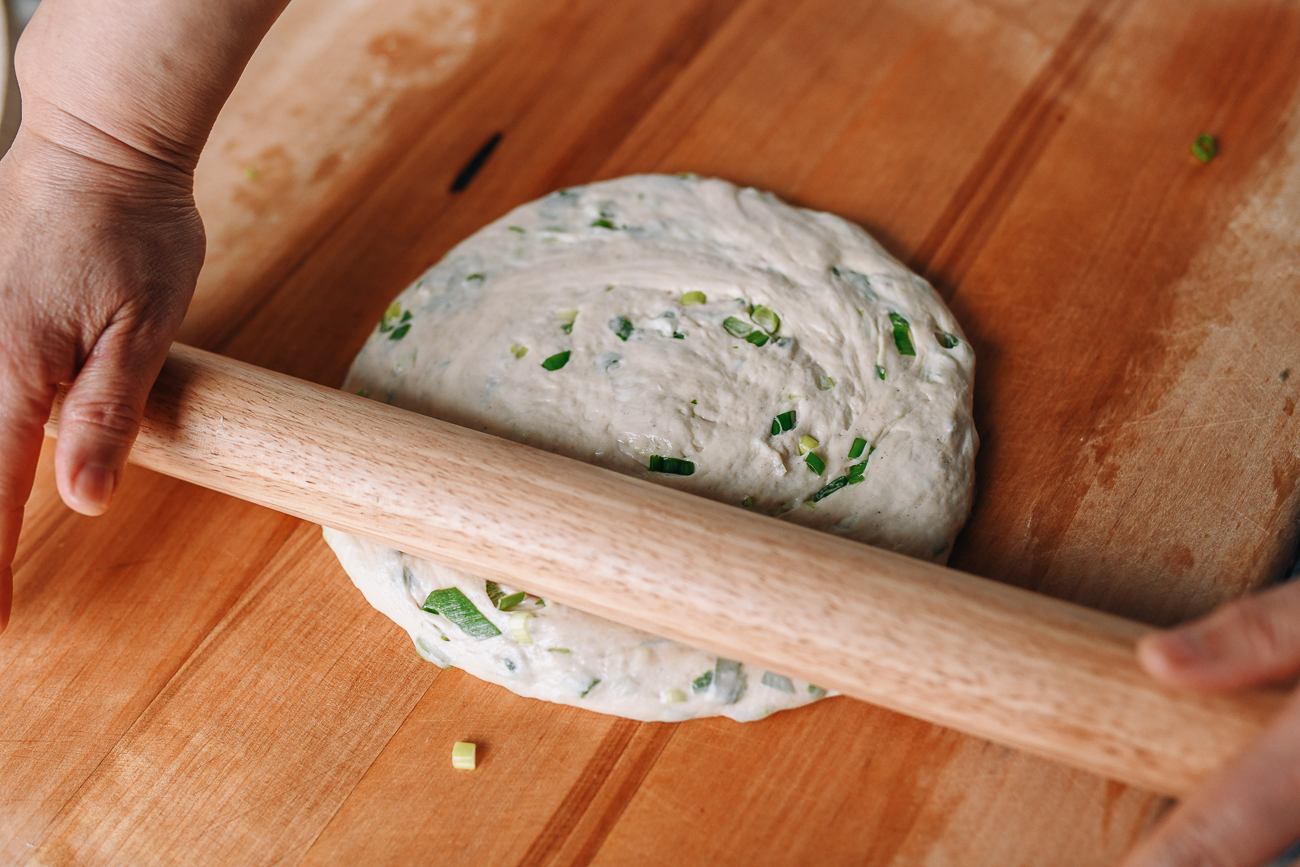
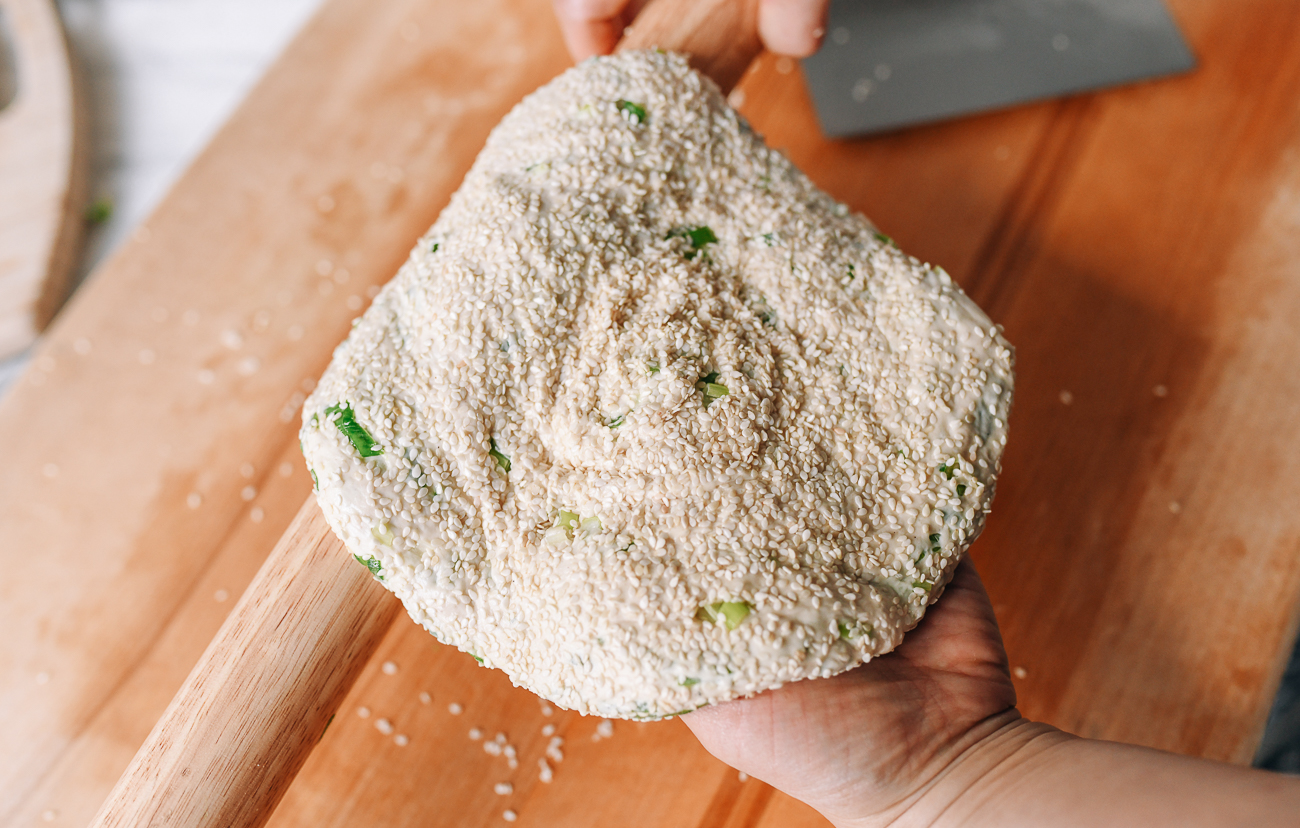
And roll the tube into a spiral to form a thick disc. Tuck the end underneath.
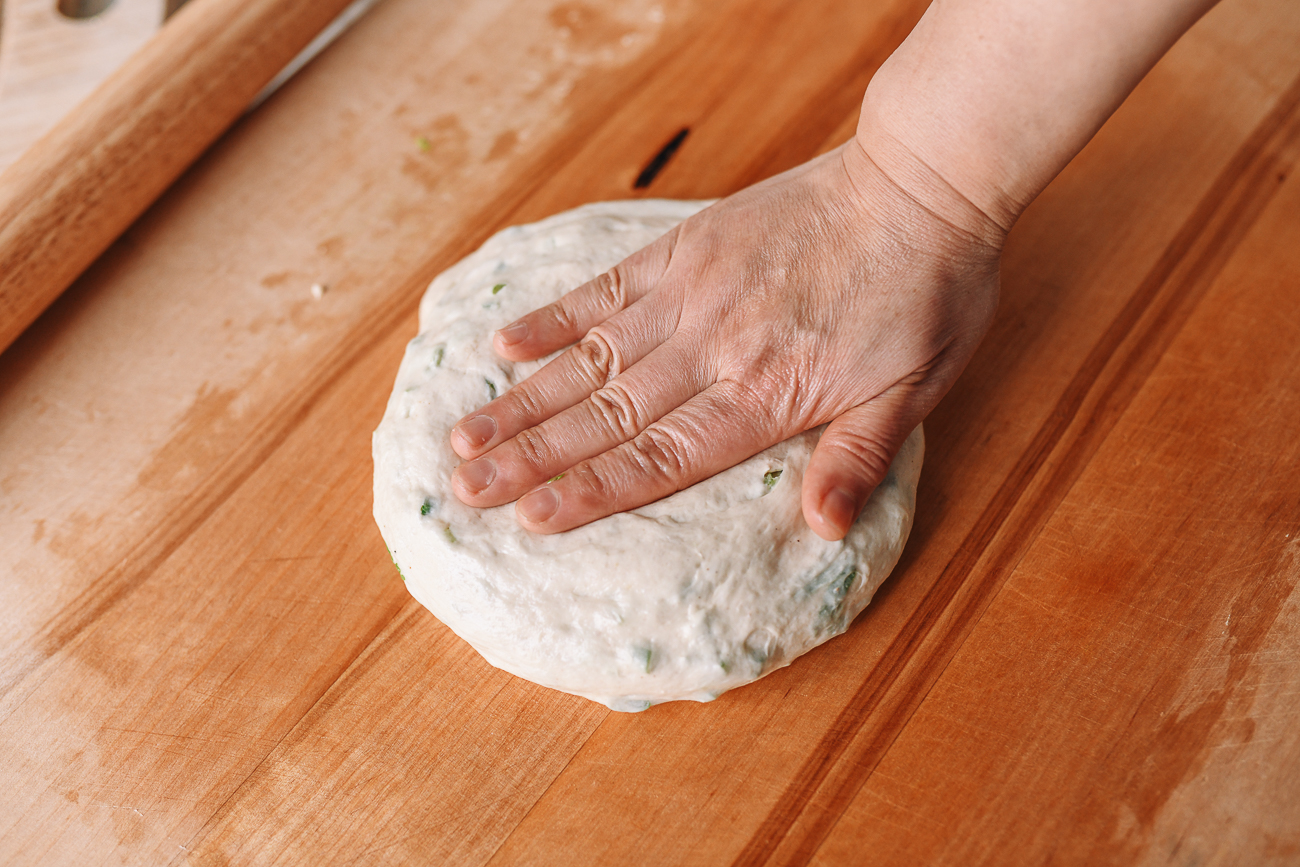
Use your hands and a rolling pin to press the disc down into a 10” circle.
Sprinkle both sides liberally with sesame seeds, making sure to cover the entire surface.
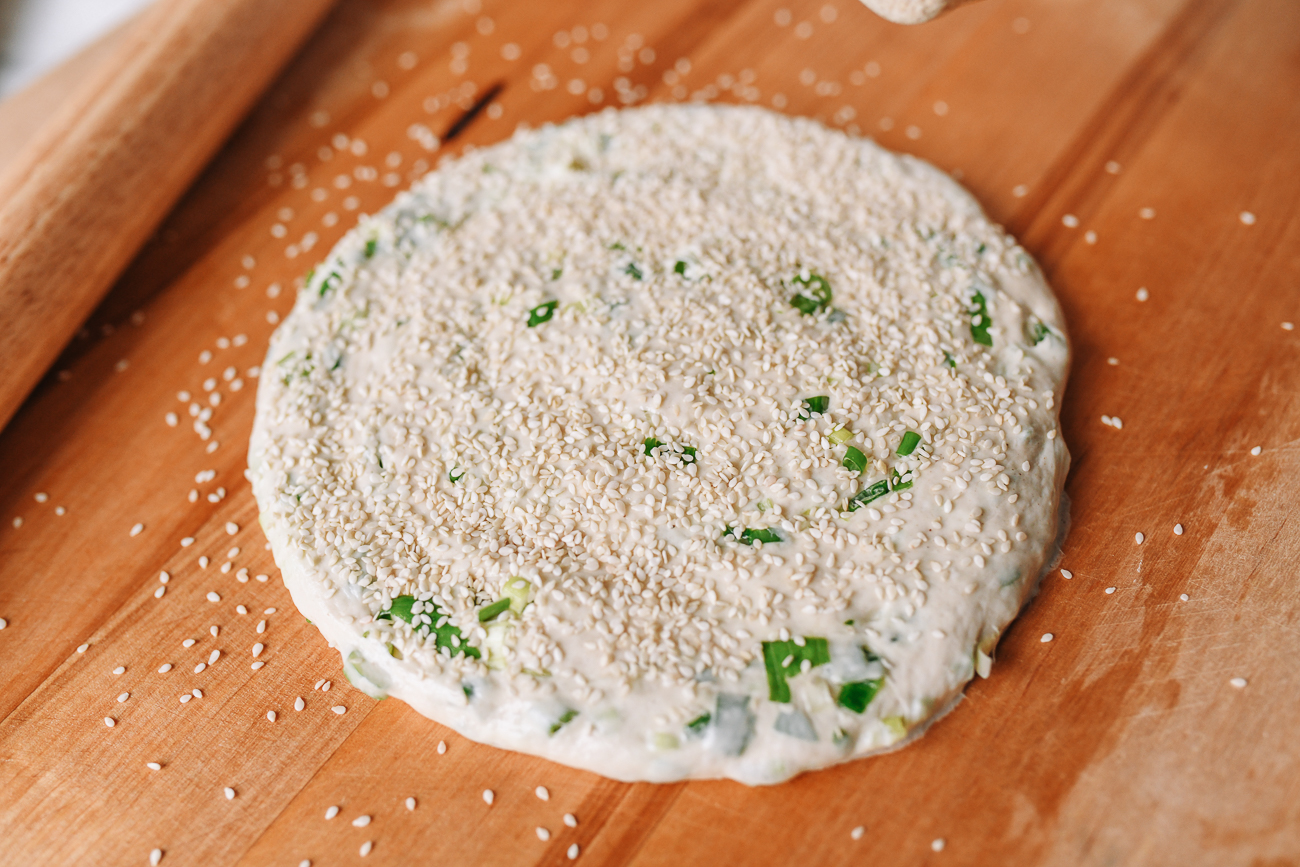
Press the sesame seeds into the dough with the palm of your hand.
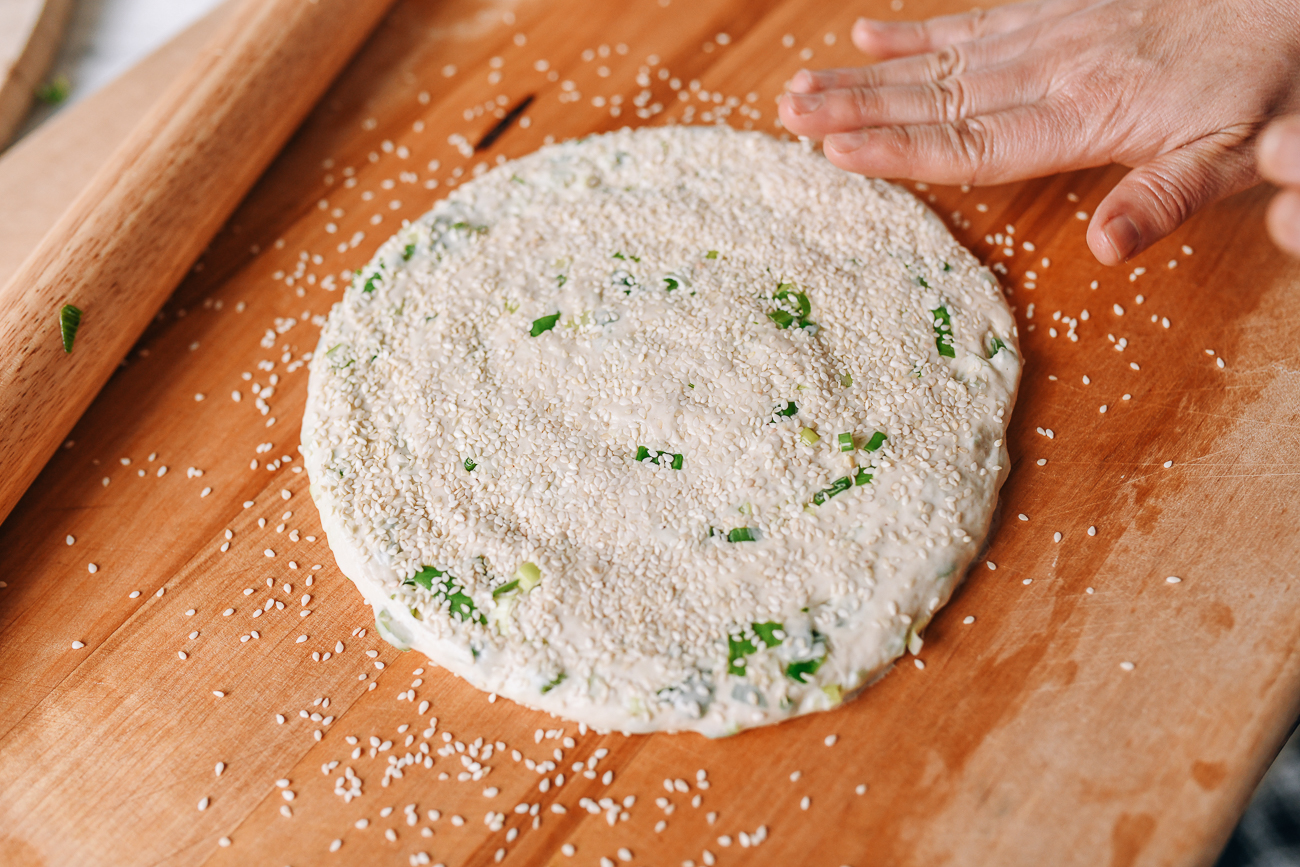
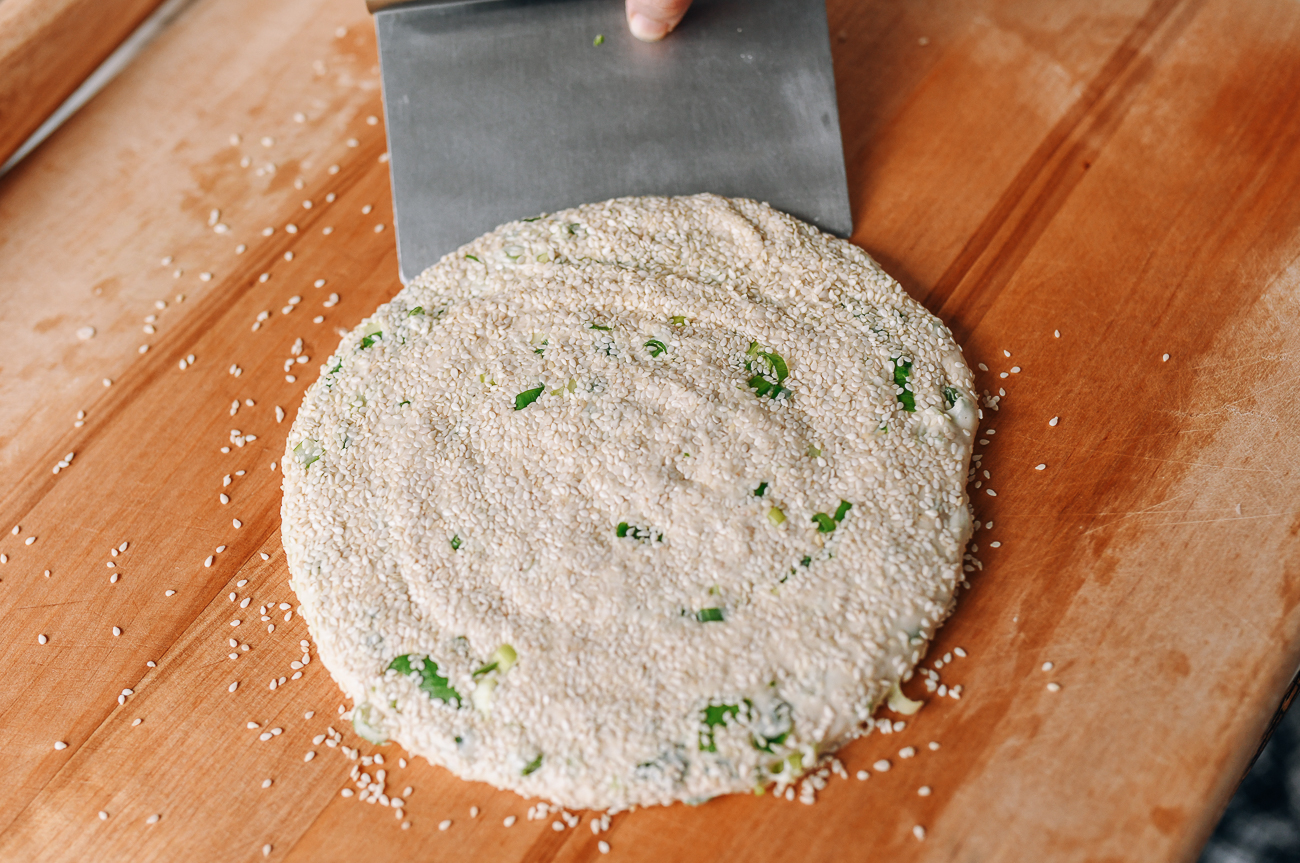
The dough circle will be very soft. Use a bench scraper or a large spatula to flip it before sprinkling the other side with sesame seeds.
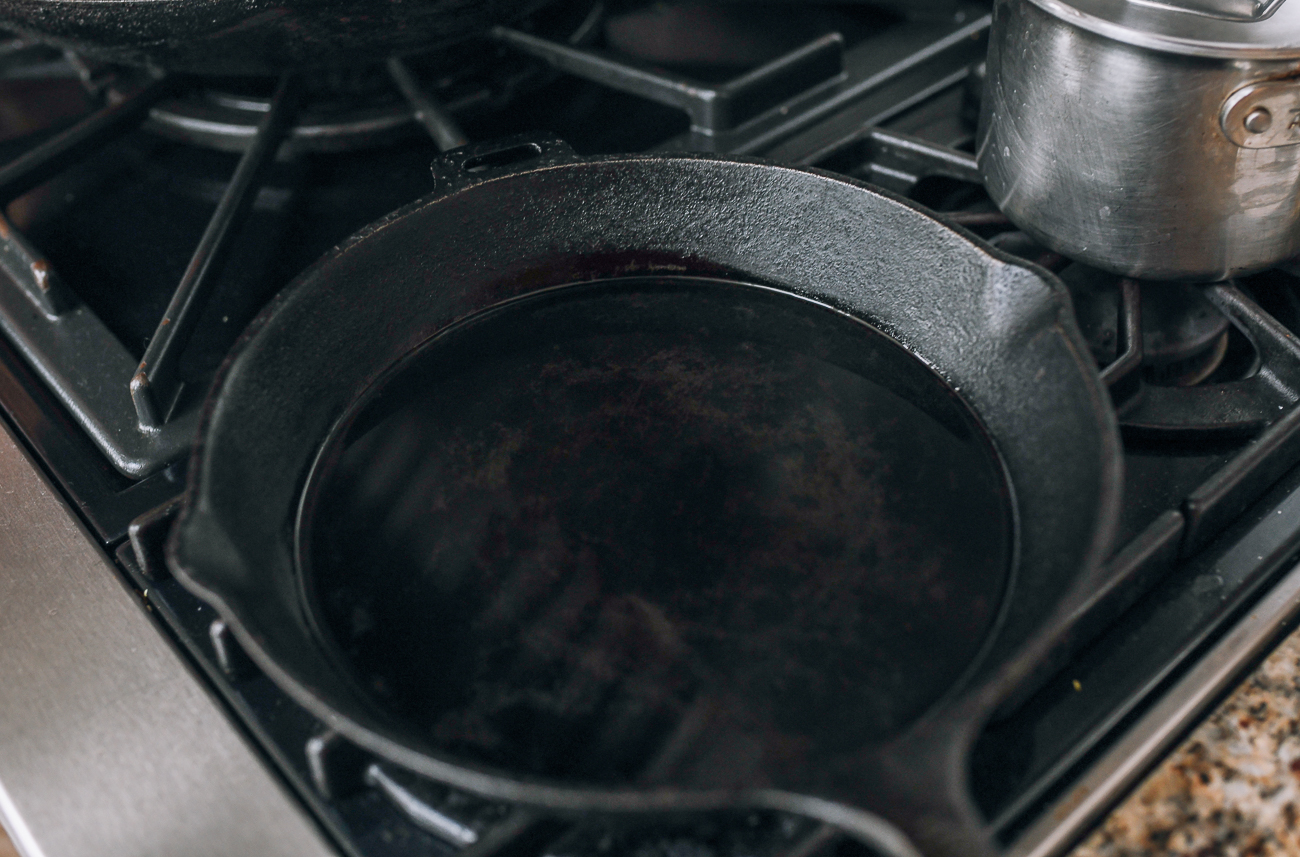
In a large flat bottomed non-stick or cast iron pan with a lid (I used a 12” cast iron pan), add 3 tablespoons of oil and spread it evenly across the pan’s surface.
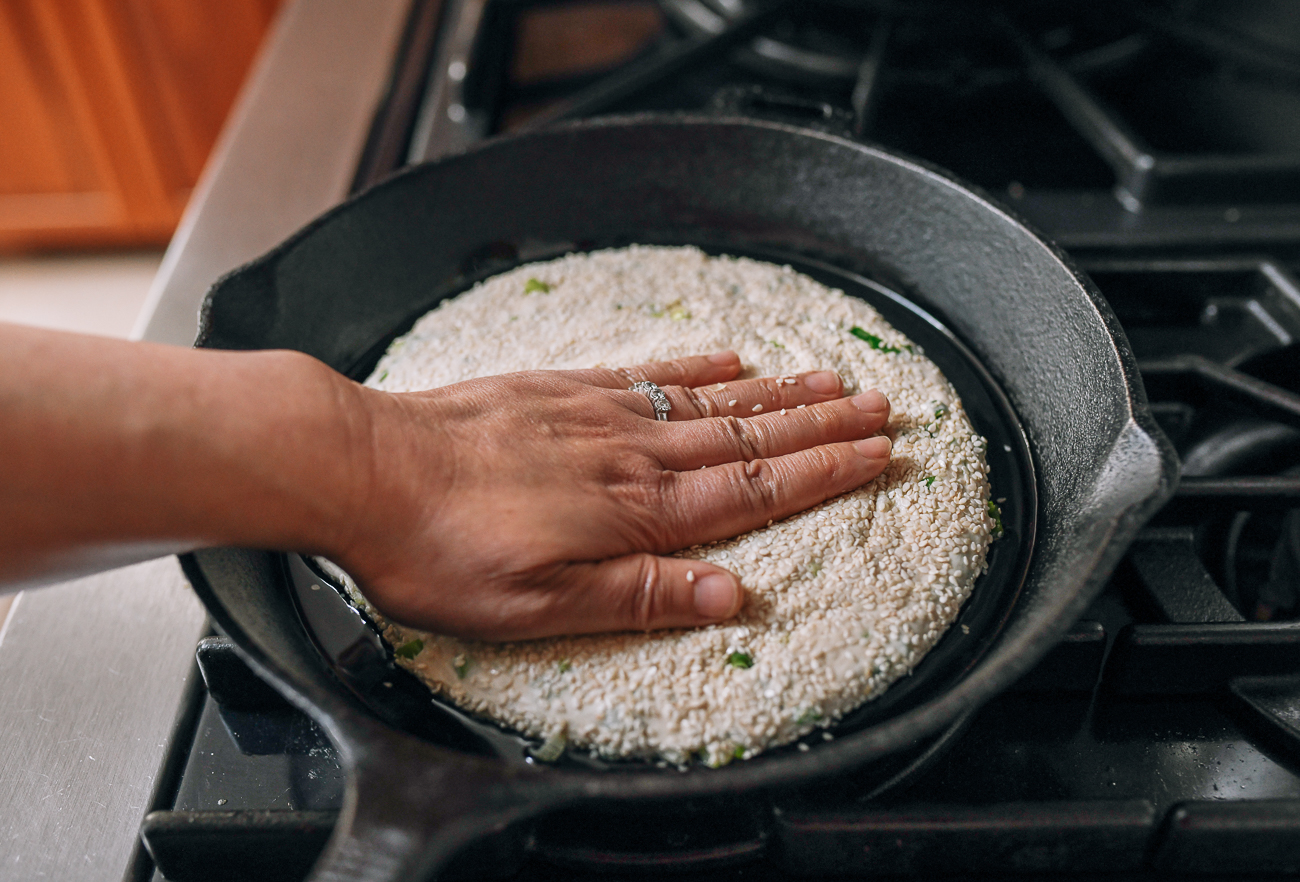
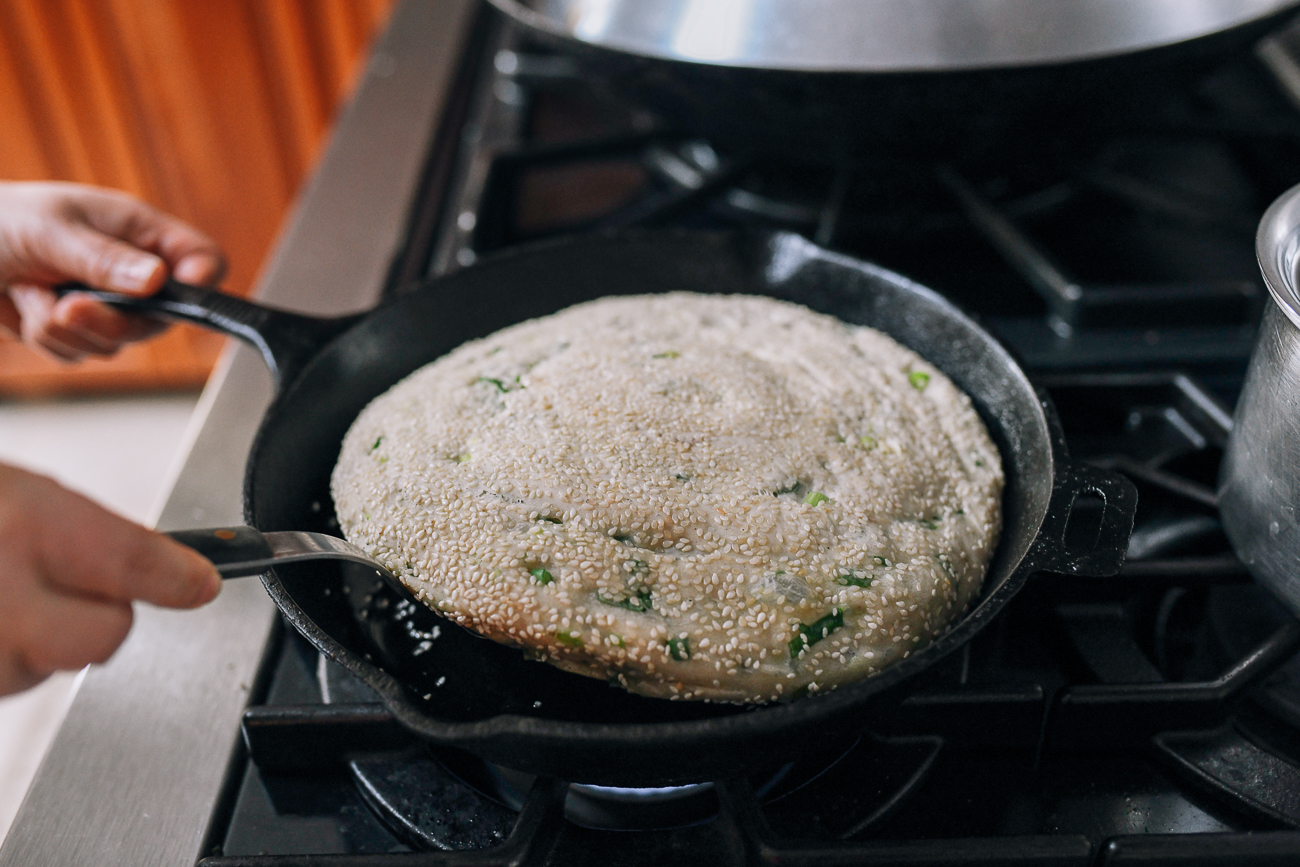
Place the dough circle into the oiled pan. (Lay it over your rolling pin to transfer it to the pan.)
Press the dough into the pan.
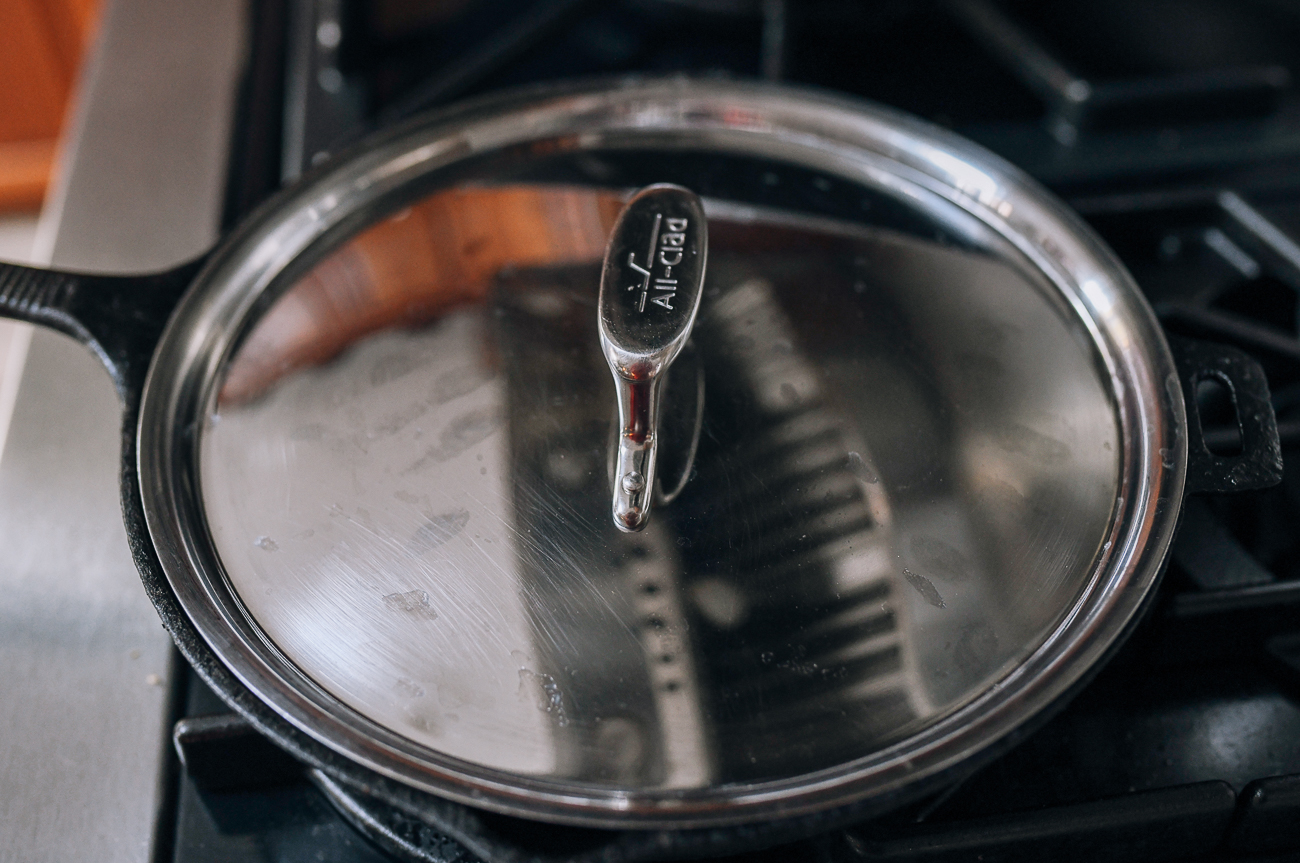
Cover and allow it to rest for another 20 minutes, without turning on the heat!
After the dough has rested, turn the heat on to medium, with the lid still on. Set a timer for 12 minutes.
After 12 minutes, open the lid and check the bottom of the pancake.
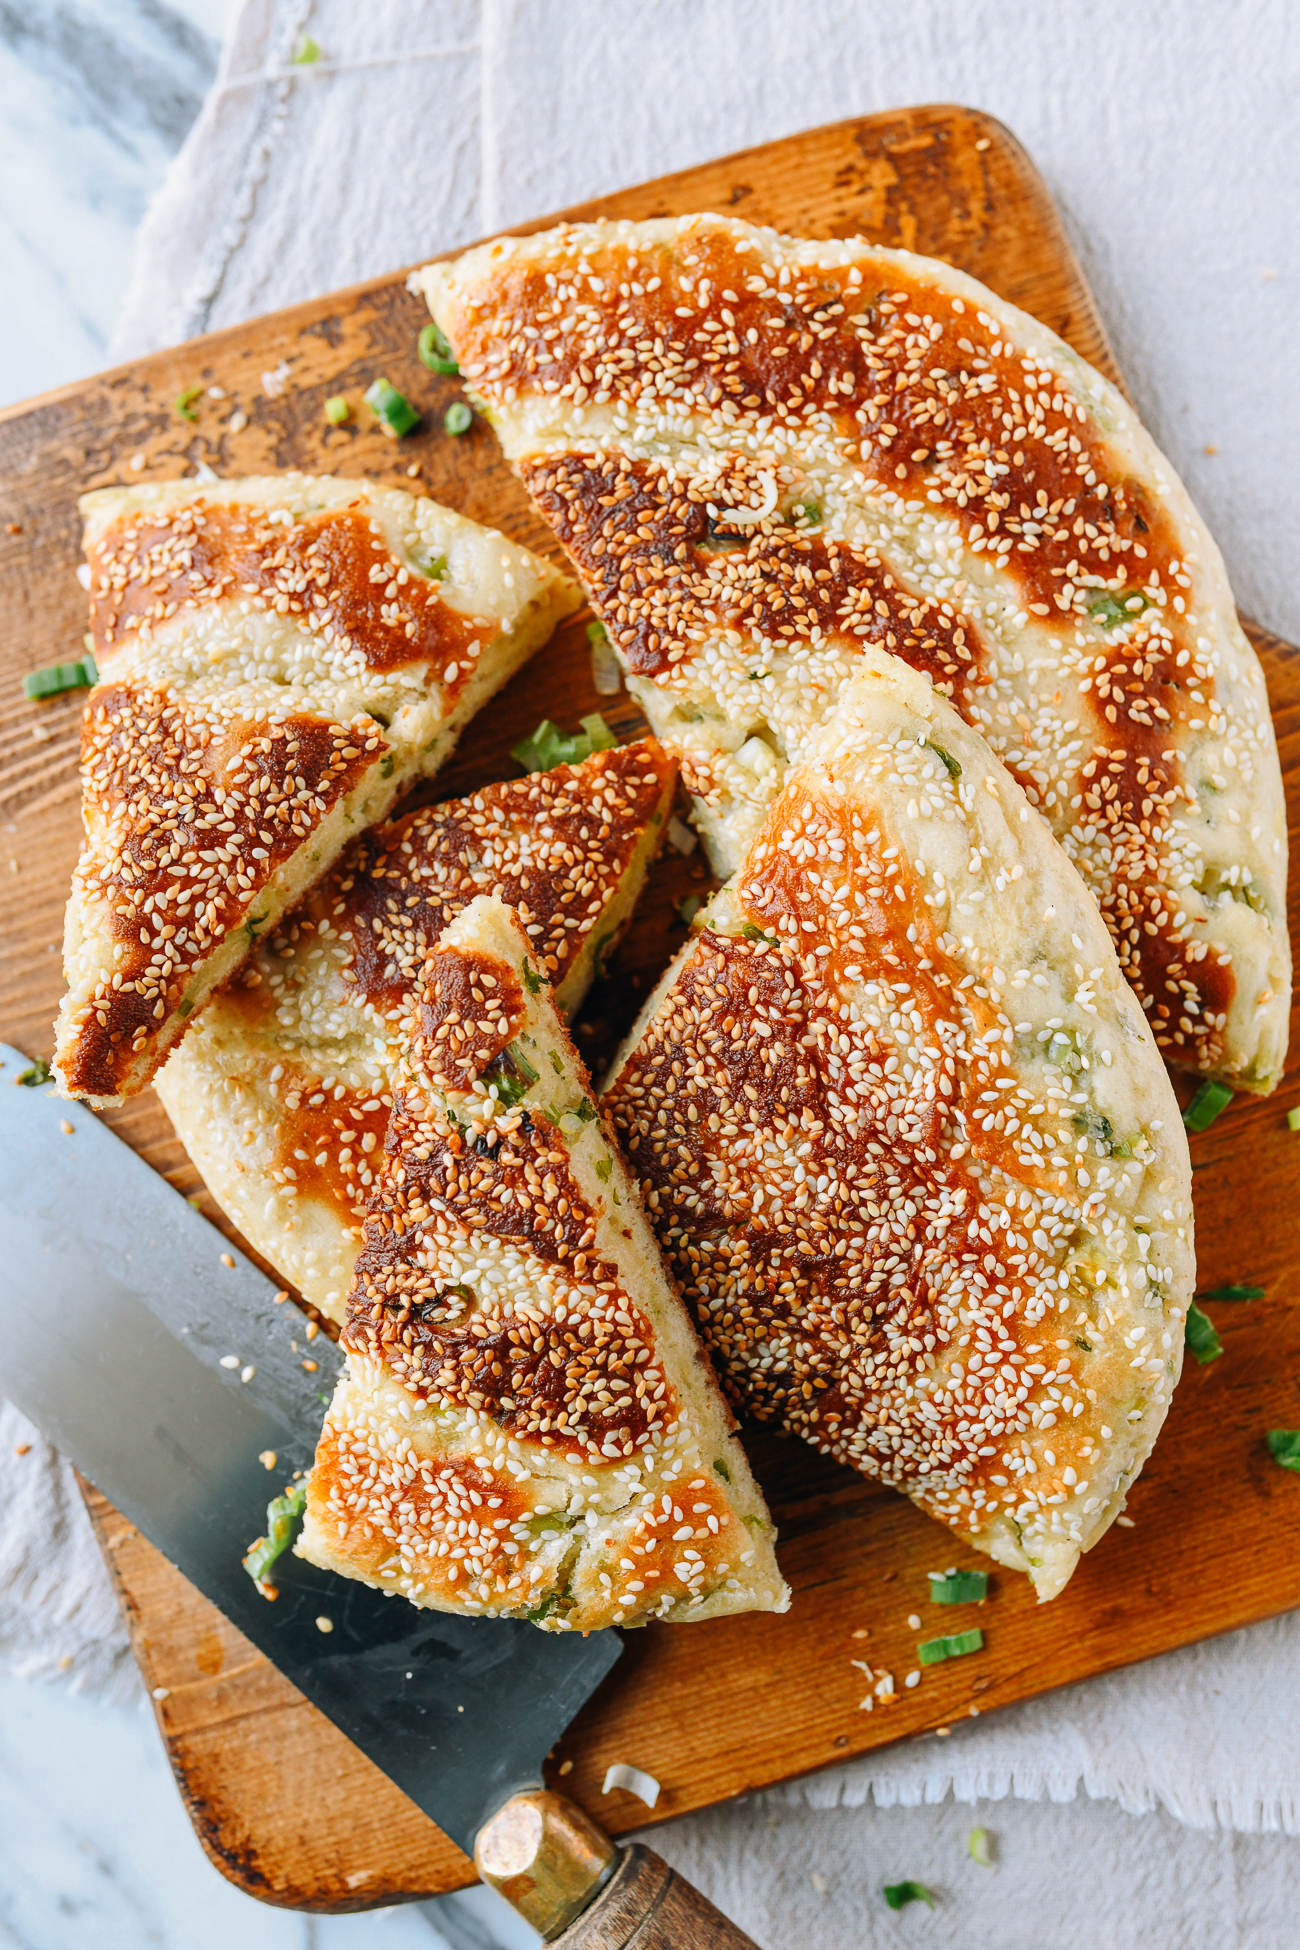
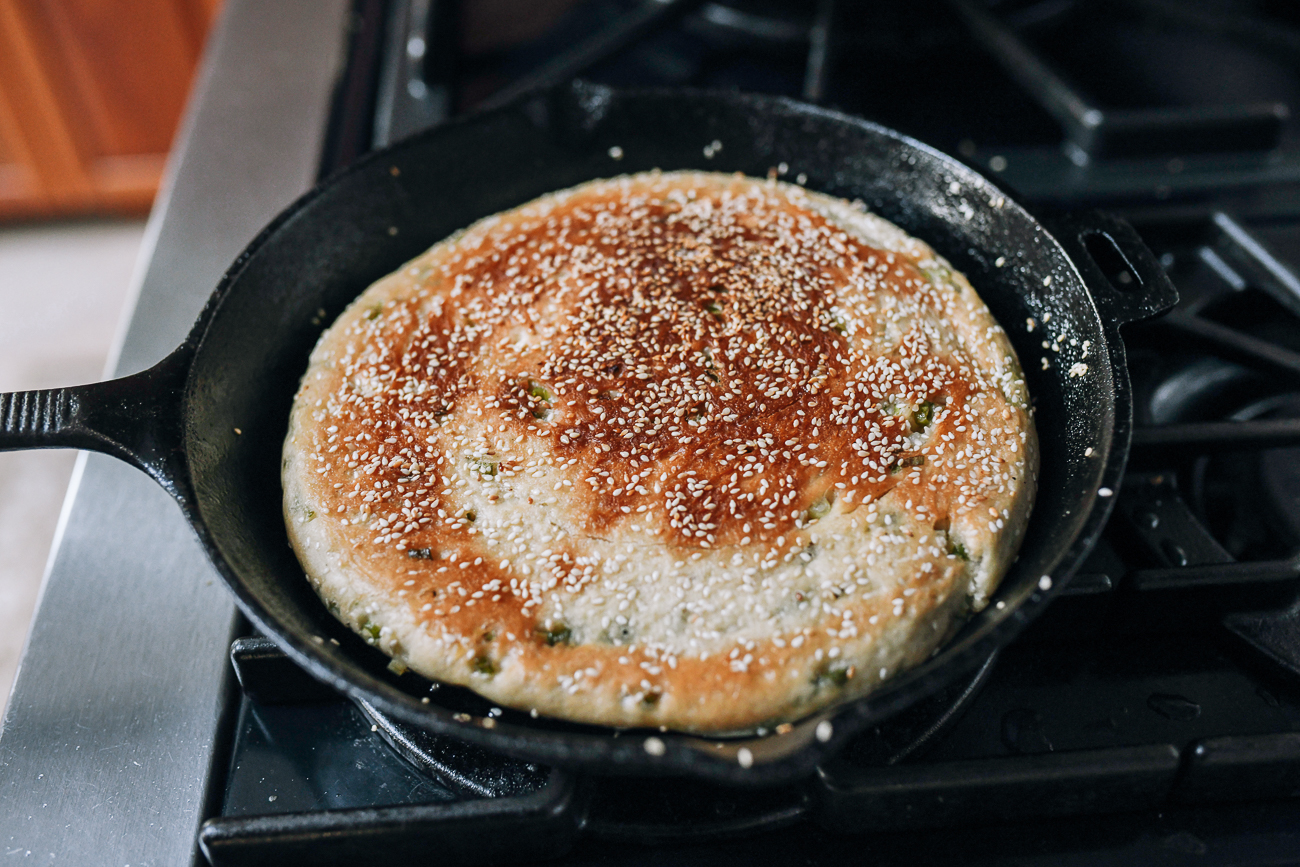
When it’s evenly golden brown, flip the pancake, cover again, and cook for another 6 minutes.
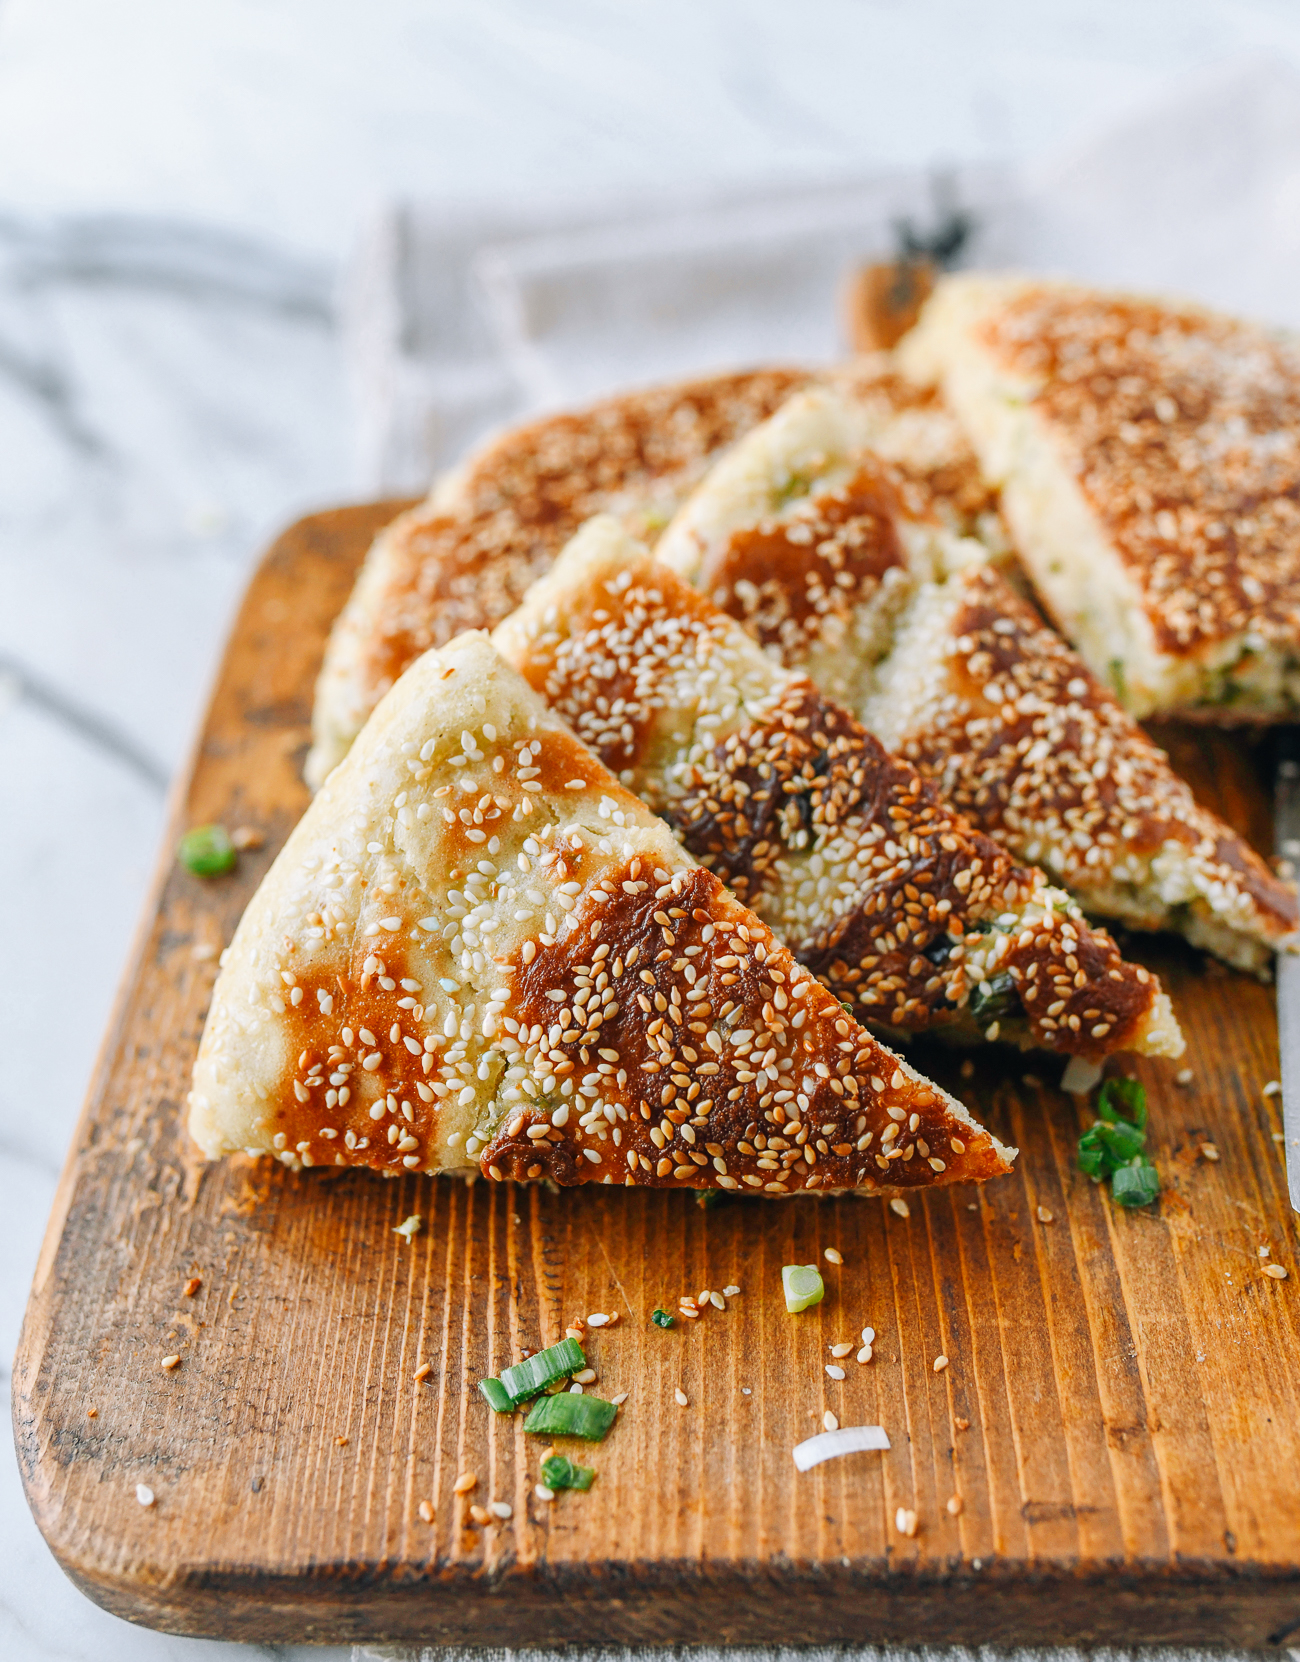
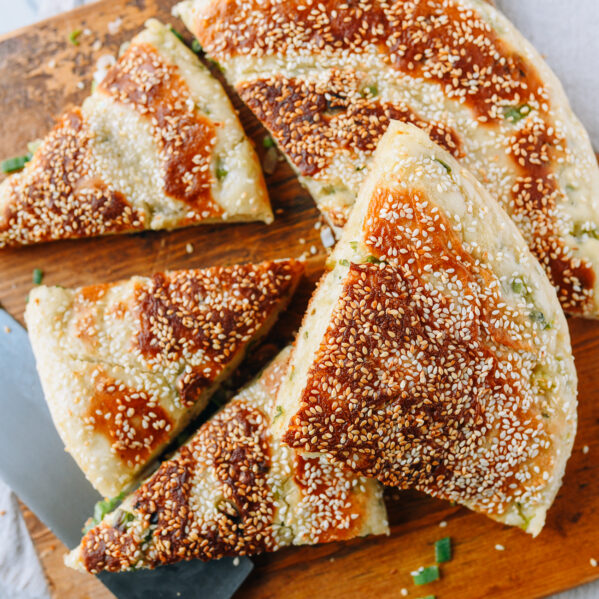
Remove the lid, and cook for another few minutes to dry out the crust. The pancake is done when both sides are a deep golden brown, and the outer crust is crisp (it should sound hollow when you tap on it).
Enjoy!


Shanghai Scallion Flatbread
Ingredients
- 2 cups all purpose flour
- 1 teaspoon active dry yeast (can substitute same amount of instant yeast)
- 2 teaspoons sugar
- 3/4 cup tepid water
- 1 teaspoon sea salt
- 1/2 teaspoon ground white pepper
- 1/4 teaspoon ground Sichuan peppercorns (optional; can substitute five spice powder)
- 3 scallions (finely chopped, about 1/2 cup)
- 2-3 tablespoons raw sesame seeds
- 3 tablespoons oil (plus more for brushing; any neutral oil works
Instructions
- In a large mixing bowl, combine the flour, yeast, sugar, and tepid water with a rubber spatula. The dough will be sticky and slightly wet, but still workable. Do your best not to add more flour to the dough from this point on!
- Knead the dough until it forms a soft, smooth ball. Cover the mixing bowl with a damp kitchen towel and proof in a warm spot until the dough triples in size, 60-90 minutes. I proof my dough inside my microwave, with a large mug of just-boiled water next to it and the microwave door closed.
- Once the dough is done proofing, add the sea salt, white pepper, and Sichuan peppercorns (or five spice powder). Knead for another 5 minutes, until everything is well-combined. If the stickiness of the dough makes it difficult to work with, oil your hands rather than using additional flour.
- Cover the dough with the towel again, and let it rest on the counter for another 15 minutes. At this point, you can very finely chop the scallions (they must be small to distribute evenly throughout the pancake and release more flavor).
- Knead the dough one more time for 2 minutes to get rid of any air bubbles. Brush a clean, flat work surface (such as a clean counter or cutting board) lightly with oil. Using an oiled rolling pin, roll the dough into a thin rectangle a little less than ¼-inch (0.6 cm) thick.
- Brush the rolled dough with a thin layer of oil, and evenly cover it with the scallions. Roll it up lengthwise into a tight log.
- Roll the log into a thinner tube (this also helps reduce air pockets), and roll the tube into a spiral to form a thick disc. Tuck the end underneath.
- Use your hands and a rolling pin to press the disc down into a 10” circle. Sprinkle both sides liberally with sesame seeds, making sure the entire surface is covered. Press the sesame seeds into the dough with the palm of your hand. (The dough circle will be very soft, so use a bench scraper or large spatula to help you flip it over before sprinkling the other side with sesame seeds too).
- In a large flat bottomed non-stick or cast iron pan with a lid (I used a 12” cast iron pan), add 3 tablespoons of oil and spread it evenly across the pan’s surface. Place the dough circle into the oiled pan. (Lay it over your rolling pin to transfer it to the pan.) Cover and allow it to rest for another 20 minutes, without turning on the heat!
- After the dough has rested, turn the heat on to medium, with the lid still on. Set a timer for 12 minutes. After 12 minutes, open the lid and check the bottom. When it’s evenly golden brown, flip the pancake, cover again, and cook for another 6 minutes.
- Remove the lid, and cook for another few minutes to dry out the crust. The pancake is done when both sides are a deep golden brown, and the outer crust is crisp (it should sound hollow when you tap on it). Slice and enjoy!