Okay by now, maybe you’re tired of me talking about steamed buns. Buns, buns, buns. But before you avert your eyes, I will say that I’ve used the dough recipe for these Steamed Lotus Leaf Buns so many times that I just know it works. These homemade steamed buns are super fluffy and slightly chewy—just the way they should be—and they’re meant to be filled!
Since David Chang first debuted Momofuku’s Pork Buns, buns or bao have really taken root and become well-known wherever there are people that love food. I see these steamed lotus leaf buns far more often on menus in the US than in China. You might say it’s in vogue!
What Is A Steamed Lotus Leaf Bun?
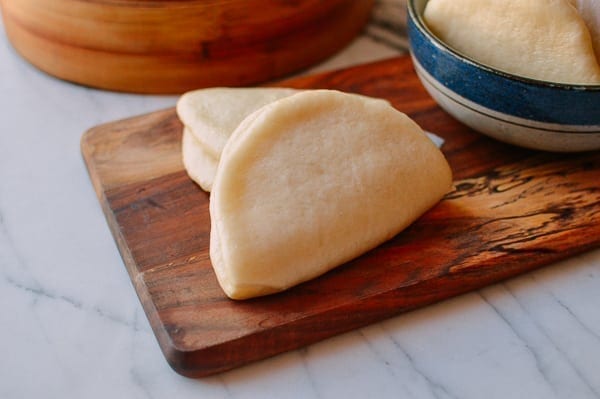
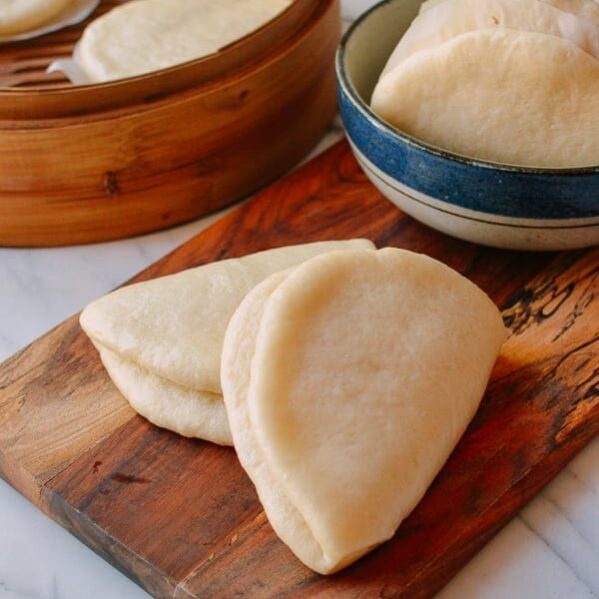
If this happens to be your first time eyeing this strange looking bun, let me explain: A lotus leaf bun is a steamed Chinese wheat-flour-based bread, flattened and folded in half.
This clam shape makes for a sandwich bun—similar to a hamburger bun that you gently open with your hands. And really, it is the Chinese version of a burger, but instead of ground beef patties, we use braised pork, roast duck or other savory meats.
Recipe Tips for Successful Buns
If you’re intimidated by the prospect of making steamed buns at home, I find it much easier than making most breads! Almost every elderly woman in Northern China knows the recipe like the back of her hand. As long as the yeast is good, you’re pretty much home free.
Just remember one thing: it’s better to underproof than over-proof the dough. The rule of thumb is that proofing is done once the dough doubles in size, and no more than that. Over-proofing makes the buns taste yeasty, and in our experience, it sometimes makes them bitter.
Also, it’s a good time to reiterate another important step when steaming any buns: the steamer must sit untouched for 5 minutes after you turn off the heat.
The buns need time to set—opening the lid right after turning off the heat will cause the buns to collapse and lose their fluffiness. I will tell you now there’s nothing sadder than your perfect lotus leaf buns getting deflated. But once you’ve successfully steamed your buns, many of you will be thrilled to hear that these freeze and reheat well!
Trust me when I say that this one is truly a proven, trick-free recipe!
Steamed Lotus Leaf Buns: Recipe Instructions
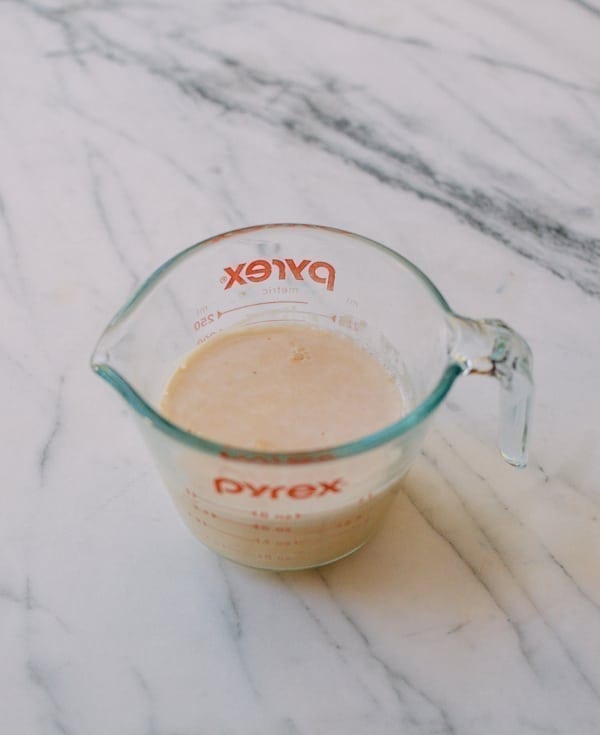
In a small bowl, whisk together ¾ cup warm water, 1 teaspoon yeast and 1 tablespoon sugar to dissolve. Wait 15 minutes until the yeast mixture “blooms” and foams. Stir in 1 tablespoon of canola oil, and set aside.
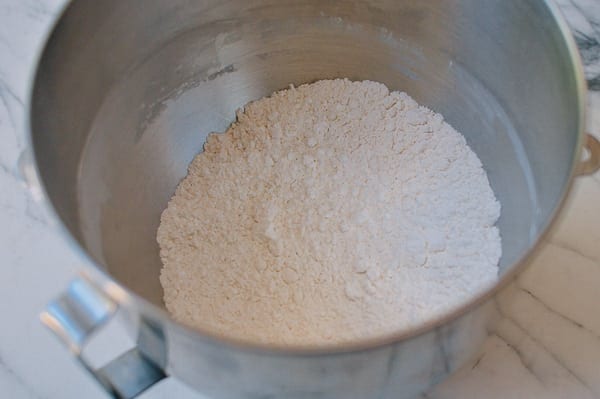
While you wait for the yeast mixture to “bloom,” whisk together 2 cups all-purpose flour, 2 tablespoons cornstarch, ¼ teaspoon salt, and 1/8 teaspoon baking soda in a medium bowl.
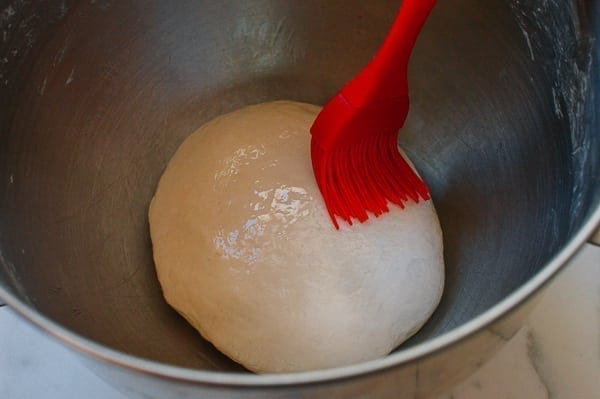
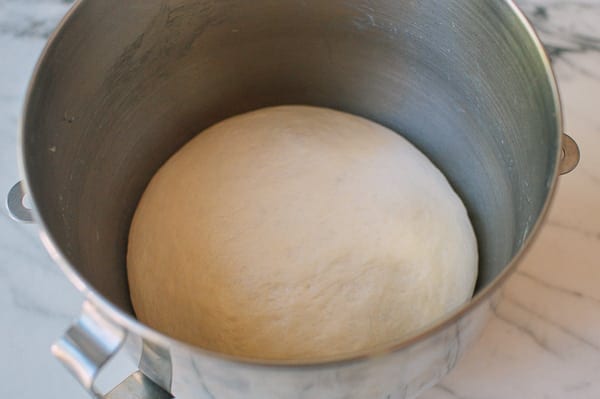
Stir in the yeast mixture using a rubber spatula. After the dry and wet ingredients are well incorporated, knead the dough until smooth and soft. If the dough feels sticky, add a bit more flour 1 tablespoon at a time, and continue kneading until the dough is smooth, soft, and pliable, but not sticky. Brush the top of the dough with 1 teaspoon canola oil, cover the bowl with a plate, and let it proof at room temperature until it has doubled in size (about 1 hour).
While the dough is proofing, prepare your steaming device/setup of choice. (Check our Chinese cooking tools page for steamer setup options using a steamer rack in a wok or a multi-level metal steamer—both of which we use regularly in our kitchen. Leave at least 2 inches of space between the water and the steam rack so the water doesn’t touch the buns during the steaming process.
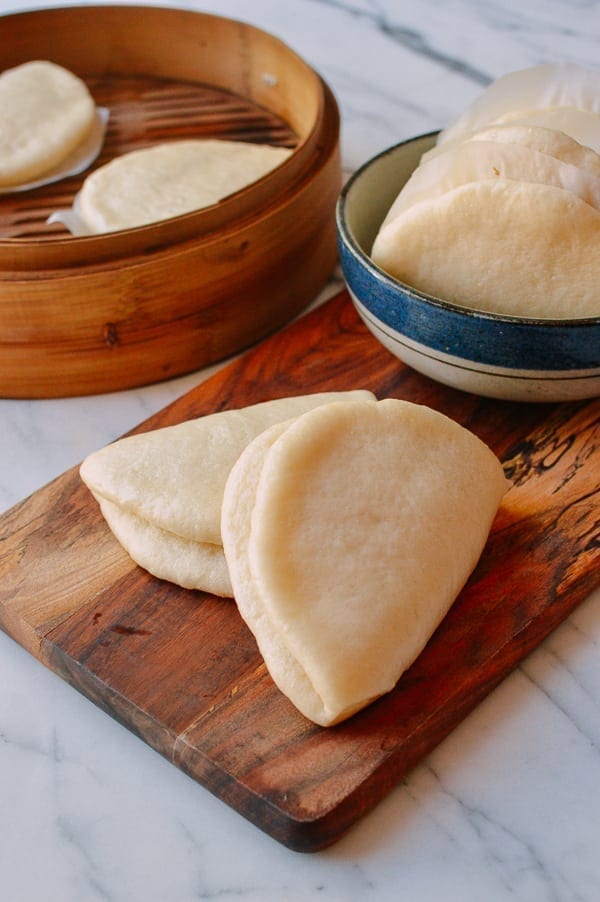
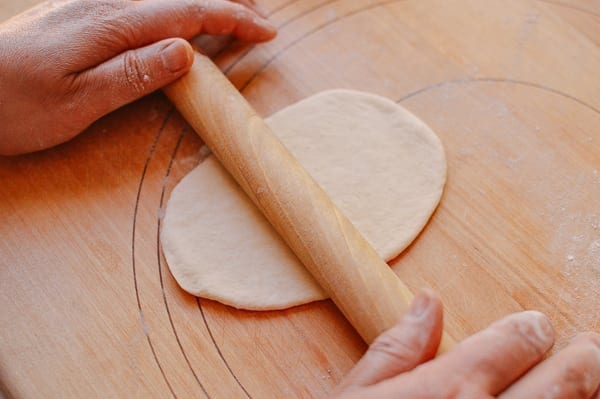
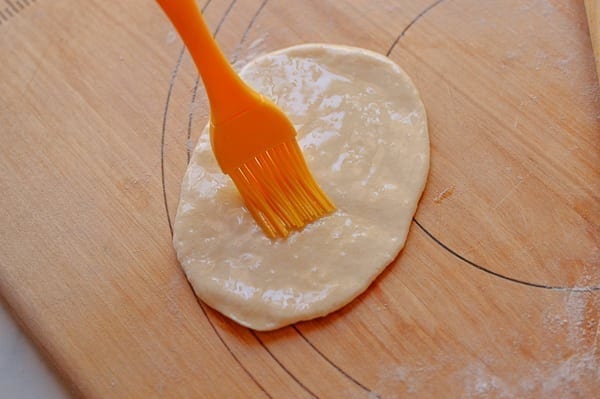
After the dough finishes proofing, punch it down and knead it for a few minutes to get rid of all the air bubbles. This step is important for achieving smooth and uniform buns! Portion the dough into 12 equal balls. Roll each ball into a 4×7 inch oval shape.
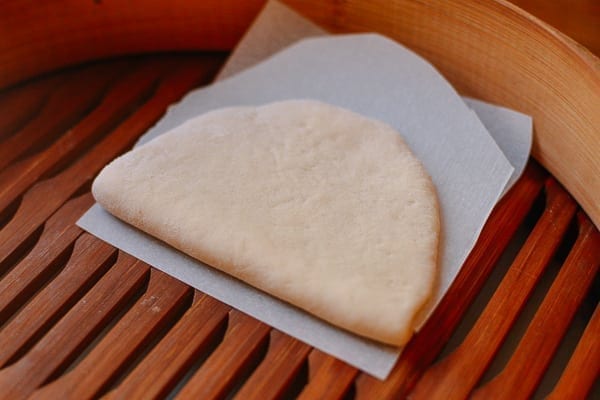
Lightly brush the tops with oil to prevent sticking.
Fold the dough in half with a small piece of parchment paper in the middle.
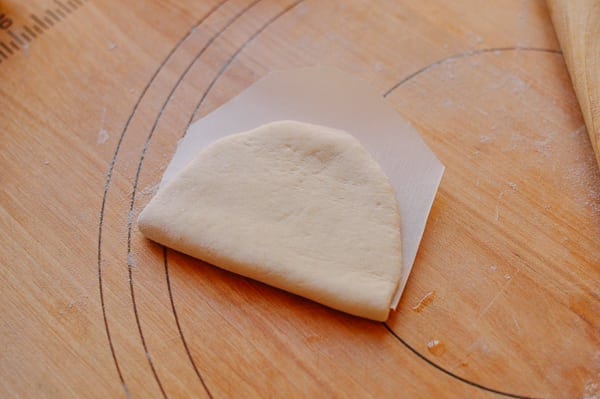
Line the bun with another piece of parchment paper on the bottom and place it in your steamer to proof a second time. Repeat these steps until you’ve used up all the dough, cover the lid of the steamer, and let proof for another 20 minutes.
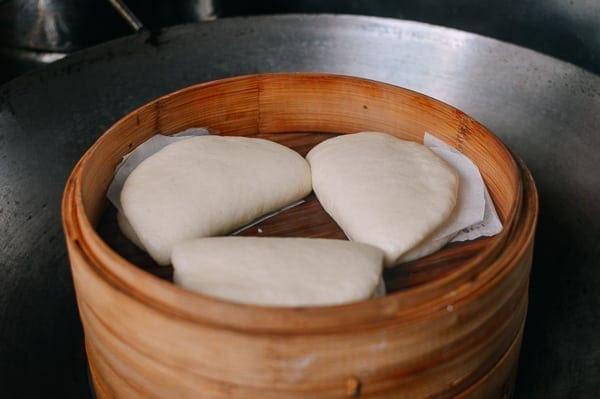
After 20 minutes, turn the heat on your steamer setup to high. See our post on how to set up a steamer if you’re not familiar with steaming foods in Chinese cooking.
Once you see steam coming out, reduce the heat to medium, and let the buns steam for another 10 minutes. Turn off the heat and let the buns rest inside the steamer for 5 minutes. Do NOT Remove the cover/lid. This is VERY important, because if you remove the cover too early, the buns will collapse and lose their fluffy shape!!!

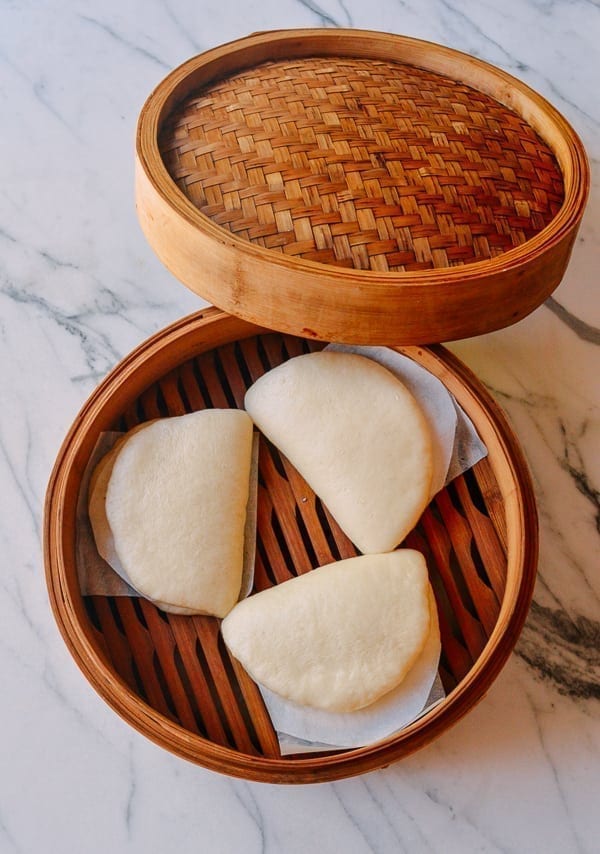
After 5 minutes have elapsed, the buns are ready to remove from the steamer.
You can use them immediately, or these lotus leaf buns also freeze well for later use. Just let them cool completely before freezing, because any condensation inside whatever you use to store the buns will make them soggy. Then, when you’re ready to eat them, just steam them for 5 minutes to reheat.
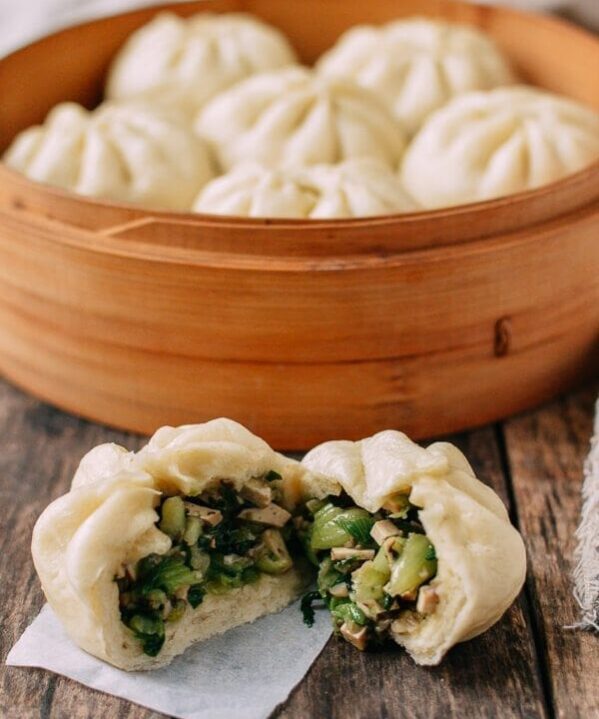
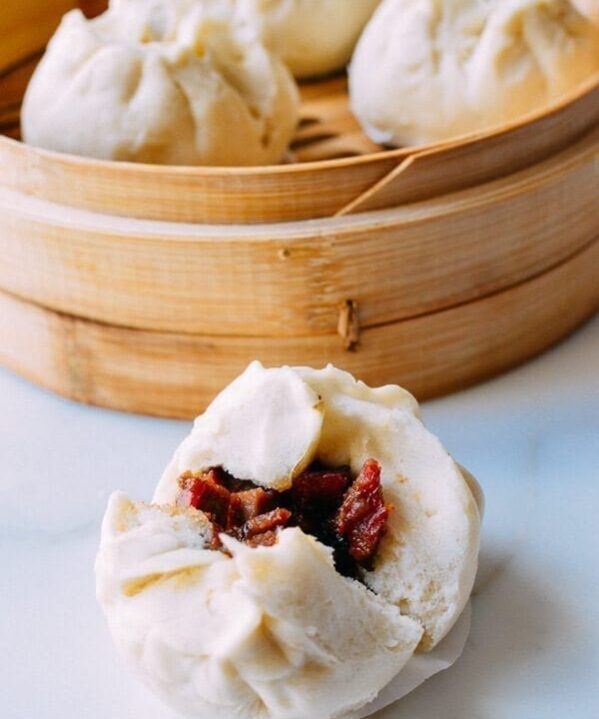
Need some ideas for what to put in these buns? Try our Instant Pot Braised Pork Buns, or our Spicy Cumin Lamb Buns!
Lotus Leaf Buns
Ingredients
- ¾ cup warm water
- 1 teaspoon instant yeast (3g)
- 1 tablespoon granulated sugar (12g)
- 1 tablespoon plus 1 teaspoon canola oil
- 2 cups all purpose flour (290g)
- 2 tablespoons cornstarch (20g)
- ¼ teaspoon salt (3g)
- 1/8 teaspoon baking soda (1g)
- 24 pieces parchment paper (cut into 3x4 inch rectangles)
Instructions
- In a small bowl, whisk together ¾ cup warm water, 1 teaspoon yeast and 1 tablespoon sugar to dissolve. Wait 15 minutes until the yeast mixture “blooms” and foams. Stir in 1 tablespoon of canola oil, and set aside.
- While you wait for the yeast mixture to “bloom,” whisk together 2 cups all-purpose flour, 2 tablespoons cornstarch, ¼ teaspoon salt, and 1/8 teaspoon baking soda in a medium bowl. Stir in the yeast mixture using a rubber spatula. After the dry and wet ingredients are well incorporated, knead the dough until smooth and soft. If the dough feels sticky, add a bit more flour 1 tablespoon at a time, and continue kneading until the dough is smooth, soft, and pliable, but not sticky. Brush the top of the dough with 1 teaspoon canola oil, cover the bowl with a plate, and let it proof at room temperature until it has doubled in size (about 1 hour).
- While the dough is proofing, prepare your steaming device/setup of choice. (Check our Chinese cooking tools page for steamer setup options using a steamer rack in a wok or a multi-level metal steamer—both of which we use regularly in our kitchen. Leave at least 2 inches of space between the water and the steam rack so the water doesn’t touch the buns during the steaming process.
- After the dough finishes proofing, punch it down and knead it for a few minutes to get rid of all the air bubbles. This step is important for achieving smooth and uniform buns! Portion the dough into 12 equal balls. Roll each ball into a 4x7 inch oval shape, lightly brushing the tops with oil to prevent sticking. Fold the dough in half with a small piece of parchment paper in the middle. Line the bun with another piece of parchment paper on the bottom and place it in your steamer to proof a second time. Repeat these steps until you’ve used up all the dough, cover the lid of the steamer, and let proof for another 20 minutes.
- After 20 minutes, turn the heat on your steamer setup to high. Once you see steam coming out, reduce the heat to medium, and let the buns steam for another 10 minutes. Turn off the heat and let the buns rest inside the steamer for 5 minutes. Do NOT Remove the cover/lid. This is VERY important, because if you remove the cover too early, the buns will collapse and lose their fluffy shape!!!
- After 5 minutes have elapsed, the buns are ready to remove from the steamer.
- You can use them immediately, or these buns also freeze well for later use. Just let them cool completely before freezing, because any condensation inside whatever you use to store the buns will make them soggy. Then, when you’re ready to eat them, just steam them for 5 minutes to reheat.
nutrition facts