Liangpi, which translates to “cold skin” noodles, is a street food dish originally from Shaanxi Province. It has become popular throughout China and even abroad for good reason. Liangpi dishes are delicious, especially during the summertime.
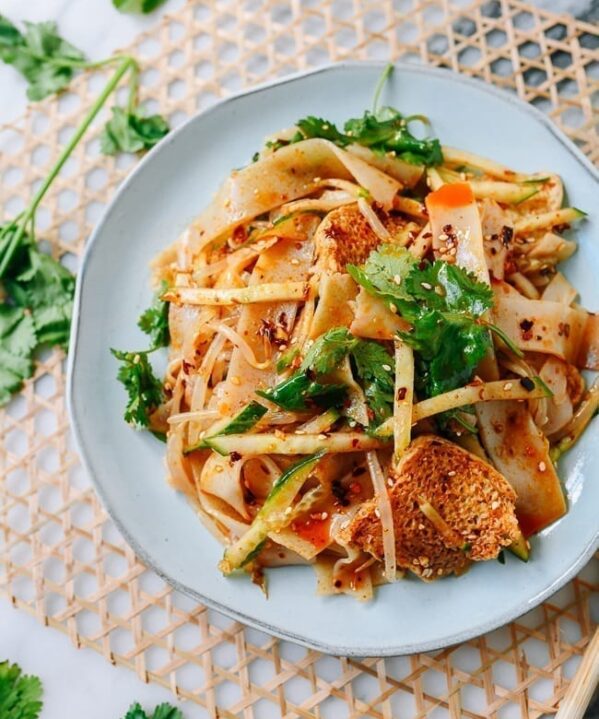
Liangpi’s springy, elastic, and almost slippery texture makes it an ideal candidate for cold noodle dishes, slathered in flavorful sauces with refreshing crunchy vegetables like cucumber and bean sprouts. I recently shared a spicy liangpi recipe, and today, I’m going to show you how to make the noodles!
That’s right, you’re gonna learn how to make your own fresh liangpi using just flour, water, and salt. It’s a bit of a process, but if you’re craving these noodles or would like to try them for the first time, it’s a cool bit of “project cooking” with a delicious reward at the end!
What Are Liangpi Noodles?
Liangpi noodles can be made with either wheat or rice. Indeed, the texture of liangpi is similar to fresh rice noodles, like those in my mom’s homemade rice noodle recipe. The method of cooking (steaming a thin starch-based batter) is also very similar.
However, liangpi is most traditionally made with wheat flour. That’s right––the regular ol’ all purpose flour you probably use in most of your baking.
How To Make Liangpi
The process involves making a simple flour/water dough (with a bit of salt added), and repeatedly “washing” it to separate the starch from the gluten in the flour. This “washing” process may seem a bit strange. When else would you ever make a dough and then start bashing it in a bowl of water?
But once the starch is separated from the gluten, you can use it to make a noodle batter! That batter is then steamed in thin sheets, which can then be sliced into noodles.
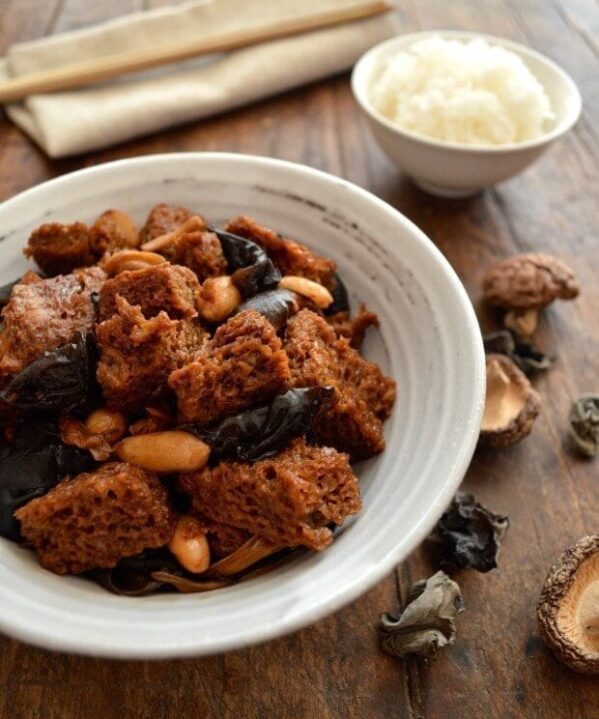
The remaining wheat gluten by-product is edible too. In fact, you may know it by its more common name––seitan! That’s right, you get two products for the price of one. Not only do you get a big pile of chewy noodles, you also get a sizable piece of seitan.
In Chinese, this product is known as kaofu, which is featured in my mom’s Braised Kao Fu (Wheat Gluten) with Mushrooms recipe.
This is why liangpi dishes are often tossed with pieces of wheat gluten. They’re made in the same process! The spongy texture of the kaofu makes it PERFECT for soaking up tasty sauce.
There are many shortcuts out there for making liangpi. Some methods use just pure wheat starch and water. Some use a simple “unwashed” flour and water mixture. However, those recipes are not traditional, and you won’t get the gluten by-product out of it.
While we may publish a shortcut version in the future, we have to start with the OG! This recipe will show you how to make liangpi in the way it was originally intended.
It does take some work, but if you can’t find prepared liangpi at your local Chinese market, or just want a bit of a fun science project to do on a weekend (this is great to do with kids), give this recipe a try. After all, we all need more stuff to do and experiment with at home these days!
Mixer Method vs. By Hand
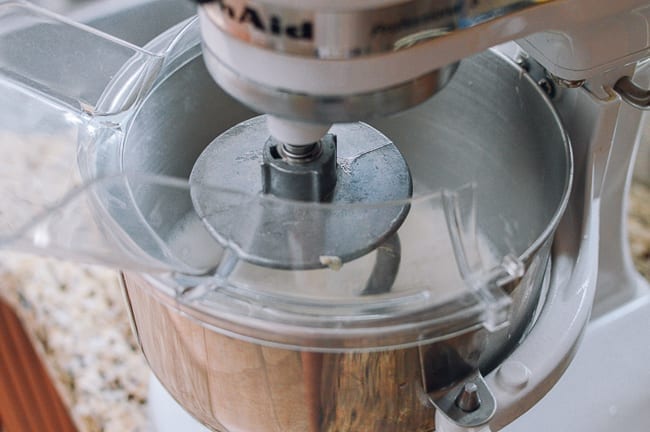
I used my stand mixer for almost the entire dough making/washing process, and it was a snap. The dough hook did all the kneading and “washing” for me, and all I had to do was set a timer and keep track of each washing step.
While the mixer was going, I could putter around the kitchen doing other things, read, watch TV, whatever!
If you don’t have a stand mixer, the process is admittedly a bit labor intensive. It will take about 45 minutes of active prep. However, if doing it by hand, you’ll be making liangpi the same way Chinese cooks have been doing it for generations.
Final Notes
- You should either start this recipe the night before you plan to eat these noodles (if you want them for lunch), or early in the morning on the day of (if you want them for dinner). The prep process of making the dough and “washing” it takes about 90 minutes (45 minutes of which is “active prep”). However, the starchy water needs at least 6 hours to fully settle, so you can easily pour off the water and have only starch remaining.
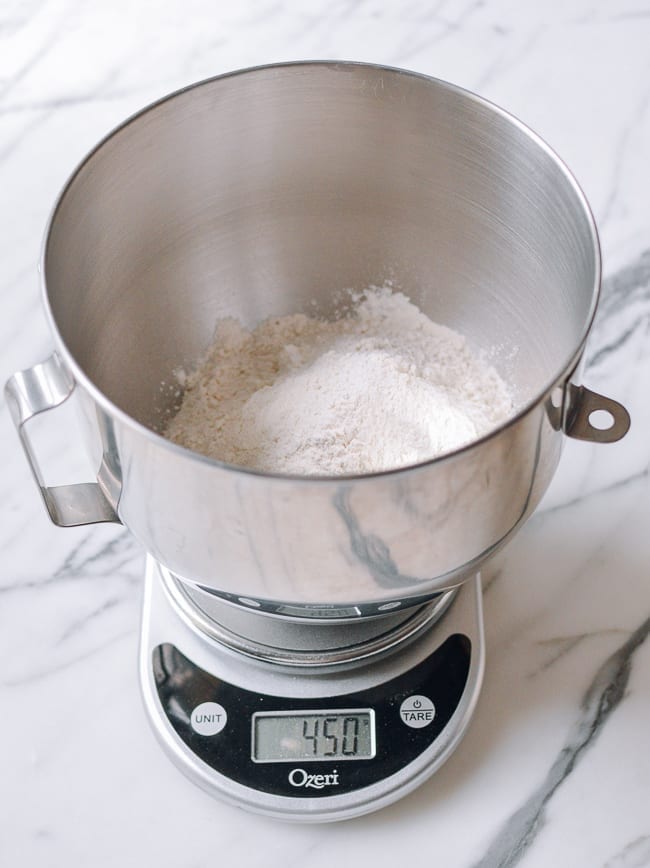
- While I included US cup/teaspoon measurements in this recipe, use a digital kitchen scale for best results. If you don’t already own one, they’re relatively inexpensive ($11-18). It really is a key tool that we use in our kitchen almost every day!
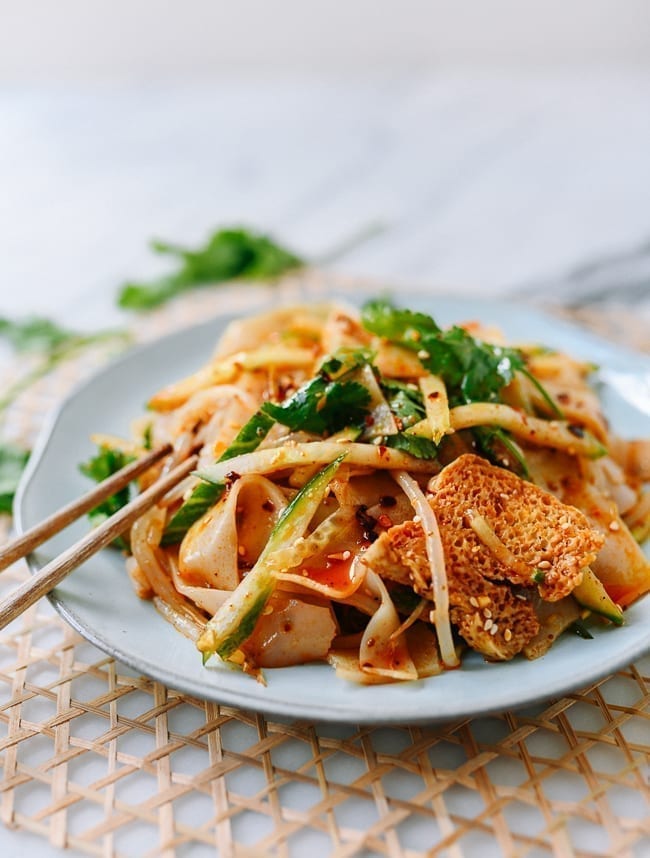
- If you’re wondering how to serve your liangpi noodles after they’re done, check out our Spicy Cold Skin Noodles recipe, which shows you how to assemble the dish with sauce and vegetables. There are numerous ways to prepare/dress liangpi noodles, but our method is pretty traditional, and also very tasty!
Ok, on to the recipe!
Liangpi Recipe Instructions
Phase 1: Separate the Starch & Gluten
Combine 450g flour and 4g salt in a large mixing bowl, or the bowl of a stand mixer fitted with the dough hook attachment.
As I mentioned in the introduction, it’s best to measure the flour by weight using a kitchen scale.
If kneading by hand, combine the dry mixture with 250g water gradually by hand until a shaggy dough forms. If using a mixer, turn the mixer on low speed (usually the “stir” setting), while gradually pouring in the water until you have a shaggy dough.
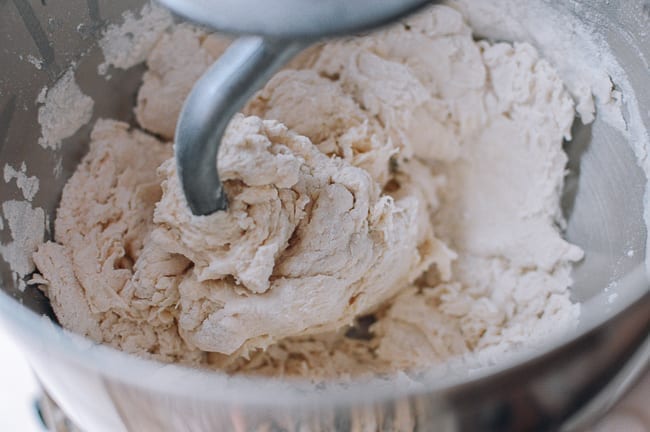
Once you’ve formed dough, knead it for about 3 minutes, or until it forms a relatively firm, cohesive ball. Cover and rest for 10 minutes.
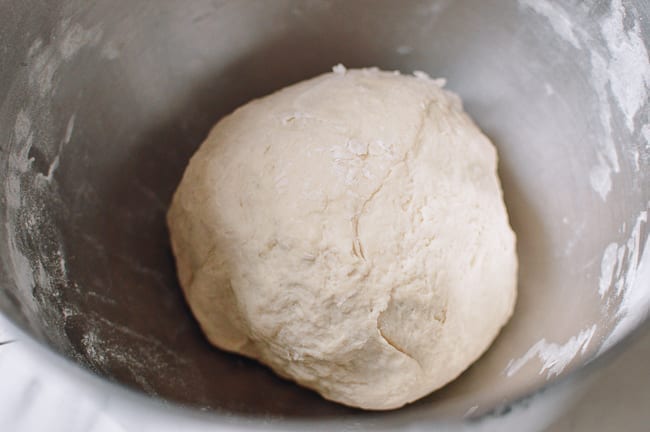
Knead the dough again by hand for about 1 minute until it forms a smooth ball. Cover and rest for 30 minutes.
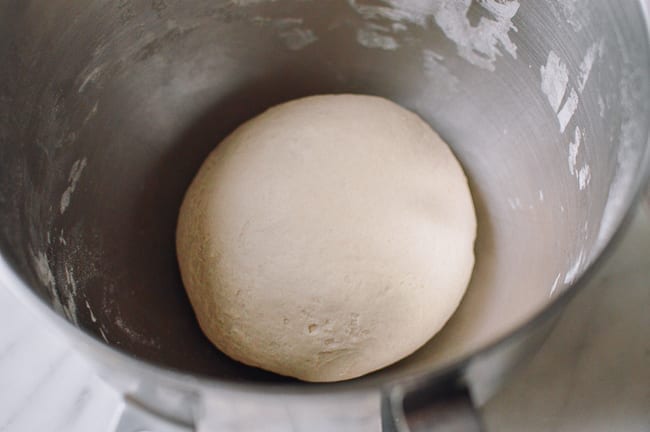
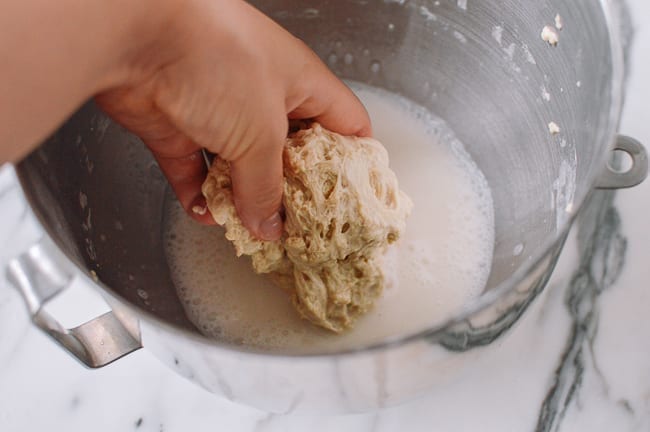
To the dough in the bowl, add 3 cups of water. Push the dough down into the water to fully submerge it, and soak it for 5 minutes.
Next, begin the “washing” process. Traditionally, this is done by hand. While the dough is still submerged in the water, squeeze and stretch it between your fingers to release the starch. Wash until the dough loses its shape and the water is opaque white, about 2-3 minutes.
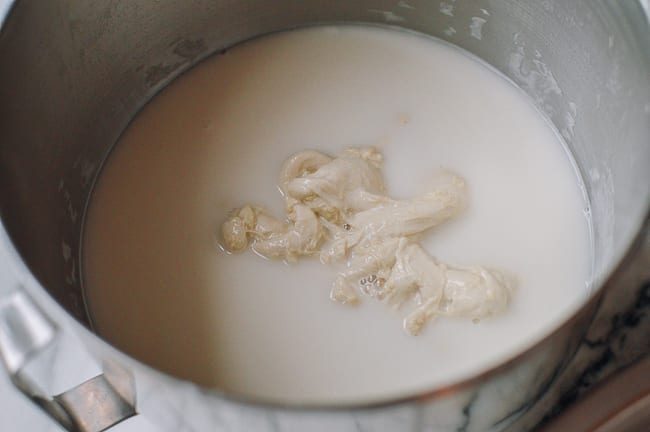
Alternatively, you can use a mixer to do this work for you. Place the mixing bowl of dough/water back on the mixer with the dough hook attachment. Place the pouring shield/splash guard on the mixer and turn it on at the lowest setting. Let the dough hook massage the dough for 2 minutes.
(There is some risk of splashing with this first step since this is the most water you will use at one time, so you may choose to do this first step by hand.)
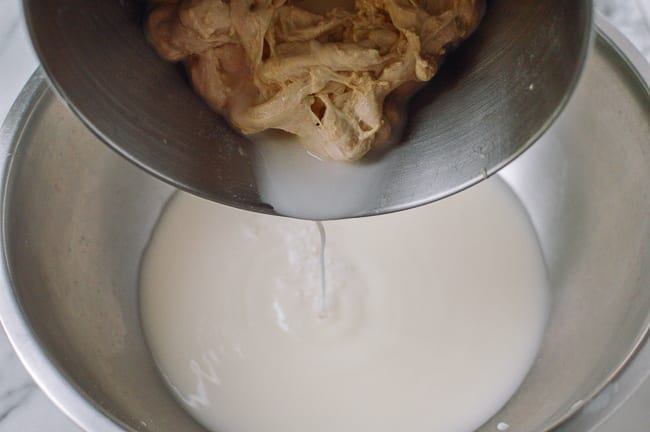
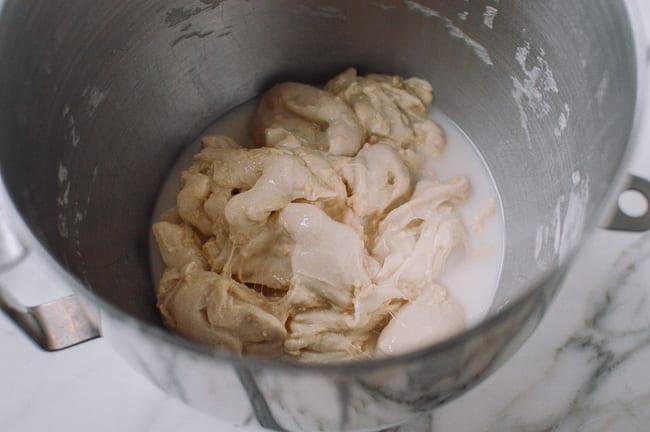
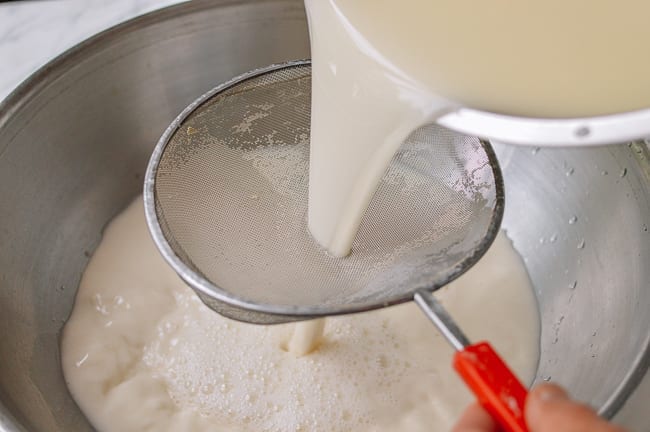
Pour out the starchy water into another large bowl and set aside (this is the bowl of starch you will be using to make the noodles).
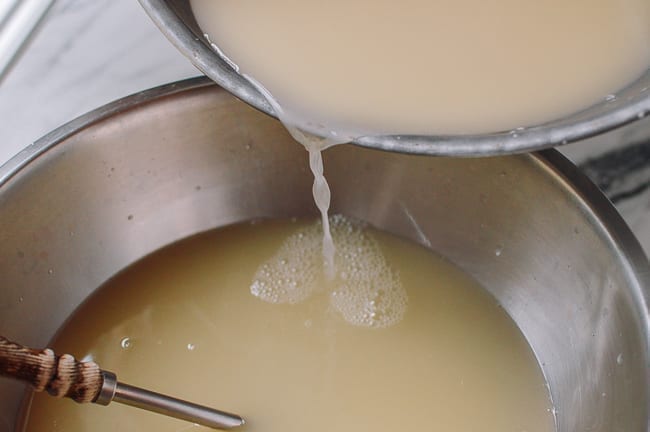
Add 2 more cups of fresh water to your dough and wash again for 3 minutes. This time, strain off the starchy water with a fine meshed strainer (as the dough becomes more broken up, little pieces will begin to separate out).
Repeat one more time with 2 cups of fresh water, for a total of 3 “washings” so far.

After you’ve strained off your third batch of starchy water, add 1 cup of fresh water to the dough, and massage for 4 minutes. (You’ll have to massage it longer to remove the remaining starch. If you’re using a mixer, you can also turn the speed up one notch, now that there’s less risk of splashing.) Do this step (with 1 cup fresh water) 3 times, for a total of 6 “washings” thus far. If using a mixer, squeeze the dough between your fingers a few times after each washing to thoroughly release as much starch as possible.
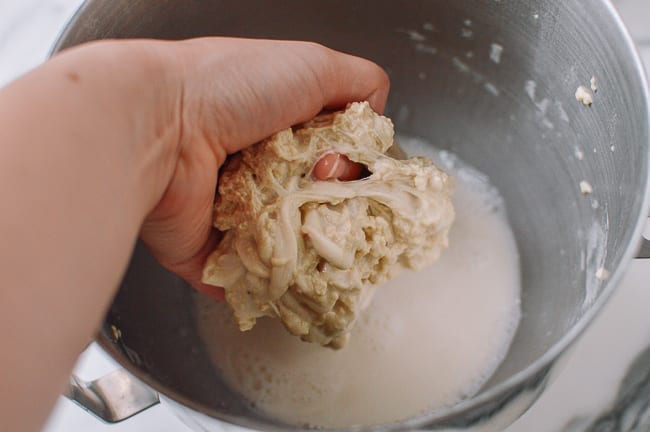
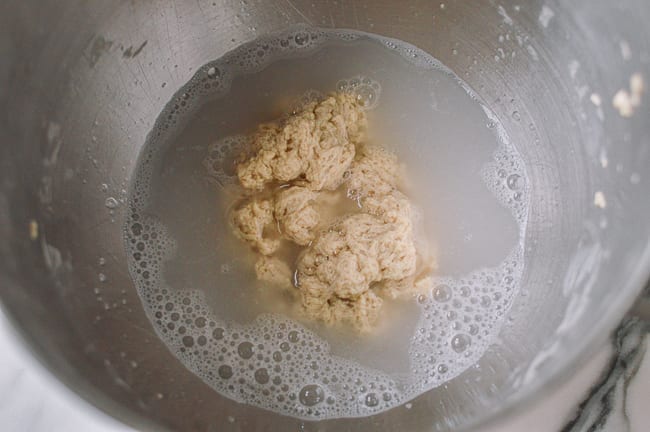
Next, add a cup of water and wash again for a few minutes by hand to really squeeze out the last remaining bits of starch.
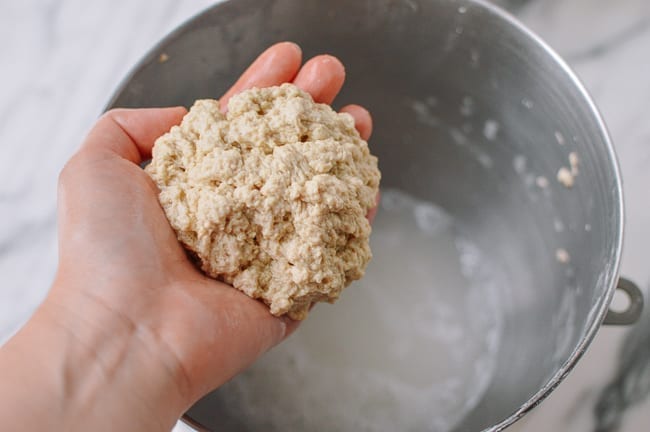
Do this 1-2 more times, until the water is mostly clear and your gluten ball comes together. If the water is mostly clear, you can discard it rather than adding it to your bowl of starchy liquid.
Phase 2: Strain & Allow Starch to Settle
Set the gluten ball aside, covered with an overturned bowl, to allow the gluten to relax at least 2 hours (you can store it in the refrigerator longer as well). Just make sure it remains covered, or it will dry out.
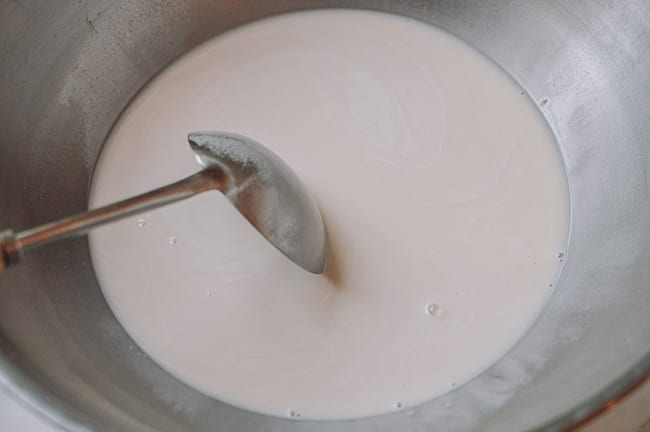
Strain the starchy water through a fine meshed strainer into another large bowl, to remove any dough solids that may have slipped by.
Set aside for at least 6 hours or overnight. You can set it out at room temperature if it’s not too hot/humid, or in the refrigerator. This allows the starch in the water to settle fully to the bottom of the bowl. You can’t shortcut this step––believe me, I tried! It’ll look like the starch is settling rapidly, but you really need the full 6 hours for all the suspended starch to fully settle and meld to itself at the bottom of the bowl.
Phase 3: Cook Noodles & Wheat Gluten
Uncover your reserved wheat gluten, and steam it for 30 minutes. Set aside.

While the gluten is steaming, pour off the water from the starchy liquid bowl, leaving just the thick glue-like layer of white starch at the bottom.
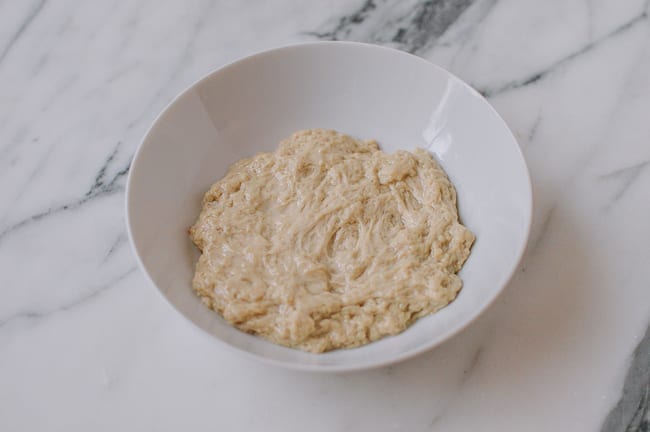
When you’ve poured off all the water, use a metal spoon or ladle to scrape the starch from the bottom of the bowl. Stir the thick liquid so the mixture is completely homogeneous throughout. There should be no lumps of starch remaining. Using your ladle and a kitchen scale, ladle out 300g of the starchy mixture into a separate medium bowl.
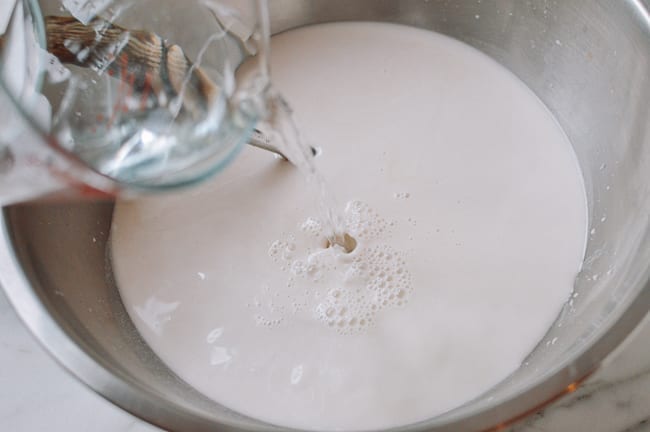
To that, add 2g (½ teaspoon) salt and 150ml (about ⅔ cup) fresh water. Mix until well combined. This is your noodle batter.
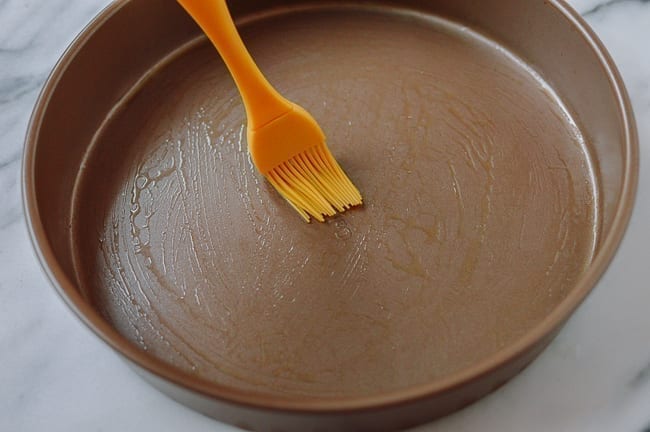
Bring water to a boil in your steamer. Brush vegetable oil on a round or square cake pan. Remember that it must be able to fit in your steamer. A light metal cake pan works best.
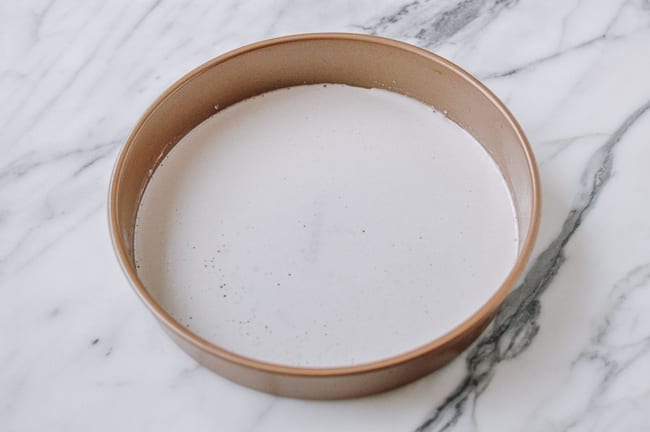
Pour a thin layer of batter into the oiled pan, so that it just covers the entire bottom of the pan.
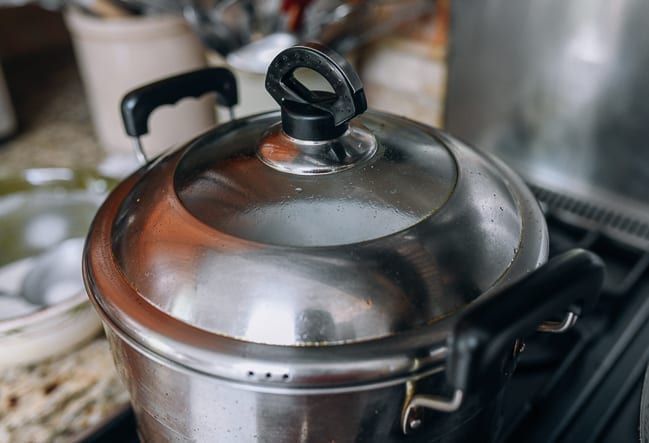
Immediately put in the steamer, cover, and steam for 90 seconds to 2 minutes. Alternatively, you can steam the noodles directly on top of simmering water in a wok with a lid, like my mom did in her homemade rice noodle recipe.
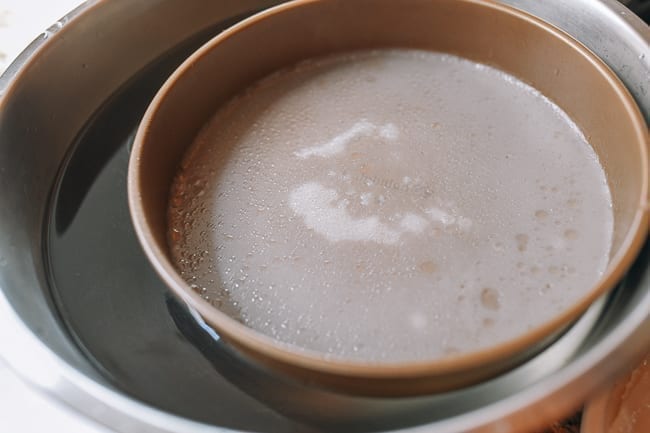
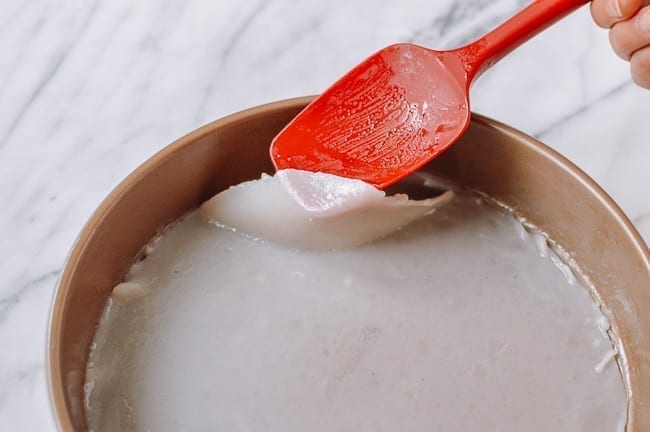
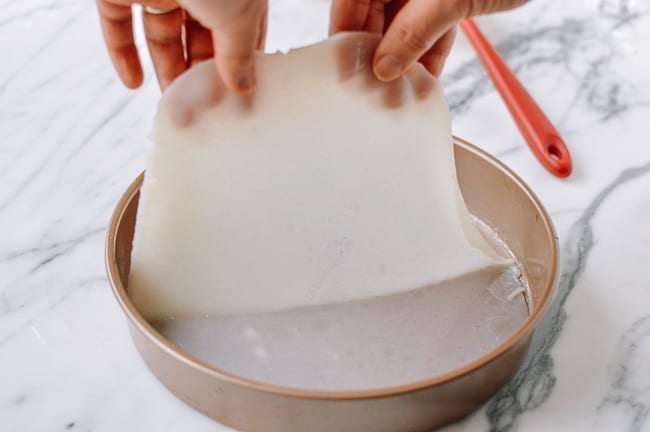
Meanwhile, prepare a large bowl of cold water––you can put a few ice cubes in it to make sure it stays cold. Carefully remove the pan from the steamer and set it on the surface of the cold water so it can cool.
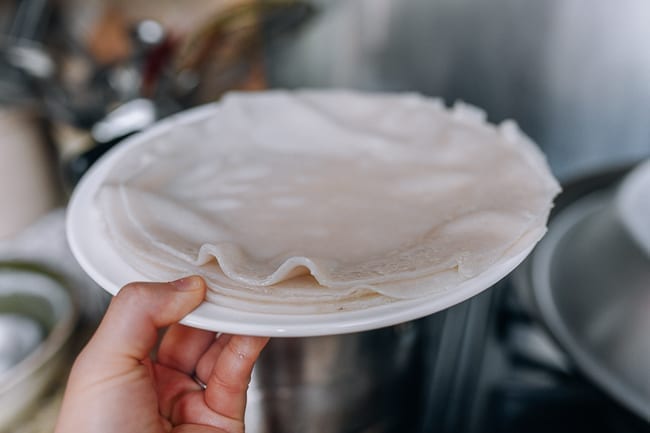
When the noodle is cool to the touch (it will take about 1 minute to cool), brush the surface with a thin layer of oil, and carefully peel it off the oiled pan using a rubber spatula and your hands.
Repeat this process, thoroughly stirring the batter before you ladle it into the pan every single time (the starch rapidly settles, so you have to make sure the mixture is evenly combined each time to get the right ratio of starch to water). Be sure to scrape up any starch that has settled to the bottom, and incorporate it back into the batter. As you make your noodles, oil them thoroughly and stack on top of one another.
When you run out of batter, measure out another 300g of the starch. Add 150 ml water to make more batter. You will have about three total batches. If the remaining total starch does not exactly measure 900g, just know that you need about ½ the weight of water to starch. Basically, divide whatever your starch weight is in half, and that is the weight/volume of water you need (when measuring water, 1g = 1 ml).
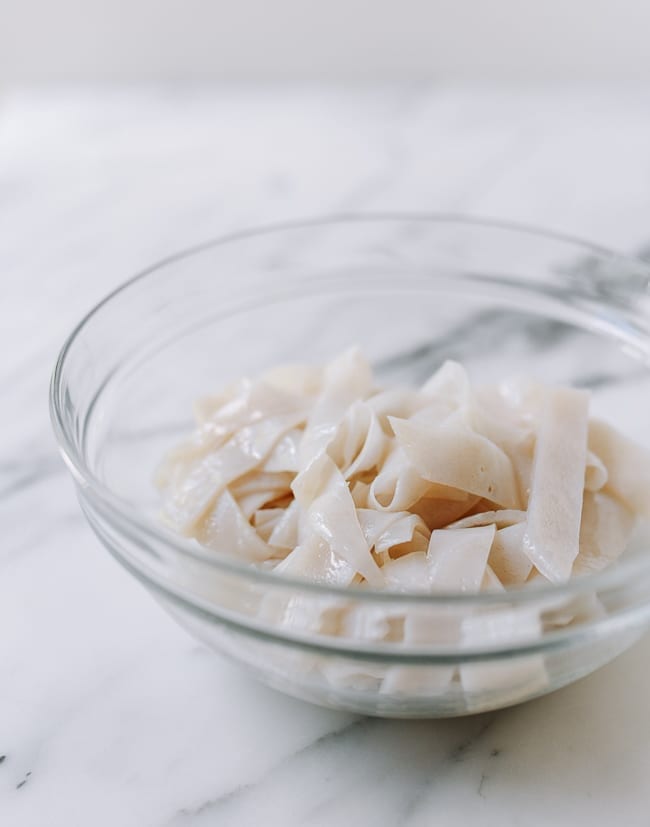
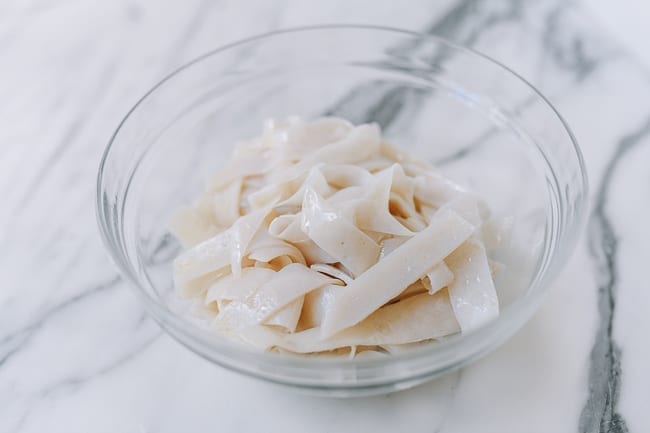
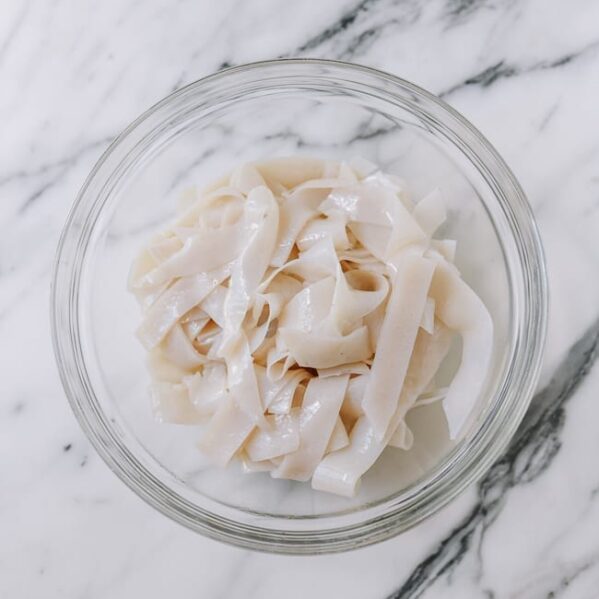
When finished, slice the noodles and separate them.
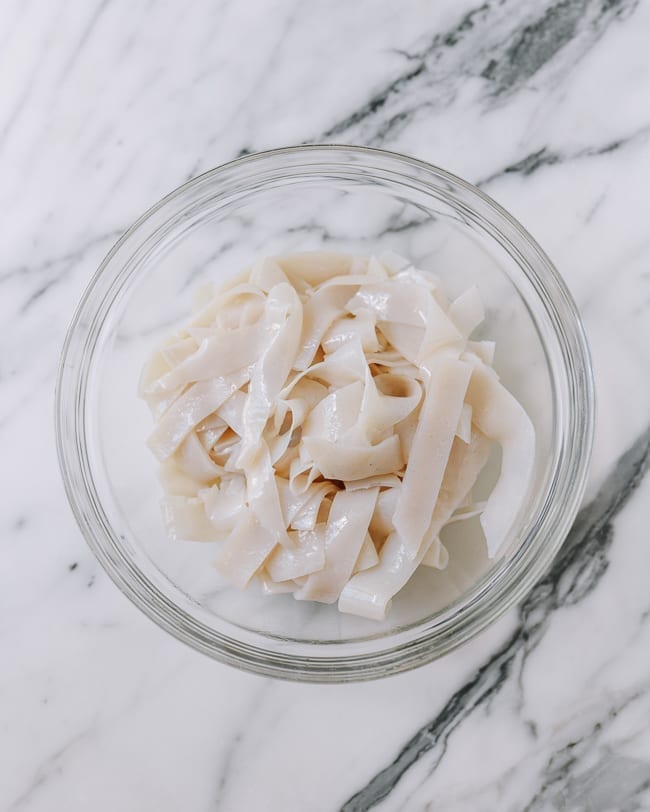
Also slice the steamed gluten.
This recipe makes enough for about 6 servings of liangpi noodles. If you have leftover noodles, transfer them to an airtight container, and refrigerate. They will keep for 2-3 days. Just make sure they’re tightly covered, or they can dry out!
To see how we like to serve our liangpi, check out our Spicy Cold Skin Noodles recipe.
How to Make Liangpi
Ingredients
- 450 g all purpose flour (450g = about 3 ¼ cups; measure by weight for best results)
- 4 g salt (4g salt = 1 teaspoon)
- 250 g water (250g water = 250 ml = about 1 cup; will need more for washing/batter)
Instructions
PHASE 1: Separate the Starch & Gluten
- Combine 450g flour and 4g salt in a large mixing bowl, or the bowl of a stand mixer fitted with the dough hook attachment. If kneading by hand, combine the dry mixture with 250g water gradually by hand until a shaggy dough forms. If using a mixer, turn the mixer on low speed (usually the “stir” setting), while gradually pouring in the water until you have a shaggy dough.
- Once you’ve formed dough, knead it for about 3 minutes, or until it forms a relatively firm, cohesive ball. Cover and rest for 10 minutes. Knead the dough again by hand for about 1 minute until it forms a smooth ball. Cover and rest for 30 minutes.
- To the dough in the bowl, add 3 cups of water. Push the dough down into the water so it’s fully submerged, and soak it for 5 minutes.
- Next, begin the “washing” process. Traditionally, this is done by hand. While the dough is still submerged in the water, squeeze and stretch it between your fingers to release the starch. Wash until the dough loses its shape and the water is opaque white, about 2-3 minutes. Alternatively, you can use a mixer to do this work for you. Place the mixing bowl of dough/water back on the mixer with the dough hook attachment. Place the pouring shield/splash guard on the mixer and turn it on at the lowest setting. Let the dough hook massage the dough for 2 minutes. (There is some risk of splashing with this first step since this is the most water you will use at one time, so you may choose to do this first step by hand.)
- Pour out the starchy water into another large bowl and set aside (this is the bowl of starch you will be using to make the noodles). Add 2 more cups of fresh water to your dough and wash again for 3 minutes. This time, strain the starchy water with a fine meshed strainer (as the dough becomes more broken up, little pieces will begin to separate out). Repeat one more time with 2 cups of fresh water, for a total of 3 “washings” so far.
- After you’ve strained your third batch of starchy water add 1 cup of fresh water to the dough, and massage for 4 minutes. (You’ll have to massage it longer to remove the remaining starch. If you’re using a mixer, you can also turn the speed up one notch, now that there’s less risk of splashing.) Do this step (with 1 cup fresh water) 3 times, for a total of 6 “washings” thus far. If using a mixer, squeeze the dough between your fingers a few times after each washing to thoroughly release as much starch as possible.
- Next, add a cup of water and wash again for a few minutes by hand to really squeeze out the last remaining bits of starch. Do this 1-2 more times, until the water is mostly clear and your gluten ball comes together. If the water is mostly clear, you can discard it rather than adding it to your bowl of starchy liquid.
PHASE 2: Strain & Allow Starch to Settle
- Set the gluten ball aside, covered with an overturned bowl, to allow the gluten to relax at least 2 hours (you can store it in the refrigerator). Keep it covered, or it will dry out. Strain the starchy water through a fine meshed strainer into another large bowl, to remove any dough solids that may have slipped by.
- Set aside for at least 6 hours or overnight (at room temperature if it’s not too hot/humid, or in the refrigerator). This allows the starch in the water to settle fully to the bottom of the bowl. You can’t shortcut this step––believe me, I tried! It’ll look like the starch is settling rapidly, but you really need the full 6 hours for all the suspended starch to fully settle and meld to itself at the bottom of the bowl.
PHASE 3: Cook Noodles & Wheat Gluten
- Steam your gluten for 30 minutes and set aside. While the gluten is steaming, pour off the water from the starchy liquid bowl, leaving just the thick glue-like layer of white starch at the bottom. When all the water is poured off, use a metal spoon or ladle to scrape the starch from the bottom of the bowl, and stir the thick liquid so the mixture is completely homogeneous throughout (there should be no lumps of starch remaining). Using your ladle and a kitchen scale, ladle out 300g of the starchy mixture into a separate medium bowl.
- To that, add 2g (½ teaspoon) salt and 150ml (about ⅔ cup) fresh water. Mix until well combined. This is your noodle batter.
- Bring water to a boil in your steamer. Brush vegetable oil on a round or square cake pan (it must be able to fit in your steamer). Pour a thin layer of batter into the oiled pan, so that it just covers the entire bottom of the pan. Immediately put in the steamer, cover, and steam for 90 seconds to 2 minutes. Alternatively, you can steam the noodles directly on top of simmering water in a wok with a lid, like my mom did in her homemade rice noodle recipe.
- Meanwhile, prepare a large bowl of cold water––you can put a few ice cubes in it to make sure it stays cold. Carefully remove the pan from the steamer and set it on the surface of the cold water so it can cool. When the noodle is cool to the touch (it will take about 1 minute to cool), brush the surface with a thin layer of oil, and carefully peel it off the oiled pan using a rubber spatula and your hands.
- Repeat this process, thoroughly stirring the batter before you ladle it into the pan every single time (the starch rapidly settles, so you have to make sure the mixture is evenly combined each time to get the right ratio of starch to water). Be sure to scrape up any starch that has settled to the bottom, and incorporate it back into the batter. As you make your noodles, oil them thoroughly and stack on top of one another.
- When you run out of batter, measure out another 300g of the starch, and add 150 ml water to make more. You will have about three total batches. If the remaining total starch does not exactly measure 900g, just know that you need about ½ the weight of water to starch. Basically, divide whatever your starch weight is in half, and that is the weight/volume of water you need (when measuring water, 1g = 1 ml).
- When your noodles are done and cooled, slice them, and slice the gluten. To see how we like to serve our liangpi, check out our Spicy Cold Skin Noodles recipe.
Tips & Notes:
nutrition facts