Growing up, Cantonese Poached Chicken is one of those dishes that was always on the table at family dinners. It’s one of the best-loved chicken dishes in Chinese cuisine––Cantonese cuisine more specifically.
NOTE: This recipe was originally published in 2014. We have since re-tested and updated it as of January 2020 with new photos, nutrition information, much more detailed instructions. Enjoy!
A Classic Chinese Poached Chicken Recipe
My parents made this poached chicken for years, and I’ve been eating it since I was a kid. The poached, always whole chicken was a welcome sight during Chinese New Year, Qing Ming (清明), birthdays, or even just a mahjong party when my parents invited friends over for a friendly game!
Judy and I continued the same tradition for Sarah and Kaitlin, and I’m certain they will do the same for their children.
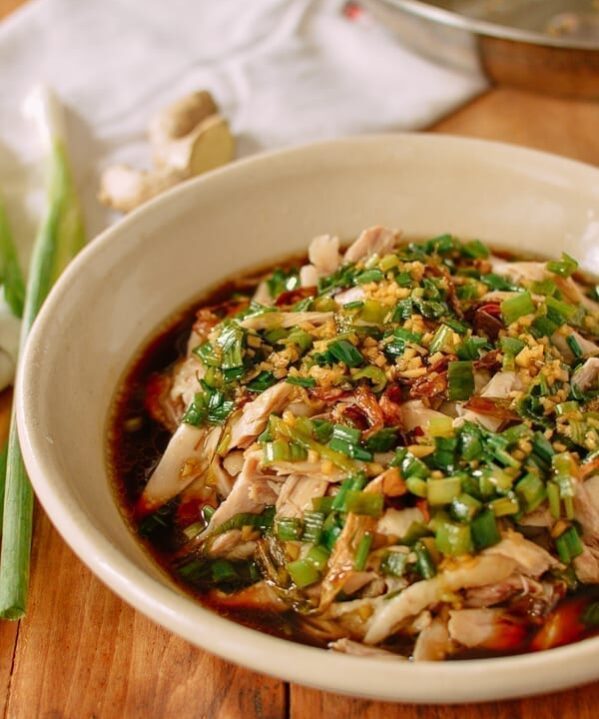
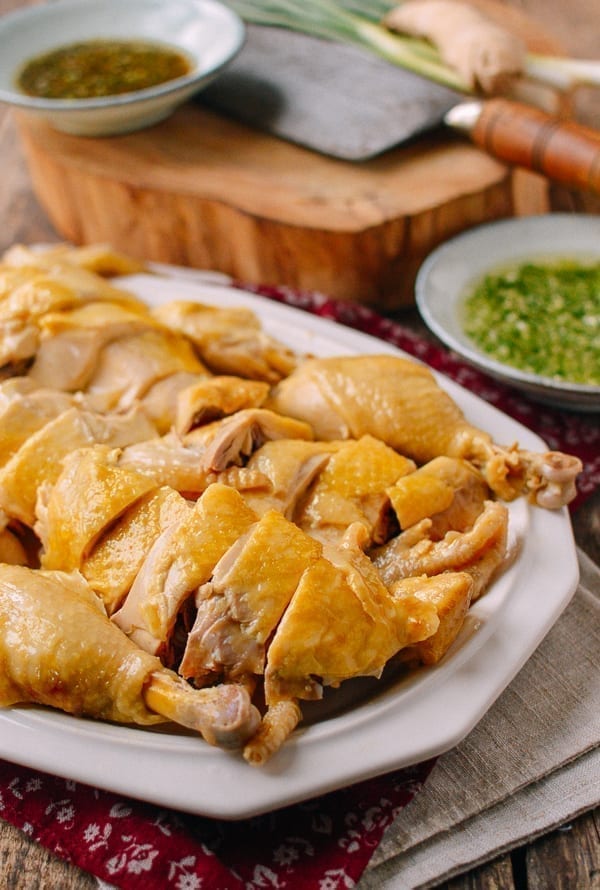
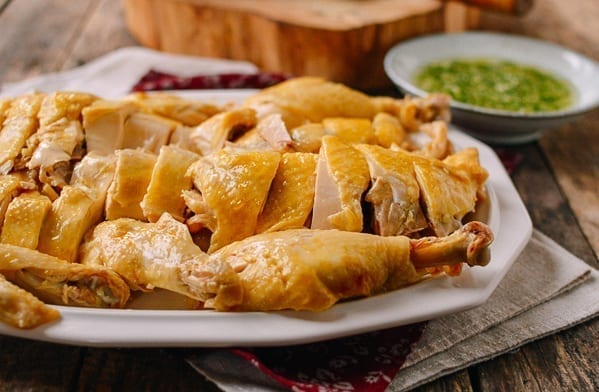
It couldn’t be healthier or simpler: you slowly poach a whole (ideally free-range) chicken and flavor it with fresh scallions and ginger. After cooling, simply carve and serve with salted ginger scallion oil (and maybe a little soy sauce).
The next time you visit any Chinatown and walk by a restaurant with hanging roast duck, soy sauce chickens, and char siu in the window, look for the whole white cut chickens. That said, while restaurants offer it on the menu, this classic Cantonese poached chicken dish is most commonly cooked and eaten at home. If you’re Cantonese, there is zero chance that you never had bak chit gai!
If you’re looking for other classic chicken recipes, check these out:
Why is it called White Cut Chicken?
The Chinese name for the dish (白切鸡 – bak chit gai in Cantonese or bai qie ji in Mandarin) translates to white cut chicken. It’s named as such because it’s poached in water and results in what is technically a very plain dish, like a pure, blank piece of paper.
In fact, anything cooked in water with little or no seasoning is prefaced with the word “white” in Chinese. Another example of this is boiled fresh shrimp, which is usually called “white boiled shrimp” in Cantonese or bak churk ha.
How To Cook Bai Qie Ji The Traditional Way
White cut chicken is a whole poached chicken. As in…really whole! Head, feet, and all. It’s a Chinese New Year tradition to serve an entire chicken, as it represents prosperity, togetherness, and completeness. For that reason, this Cantonese dish is often present on Chinese New Year dinner tables!
The best chicken to poach for this white cut chicken recipe is a high quality, smaller, free-range chicken. In my opinion, the best place to go is your local Chinese grocery store because the texture (tender but not mushy) of the chickens sold their are much better than you find in supermarkets. Smaller chickens will yield more tender, evenly cooked results than the mega chickens at your standard grocery store. Give one a try, and you’ll see what I mean!
If you don’t have access to a Chinese grocery store, the next best thing is to use a free-range (preferably organic) chicken from your local supermarket.
Do I have to use a whole chicken?
Luckily for you, we have a few shortcuts on the blog. Judy’s shredded Poached Chicken with Ginger Scallion Sauce is a delicious option, and if you’re looking for white meat, try Kaitlin’s Soy-Glazed Chicken Breast with Ginger Scallion Sauce.
Both recipes have flavors similar to a piece of white cut chicken dipped in ginger scallion oil and soy sauce.
But if you’re up for the traditional recipe, let’s try your hand at making this home-style Chinese chicken dish. And if you’re in the midst of planning for your next Chinese New Year celebration dinner, Gung Hei Fat Choy!
Cantonese Poached Chicken: Recipe Instructions
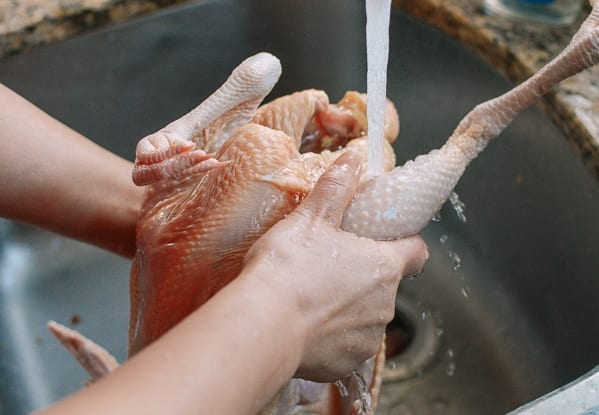
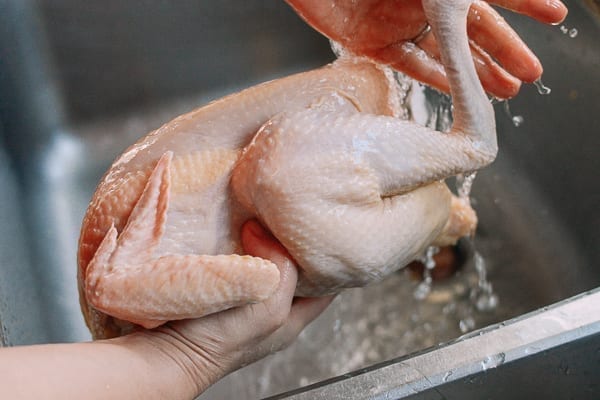
Make sure your chicken is at room temperature (trying to poach a cold chicken right out of the refrigerator will result in uneven cooking or undercooking). Clean the chicken by rinsing it under cold water, paying special attention to the cavity. Any giblets should already be removed but there may still be organs on the inside that should be removed or sometimes stray feathers that need to be plucked. Experts recommend that it’s not necessary to wash your chicken before cutting and cooking but in this case for a whole chicken (especially if you get it from a live poultry place or even from Asian markets), it’s a step that shouldn’t be skipped, in my opinion. When washing and prepping the whole chicken, be very careful about splashing water and contaminating surfaces with unwanted bacteria.
Be careful not to break or trim away any of the skin on the chicken, as you don’t want the meat exposed to the boiling water as it cooks. This will ensure a moist, silky texture in the final product.
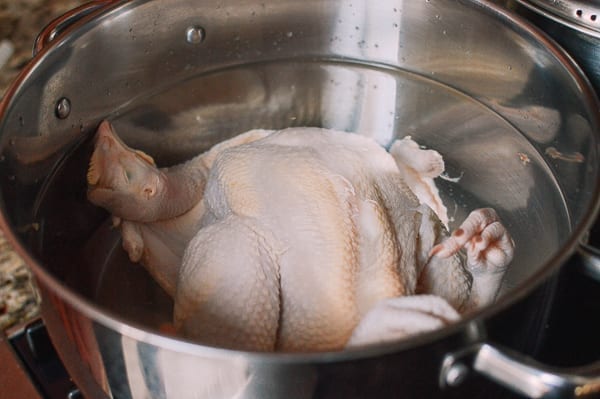
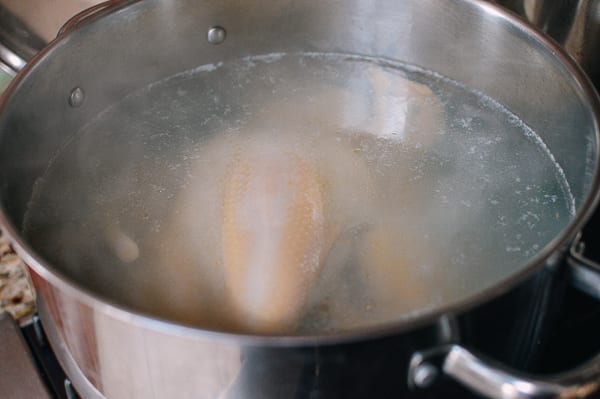
Fill a large stock pot with water, just enough to submerge the chicken completely. You can determine this by putting the entire chicken in the pot, filling it with water until the chicken is submerged, and then removing the chicken. Do not turn on the heat while the chicken is still in the pot!
This method of ensuring you have just enough water to submerge the chicken (and avoiding any extra) will ensure you have a more flavorful stock to save at the end. We used about 18 cups of water to submerge a 4 pound chicken in a deep stock pot.
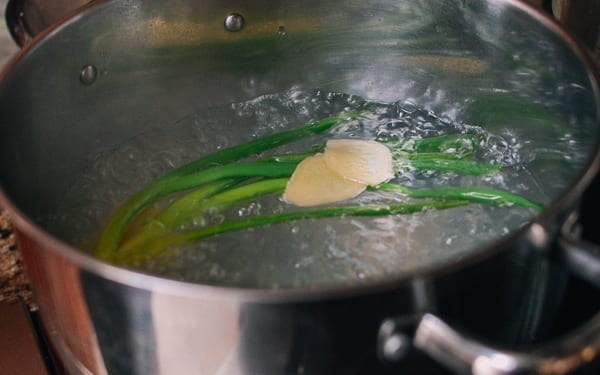
Once you have your water properly measured into the pot, add 2 scallions and 5 slices of ginger, and bring it to a boil.
Once boiling, slowly lower the chicken into the pot, legs down and head up.
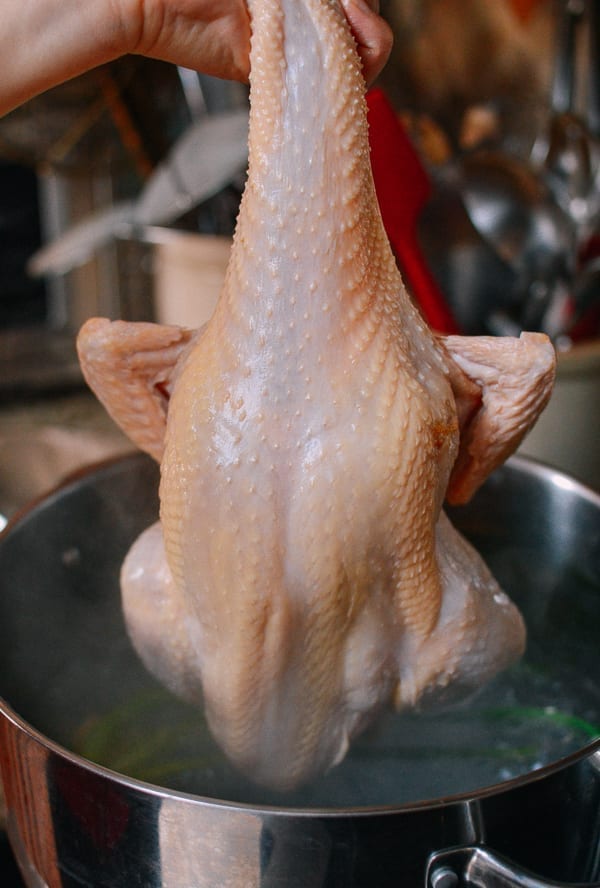
It’s ok if the breast is peeking out of the water a bit. The water will cool down and stop boiling when you add the chicken, so bring it up to a boil once again, and do not walk away from the pot.
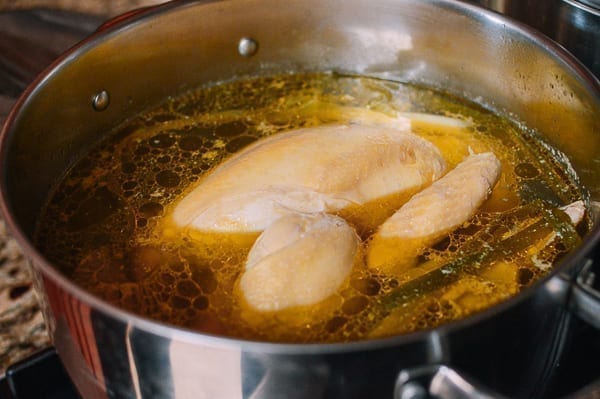
Once the water boils again, IMMEDIATELY lift the chicken out of the water very carefully. You can carefully hook two wooden spoons under the wings to lift the chicken up. The goal is to empty any colder water that may be trapped inside the cavity. Once you’ve released that water, lower the chicken back into the pot, and bring to a boil again.
When the water is JUST starting to boil, turn the heat down. Keep it at barely a simmer. There should be very little movement in the water, but it also shouldn’t be still. Cover the pot, and keep the heat around the lowest setting so the liquid continues to simmer slowly. Cook for about 35-40 minutes, roughly 10-11 minutes per pound. Depending on the size of your chicken, it may take more or less time to cook it through. You can check to make sure the water is bubbling slowly/gently and not boiling too vigorously, but try to avoid uncovering the pot while it’s cooking.
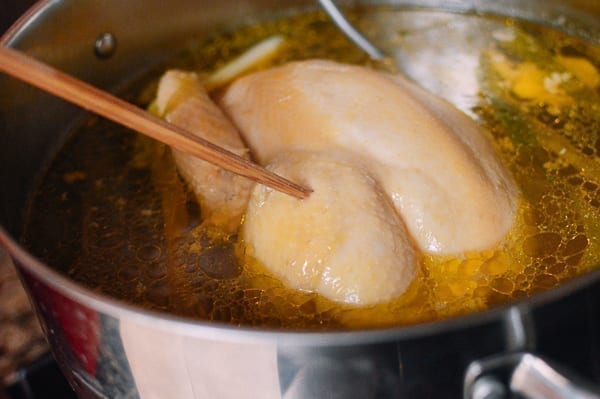
Poke a chopstick or skewer into the thigh to check for doneness. If the juices run clear, it’s done.
Carefully lift the chicken out of the pot (a sturdy meat fork or wooden spoon in the cavity is the best method).
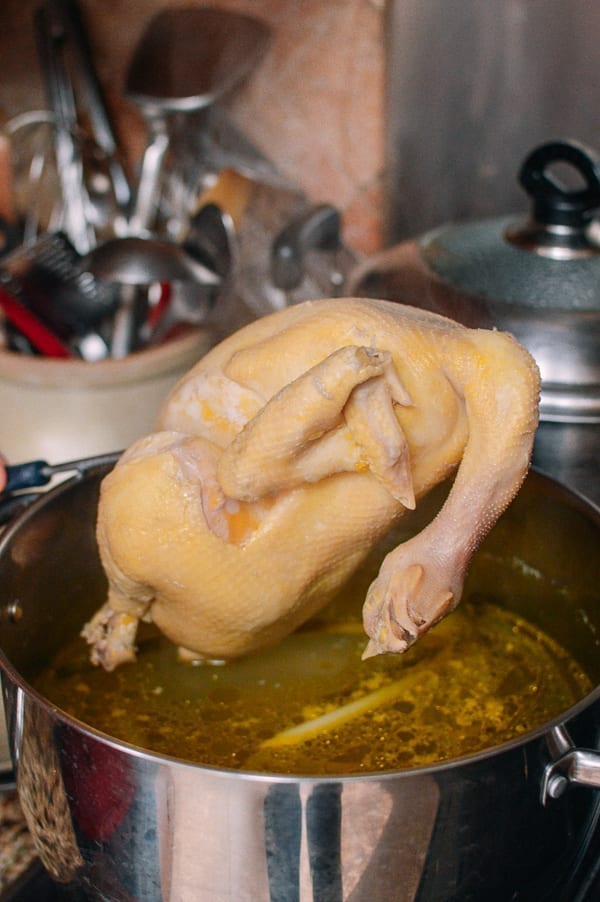
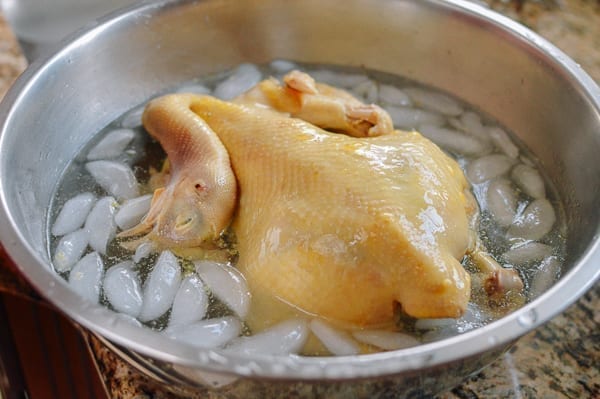
And transfer it to a large bowl of ice water. This cools it off quickly to give the chicken skin a “crunchy” texture. Texture is a big thing for Chinese diners, and so is chicken skin! Wait until cooled completely.
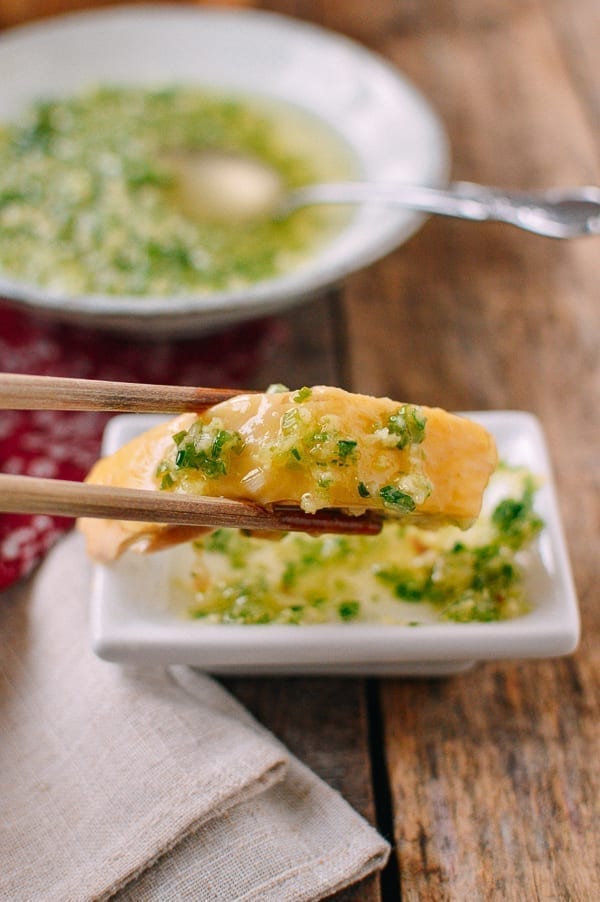
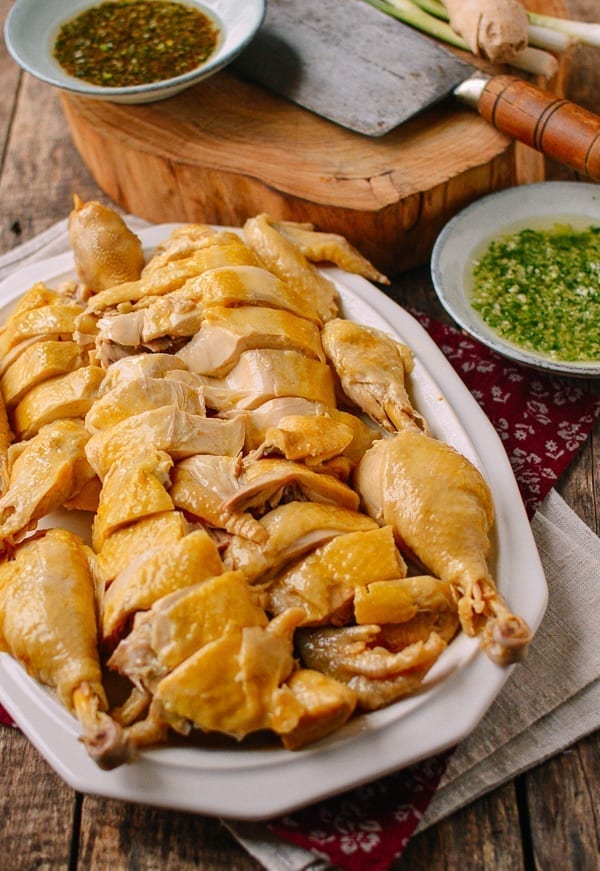
While the chicken is cooling, make the sauce. You have the option to make two versions—one with just scallions, ginger, oil and salt, and one with soy sauce. The plain version is more traditional, as it really lets the flavors of chicken, ginger, and scallion shine through. Judy loves to add soy sauce, and it’s also a tasty option! Start with the plain version, and then scoop some of it out into another bowl and add soy sauce. Try both and see which your loved ones like best!
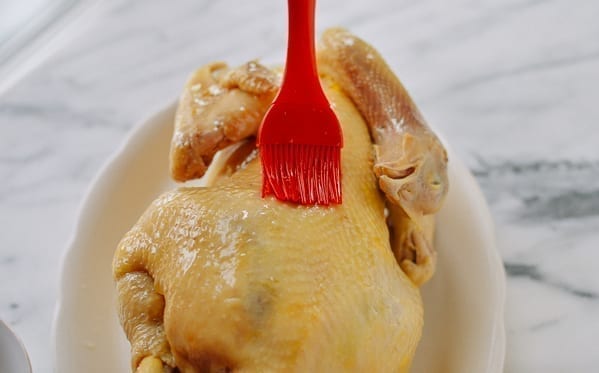
When the chicken is out of the ice water, you can brush it lightly with oil or some of the fat floating atop the poaching liquid to give it that enticing, shiny look!
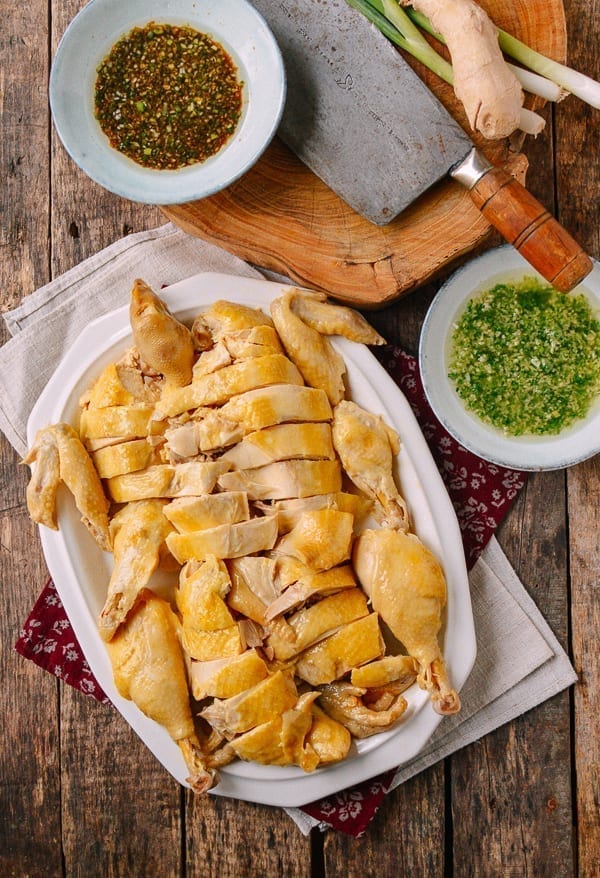
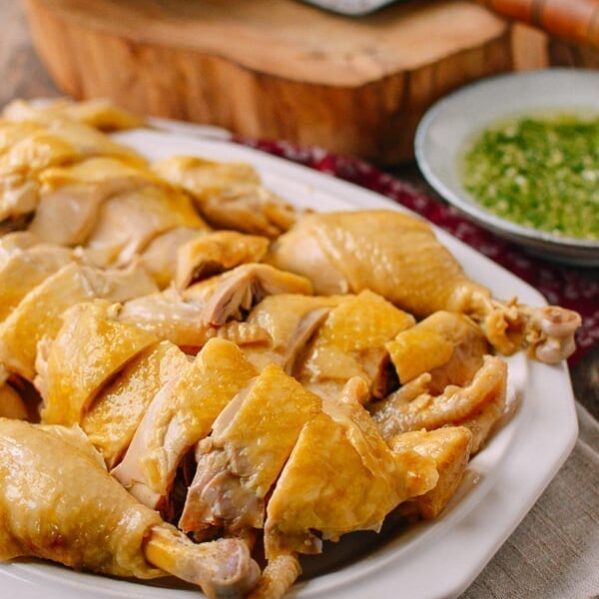
To serve, carve your chicken into pieces that you can easily grab with chopsticks. For directions on the traditional way to cut up see chicken, see our post on How to Cut a Whole Poached Chicken, Chinese Style.
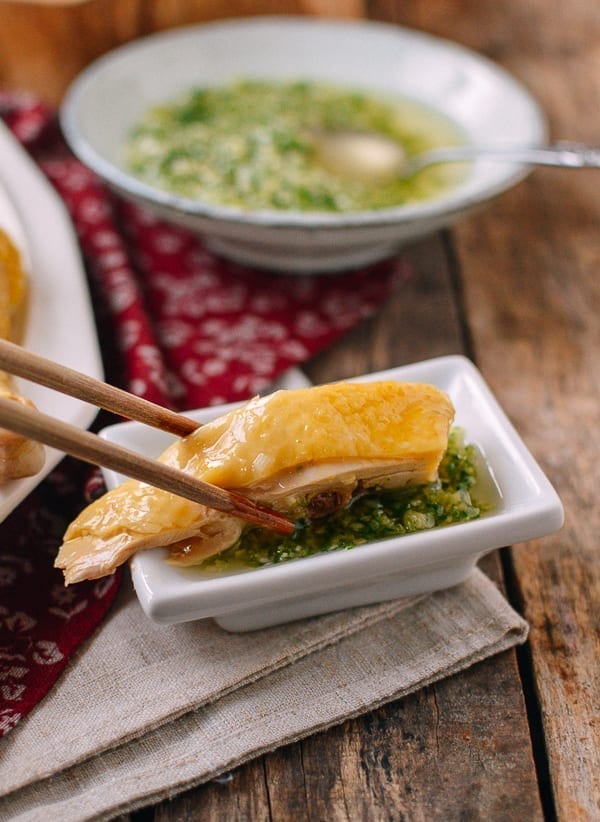
Serve with your sauce(s) and some steamed rice. Get our recipe for raw ginger scallion oil, which is the most traditional, or try the cooked version of the oil (with or without chilies).
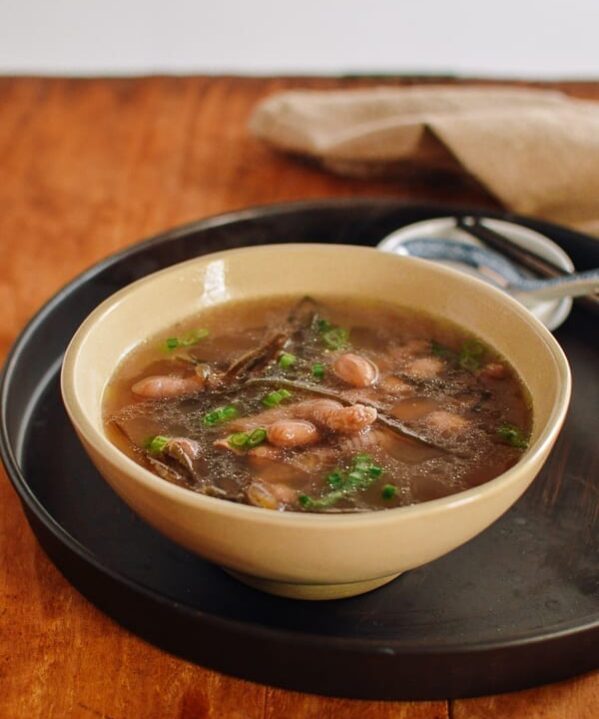
Also, don’t forget to save the light chicken stock and freeze it for later. You can also use it in place of water to cook rice!
In a couple days, we’ll post a full tutorial on how to carve a whole chicken Chinese-style, so stay tuned! (Update: HERE IT IS: How to Carve a Whole Chicken Chinese-Style!)
Cantonese Poached Chicken (Bai Qie Ji)
Ingredients
For the chicken:
Instructions
- Make sure your chicken is at room temperature (trying to poach a cold chicken right out of the refrigerator will result in uneven cooking or undercooking). Clean the chicken by rinsing it under cold water, paying special attention to the cavity. Any giblets should already be removed but there may still be organs on the inside that should be removed or sometimes stray feathers that need to be plucked. Experts recommend that it's not necessary to wash your chicken before cutting and cooking but in this case for a whole chicken (especially if you get it from a live poultry place or even from Asian markets), it's a step that shouldn't be skipped, in my opinion. When washing and prepping the whole chicken, be very careful about splashing water and contaminating surfaces with unwanted bacteria. Be careful not to break or trim away any of the skin on the chicken, as you don’t want the meat exposed to the boiling water as it cooks. This will ensure a moist, silky texture in the final product.
- Fill a large stock pot with water, just enough to submerge the chicken completely. You can determine this by putting the entire chicken in the pot, filling it with water until the chicken is submerged, and then removing the chicken. Do not turn on the heat while the chicken is still in the pot! This method of ensuring you have just enough water to submerge the chicken (and avoiding any extra) will ensure you have a more flavorful stock to save at the end. We used about 18 cups of water to submerge a 4 pound chicken in a deep stock pot.
- Once you have your water properly measured into the pot, add 2 scallions and 5 slices of ginger, and bring it to a boil. Once boiling, slowly lower the chicken into the pot, legs down and head up. It’s ok if the breast is peeking out of the water a bit. The water will cool down and stop boiling when you add the chicken, so bring it up to a boil once again, and do not walk away from the pot.
- Once the water boils again, IMMEDIATELY lift the chicken out of the water very carefully. You can carefully hook two wooden spoons under the wings to lift the chicken up. The goal is to empty any colder water that may be trapped inside the cavity. Once you’ve released that water, lower the chicken back into the pot, and bring to a boil again.
- When the water is JUST starting to boil, turn the heat down. Keep it at barely a simmer. There should be very little movement in the water, but it also shouldn’t be still. Cover the pot, and keep the heat around the lowest setting so the liquid continues to simmer slowly. Cook for about 35-40 minutes, roughly 10-11 minutes per pound. Depending on the size of your chicken, it may take more or less time to cook it through. You can check to make sure the water is bubbling slowly/gently and not boiling too vigorously, but try to avoid uncovering the pot while it’s cooking.
- Poke a chopstick or skewer into the thigh to check for doneness. If the juices run clear, it's done. Carefully lift the chicken out of the pot and transfer it to a large bowl of ice water. Cool completely.
- While the chicken is cooling, make the sauce. You have the option to make two versions—one with just scallions, ginger, oil and salt, and one with soy sauce. The plain version is more traditional, as it really lets the flavors of chicken, ginger, and scallion shine through. Judy loves to add soy sauce, and it’s also a tasty option! Start with the plain version, and then scoop some of it out into another bowl and add soy sauce. Try both and see which your loved ones like best!
- When the chicken is out of the ice water, you can brush it lightly with oil or some of the fat floating atop the poaching liquid to give it that enticing, shiny look!
- To serve, carve your chicken into pieces that you can easily grab with chopsticks. For directions on the traditional way to cut up see chicken, see our post on How to Cut a Whole Poached Chicken, Chinese Style.Serve with your sauce(s) and some steamed rice.
Tips & Notes:
nutrition facts